Binder Design Tyrannosaur 50th BDay Present Build

The Rocketry Forum

Help Support The Rocketry Forum:

This site may earn a commission from merchant affiliate links, including eBay, Amazon, and others.
Steal away. It's all a learning process....and obviously I'm in learning mode! Btw. I guess I had failed to mention that the peel ply was perforated...not that made much of a difference in the overall outcome. ah well. Again reading everything!
 
Kevin...sure...I'll check it out...are you going to the next Battlepark on Saturday only? (I think the wife and I have a dinner date with a friend...I can probably make if I leave the event in time to get back)
Jim.
I think saturday is the only day I can get away this time. If that changes, I'll let you know. Teaser...That "fun item" is an Apogee Saturn V. Figure it's time to fly her again while I sit back to think of next steps on this. I do believe I'm going to order a light sock and go again.
 
Peel ply, from what I understand it to be is cloth used as a protective layer when the lay up is finished. It is cured into the layup and peeled off when the lay up is finished.Also to allow a bonding surface without nearly as much sanding to kick off the blush.
I'm thinking we are referring to two seperate things. Perforated film is sort of plasticky with holes in it at varying spacing i.e. P3,P4,P6...to allow more or less resin flow into the breather/bleeder.
Now the other gentlemen mentioned it and revisiting your photo it looks like a mass cured epoxy line has formed. If I remember right this was saran wrapped? Maybe the line was the opposite side where you began to wrap and squeezed excess resin into that one spot...?

I've never tried to saran wrap a lay up. I've only used bag and gradually pulled to 24" mercury for oven cure or freestanding. Or a contact layup.
If you did saran wrap, to be honest I think better results would have come from a contact layup for sure. Just wick away excess resin and tend to the layup while it cures...

Re reading your layup I'd avoid using a roller brush. IMO it could squeeze more than desirable epoxy away from one area, into another.

I'd also like to mention reguardless how your lay up turned out, I am super jelly for you. This rocket is certainly on my list.
 
Last edited:
So you are right that this peel ply was plastic in nature with release holes. For my fins it was a woven material and I really liked the finish. I think on the next layup I will use that verse the plastic. The plastic one also came folded whereas the other came on a roll which would obviously adhere better. It's a learning process; albeit a very expensive one (at least epoxy wise).
 
Too much resin. You need just enough to wet out the cloth and substrate and not a bit more. You can sand the tubes out if you have the patience. You'll have to block sand it at every angle imaginable and keep a close eye. Personally I'd use a random orbital sander and the coarsest grit you can get usually 36 to 40 grit. Do that until it is roughed in and then switch to block sanding. I used to do tons of body and paint on vintage VW's including hand layed Baja bug kits. It is savable if you are up for the work. The final sanding will require guide coats of differing color primers to get all of the waves out.
 
So you are right that this peel ply was plastic in nature with release holes. For my fins it was a woven material and I really liked the finish. I think on the next layup I will use that verse the plastic. The plastic one also came folded whereas the other came on a roll which would obviously adhere better. It's a learning process; albeit a very expensive one (at least epoxy wise).

I went back to take a look at how you did your fin layup. The peel ply you used was the porous teflon peel ply. That is what you should use on your tube layup as well.

Apply the sleeve over the tube and wet it out (remember to weigh the sleeve to get the correct amount of epoxy), then apply the teflon peel ply and also wet that out. Once you have done that, you play the waiting game and let it cure. Once cured remove the teflon peel ply and walla, you got a neatly laminated tube with glass strength and of course without surface imperfections to worry about.

Hope this helps


Sent from my iPhone using Tapatalk
 
Jim.
I think saturday is the only day I can get away this time. If that changes, I'll let you know. Teaser...That "fun item" is an Apogee Saturn V. Figure it's time to fly her again while I sit back to think of next steps on this. I do believe I'm going to order a light sock and go again.

An Apogee Saturn V.....I think I'd like to see that.
A classic in every sense.
I could not afford the Estes 1b or V when I was a kid.
I did build the Estes Little Joe II ......been upscaling them since my return to the hobby :)

I couldn't find the Centuri Little Joe II at my LHS back then, but Estes recently got me a second chance on that one.
You got one?
I've got three...been looking at some serious mods on my first build.

I do have the new Estes Little Joe II sitting in a box. Just haven't gotten around to it yet, but do want to. Gotta be honest, it was your Little Joe that inspired me to buy this kit. I also have an Estes Saturn V anniversary edition I think that's been in the box for about 10 years or so. More of a collectors box for me. I built that one years ago as a kid and just loved it. However with the Apogee built, I just never opened the other up.
 
I do have the new Estes Little Joe II sitting in a box. Just haven't gotten around to it yet, but do want to. Gotta be honest, it was your Little Joe that inspired me to buy this kit. I also have an Estes Saturn V anniversary edition I think that's been in the box for about 10 years or so. More of a collectors box for me. I built that one years ago as a kid and just loved it. However with the Apogee built, I just never opened the other up.

Thanks - I was inspired by seeing this....
I was in high school, Time magazine had an article about the growing interest in sport rocketry, I had recently finished the tiny Estes little Joe II and seeing this really got me excited about something bigger.
Of course, at the time, there wasn't a even a D motor commercially available to us kids - but there were rumors of E and F motors in R&D.

There are a lot of sleek, sexy rocket subjects, but something this simple, functional but somewhat funky looking is pretty cool.

milestones-in-mankato-jan-1968-aam-8.jpg

Before you get around to building that one, the list of building tips here at TRF is a good prebuild, and if you want to go cluster (I am) I got a thought or two to share with you.
 
Last edited:
if you want to go cluster (I am) I got a thought or two to share with you.
That
That would be an excellent idea! And something I would love to try to grow in! Ok..off topic. As I was typing this a loud knock on my glass door. Dog went nuts I went out. No one there. Looked around, didn't look like anyone threw anything. Looked back at the door and two small body feathers are stuck to the window. :) Dumb bird!

That was NOT an omen.
 
In my humble opinion, it would appear that your fiberglass sock is way too thick. That, in turn, would indeed soak up too much epoxy.

Peel ply seems to be used differently by rocketry people as compared to others who use a lot of fiberglass. Ironically, it was designed to leave a toothy finish on a layer of fiberglass in order to help with attaching subsequent layers of fiberglass. Rocket people tend to use it to create a 'smooth' finish. If you wet out the fiberglass properly with the proper amount of epoxy then it should self level to a very smooth surface. Granted, that's not ideal when doing multi-layer layups, but for a finish coat can be really ideal.
 
I'm just curious where the peel ply was purchased from. Mostly for my educational purposes. I've never seen Teflon peel ply is why I ask also.
 
I'm just curious where the peel ply was purchased from. Mostly for my educational purposes. I've never seen Teflon peel ply is why I ask also.

You can find the teflon peel ply from these vendors, a reminder: always sand away the texture as teflon will prevent adhesion.

Applied Vehicle Technology
Aircraft spruce
Composite Envisions


Sent from my iPhone using Tapatalk
 
So the stuff I used on the fins and was really pleased with is: https://www.aircraftspruce.com/catalog/cmpages/vb7025.php. I have a light sock on order and will do it again with that. After church and scouts, I ran over to talk with Dave A and have a few good ideas on what I can do better with the fiberglassing for the tube. Really appreciated the interesting techniques he shared with me and really nice setups he has.
 
So the stuff I used on the fins and was really pleased with is: https://www.aircraftspruce.com/catalog/cmpages/vb7025.php. I have a light sock on order and will do it again with that. After church and scouts, I ran over to talk with Dave A and have a few good ideas on what I can do better with the fiberglassing for the tube. Really appreciated the interesting techniques he shared with me and really nice setups he has.

That is indeed the teflon I have used in the past and it is my favorite. It wets out real easily and pulls off with ease. Just remember to sand it well before you bond anything to it.


Sent from my iPhone using Tapatalk
 
That is indeed the teflon I have used in the past and it is my favorite. It wets out real easily and pulls off with ease. Just remember to sand it well before you bond anything to it.


Sent from my iPhone using Tapatalk

Will Do! Thanks for the advice! I will say it doesn't take much sanding to make it extremely smooth. Very little sanding. However to ensure proper bonding, especially for the fins, that makes a lot of sense.
 
Composite Envisions

Applied Vehicle Technology

Aircraft Spruce

I've looked into the sites to find "teflon peel ply"
I'm not seeing any.
Teflon is generally used a quick release material. It makes prepping flat tool surfaces faster than using release agents. Far less hazardous too.
Teflon tape can even be used for obscure shaped tools to make funky parts.

Dacron peel ply cures into the layup to either to protect the parts surface or pull off for an easier prep to bond.

Perforated film acts like teflon to provide a controlled epoxy flow into bleeder without the bleeder getting stuck. It is a real good idea to do, in layers:
Release agent (if using a tool)
Layup (composites)
Peel ply
Perforated film
Peel ply ( so the breather doesn't stick through the perforated holes. Trust me on this(!!!) Picking bleeder out of a lay up sucks)
Breather
Vacuum bag (or in this case saran wrap)

His layup more than likely had too much resin and the saran wrap being pulled tight was squeezed into the blob line. A vacuum bag with the right pleats and vacuum port setup would have pulled the bag more evenly. With the right perf all of his excess resin would have flowed out into the bleeder.

I'm with binder design. DA that sucker down close, flat table sand or block it down then either resin wipe or apply a super thin FG layer or peel ply layer.

Looking forward to seeing the results.

I stand corrected. I see "teflon 'coated' peel ply" that is used for the same purpose as other peel ply. The description of it states it is easier to pull off though.

I should have posted the links my bad, but they are there.

Obviously this was set up like a vacumn bagging layup. However, there is no need for that in this case.

The porous teflon coated peel ply will work out just fine.


Sent from my iPhone using Tapatalk
 
I should have posted the links my bad, but they are there.

Obviously this was set up like a vacumn bagging layup. However, there is no need for that in this case.

The porous teflon coated peel ply will work out just fine.


Sent from my iPhone using Tapatalk

That teflon coated stuff must be super awesome to use.
 
That teflon coated stuff must be super awesome to use.

I did say its my favorite ;), despite the one draw back its nothing to cry about when you get a neat finish.

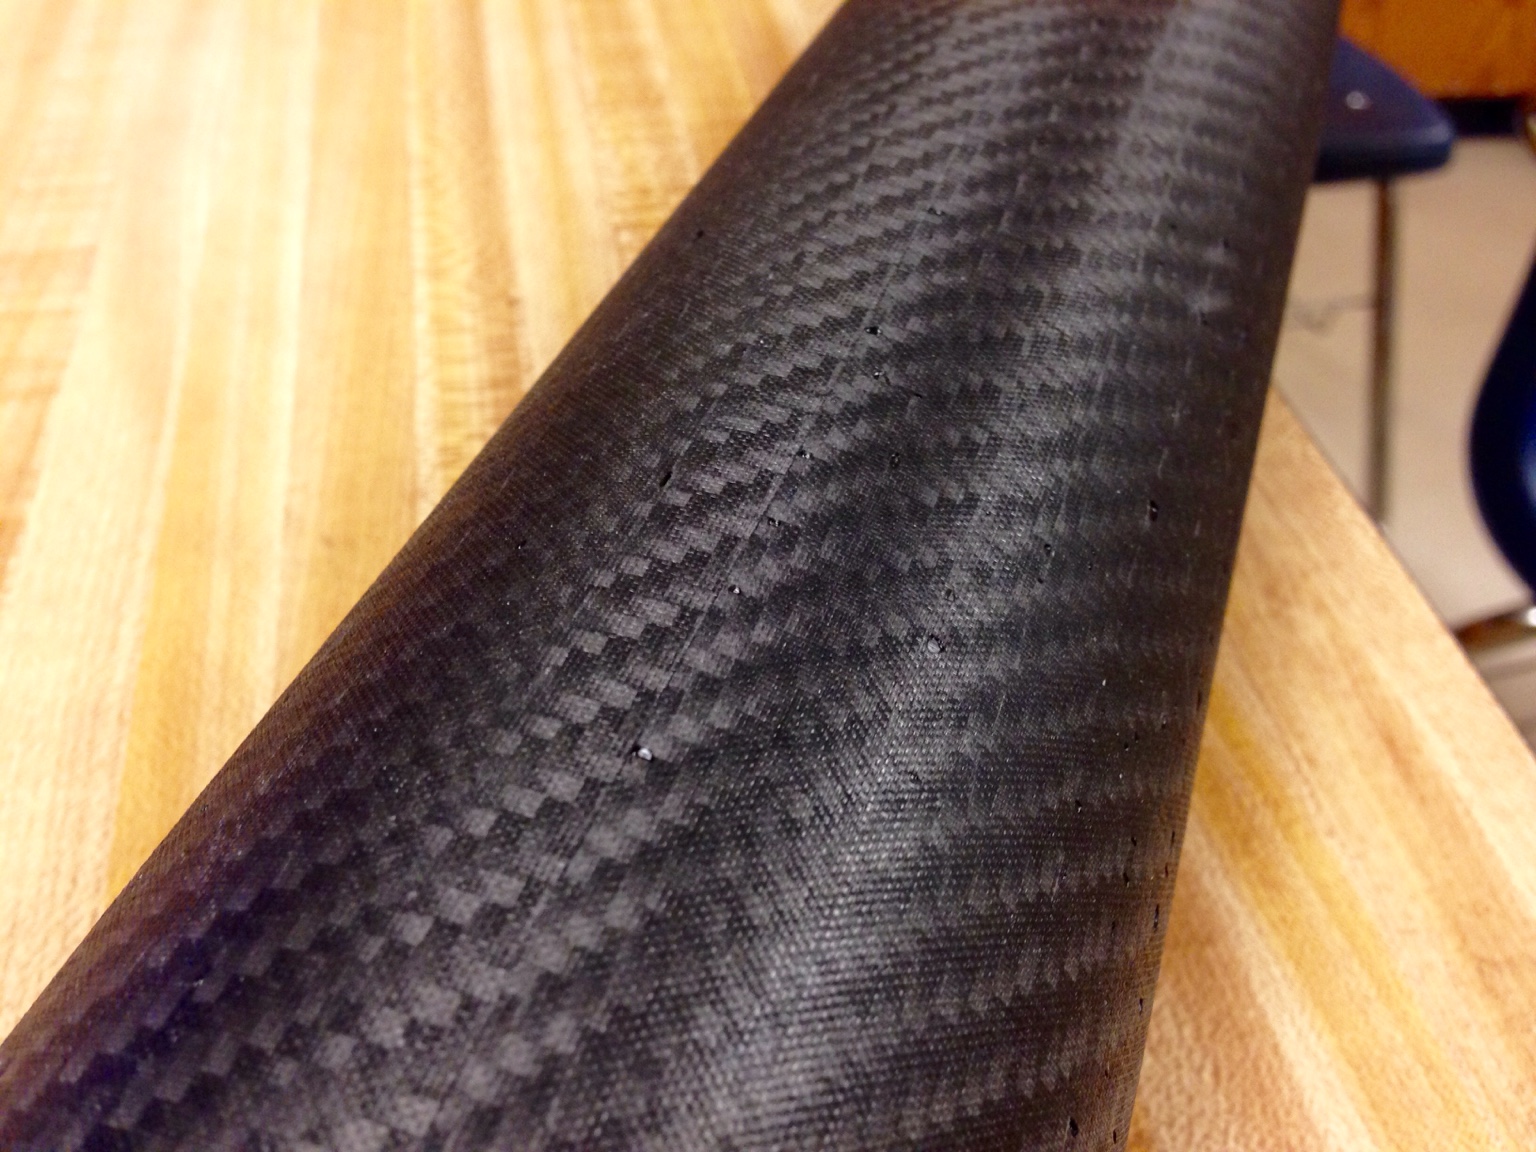
Here is a 3" carbon tube finished with that teflon coated peel ply.

4fcd0d336611a53e5900b520b3c648e1.jpg


Sent from my iPhone using Tapatalk
 
I did say its my favorite ;), despite the one draw back its nothing to cry about when you get a neat finish.

Here is a 3" carbon tube finished with that teflon coated peel ply.

4fcd0d336611a53e5900b520b3c648e1.jpg


Sent from my iPhone using Tapatalk

Woah. It's from anot her world.
 
The final sanding will require guide coats of differing color primers to get all of the waves out.

What does this mean? I haven't heard of guide coats before. I always end up trying to fill those orbital sander marks with bondo and hand sanding until it's good enough or run out of time/patience.

Thanks.
 
What does this mean? I haven't heard of guide coats before. I always end up trying to fill those orbital sander marks with bondo and hand sanding until it's good enough or run out of time/patience.

Thanks.

As dhbarr said. But you have to use a block and sand any contours with varying angles perpendicular to the curve. You don't want to block sand parallel to the long axis because you'll make flat spots. Like a 45 degree at both obliques so it cross hatches. And you use a rigid block, not your hand or sanding pad. The guide coats will show the low spots. I used to do automotive body work/restorations.
 
Well it's going slow. Another tube and a change in sock weight. Not ideal, but it's going to be good enough when I finish I think. One thing for sure...I'm probably leaving the fiberglassing to those better skilled than I am. Won't do it again when this project is completed.
 
So no posts in a while. I think I said it before. Going Slow! I fiberglassed the lower section and it went ok, but the veil layer sucked. So I ordered a new upper section from Mike and did that one. It came out nice! I am considering ordering a new lower section and fiberglassing before cutting the tabs. I'd initially done the fins (which entails cutting the tube tabs) and even with support from within, it just didn't come out as nice as I would like. Here's a shot of Good bad and ugly. ugly is the left tube that was a heavy sock and weighs 500lbs. A good level 5 rocket tube. :) The middle tube is the latest tube and it came out nice. The right tube is the lower half and the sock (light) is good, but the veil wouldn't go on well due to the fin slots and tons of raises in the end product which are cut out, but leaving lots of filler work. Note to self. Do the tube. Cut the slots. THEN do the fins.
working tubes.jpg
 
Well here we go again. Thanks to Mike for shipping off yet another tube, this time the lower section. I really wasn't happy with the initial lower section. If I had to do it all over again, I would fiberglass the lower section first, then make the fin can. Regardless of the inner support system I made, the tube curled in such a manner with the slots fully cut, that it didn't seal nicely. This time I'm leaving the fin tabs in place, putting the sock on and once dry, lightly sand, and then put the veil on a few days later. THEN I'll cut out the slots. If I cut the slots at the green stage, the veil will peel up at those areas. Lord knows I could write a book on how NOT to fiberglass. I'm really praying this one comes out like the second upper tube I did. I've also got a new 4" ebay tube tied in with this one. We'll see later tonight now the initial sock went on and then how the veil completes later this week. It's definitely been a long (Learning) process. Would love to have a real shop to work in, but at least I have a corner in the basement.
finishing lower section.jpg
 

Latest posts

Back
Top