Great looking rocket and great looking flight. Even at full screen, I couldn't quite see what happened with the boosters; hopefully we'll get some good zoom footage before the end of summer. 
You are using an out of date browser. It may not display this or other websites correctly.
You should upgrade or use an alternative browser.
You should upgrade or use an alternative browser.
TRF Summer Build Off: the "Maximilian"
- Thread starter Cabernut
- Start date

Help Support The Rocketry Forum:
This site may earn a commission from merchant affiliate
links, including eBay, Amazon, and others.
Great flight!
Cabernut
Well-Known Member
- Joined
- Oct 15, 2015
- Messages
- 1,384
- Reaction score
- 9
Great looking rocket and great looking flight. Even at full screen, I couldn't quite see what happened with the boosters; hopefully we'll get some good zoom footage before the end of summer.
Really hard to see much at 1000ft. But I can zoom in on what I have and play rocket detective... So after opening the original 4k video and going frame-by-frame zoomed in several times (with VLC player), I was able to determine that the boosters ejected at about 2.5 seconds after ignition. One booster fell away immediately but the other held on until after apogee and before main eject. That leads me to believe the other booster's shock cord & nose cone hung up on the fin until the slow speed after apogee allowed it to fall loose. At main F15-8 ejection the 2nd booster can be seen already separate and falling under streamer.
1st separation - right on cue.


2nd separation near apogee

Definitely need to not forget to bring(and attach) the 808 cam next time. Aside from being a cool vid, it would definitely help see what's going on.
Very cool!
Cabernut
Well-Known Member
- Joined
- Oct 15, 2015
- Messages
- 1,384
- Reaction score
- 9
So I'm currently doing the prime/sand/fill/sand/prime cycle when I notice the nose cone section still looks a bit plain. Need some Texture! Something I was thinking in the back of my mind to add, and it's got to be done now or never.
So I've got this scrap tubing left over from other builds, now I have a use for it.
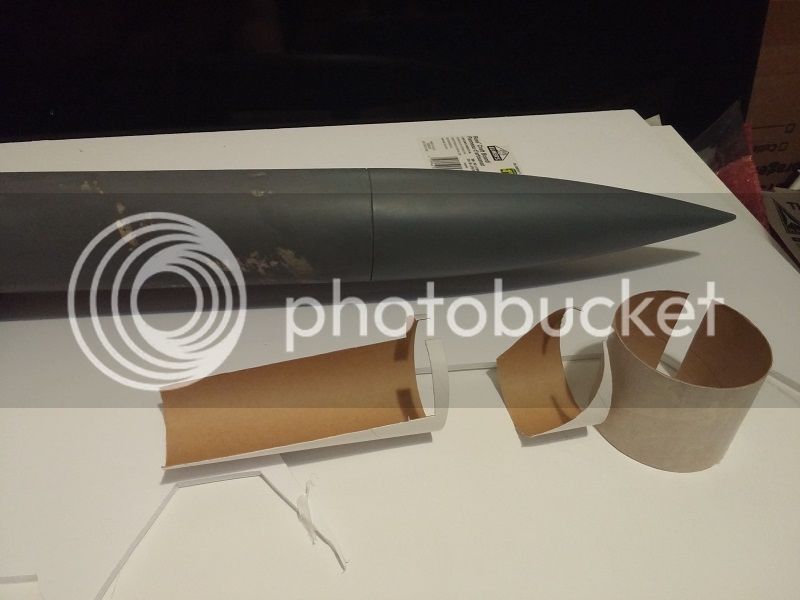
I cut out a template shaped like how I wanted a piece to look, taped it on and drew around the edge with a pencil. Then carefully cut the pencil lines with an x-acto.
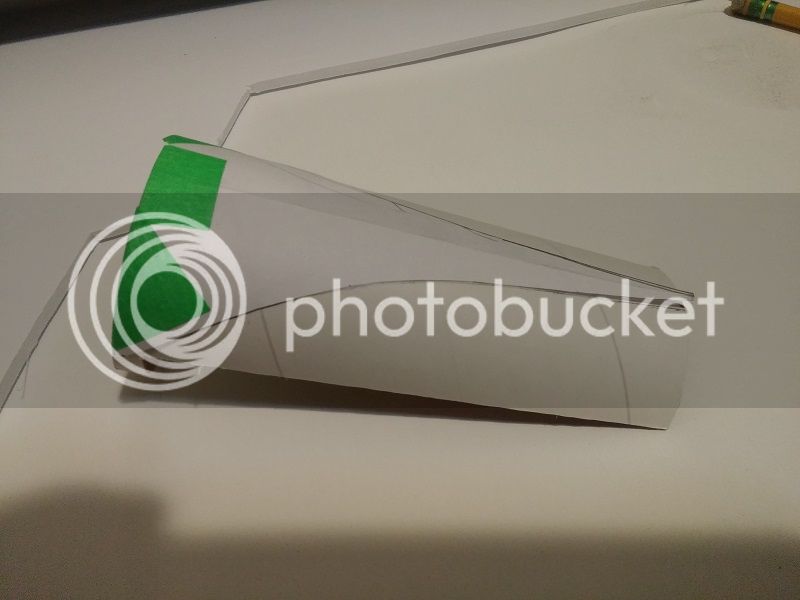
I think I'll glue them on something like this. After sanding the area back down to bare tube first though. The forward 3rd will be attached to the nose cone.
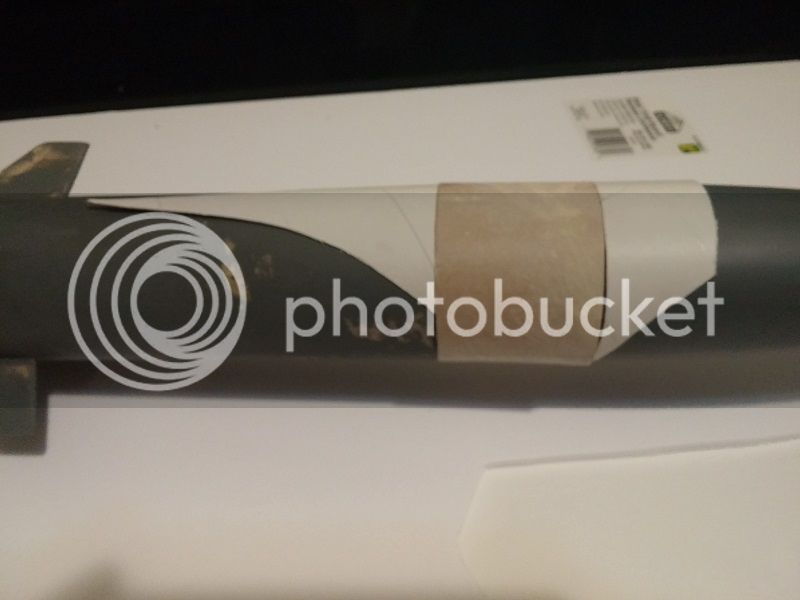
So I've got this scrap tubing left over from other builds, now I have a use for it.

I cut out a template shaped like how I wanted a piece to look, taped it on and drew around the edge with a pencil. Then carefully cut the pencil lines with an x-acto.

I think I'll glue them on something like this. After sanding the area back down to bare tube first though. The forward 3rd will be attached to the nose cone.

I'm not getting it; more pictures, please.
I'm not getting it; more pictures, please.
I'll second the motion.
Cabernut
Well-Known Member
- Joined
- Oct 15, 2015
- Messages
- 1,384
- Reaction score
- 9
I'll more or less be adding subtle physical detail by gluing on wraps or strips here and there instead of only relying on painted detail. The idea came from one of those handy Apogee videos.
Ill see what I can come up with as I go and be sure to take pics along the way.
Ill see what I can come up with as I go and be sure to take pics along the way.
Great picture, and that is really a fine looking rocket. I think you got all the proportions just right. Look forward to seeing it in paint.
Cabernut
Well-Known Member
- Joined
- Oct 15, 2015
- Messages
- 1,384
- Reaction score
- 9
Great picture, and that is really a fine looking rocket. I think you got all the proportions just right. Look forward to seeing it in paint.
Thanks! And in paint you shall now see it. Well the first color at least. Still have some silver, a bit of orange and some sharpie lines.
I spent a lot of time sanding & priming before putting 2 coats of red. Some flaws are still there and will still be there since I'm not dumping a whole can of primer and another few hours of sanding just for a few spots here and there. I'm definitely happy with how the red turned out. I used a slightly darker shade of red this time, even though it's hard to see in the pictures.
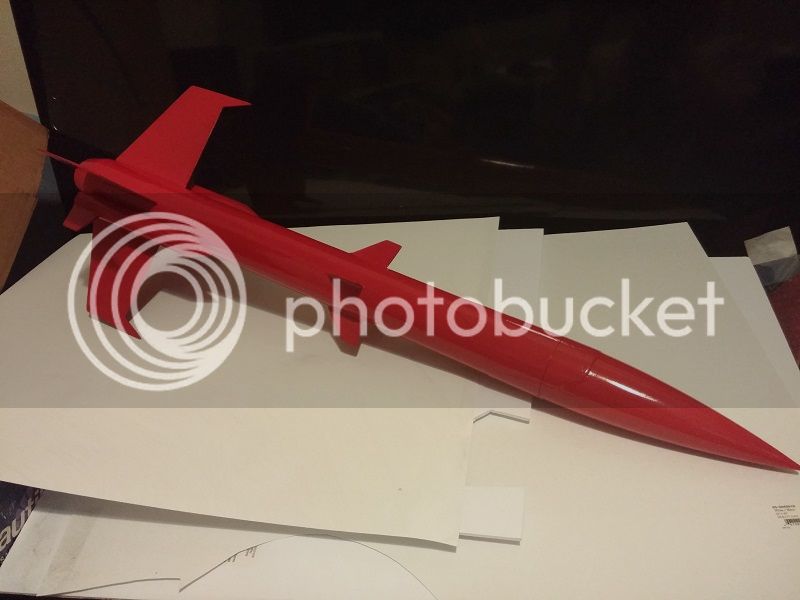
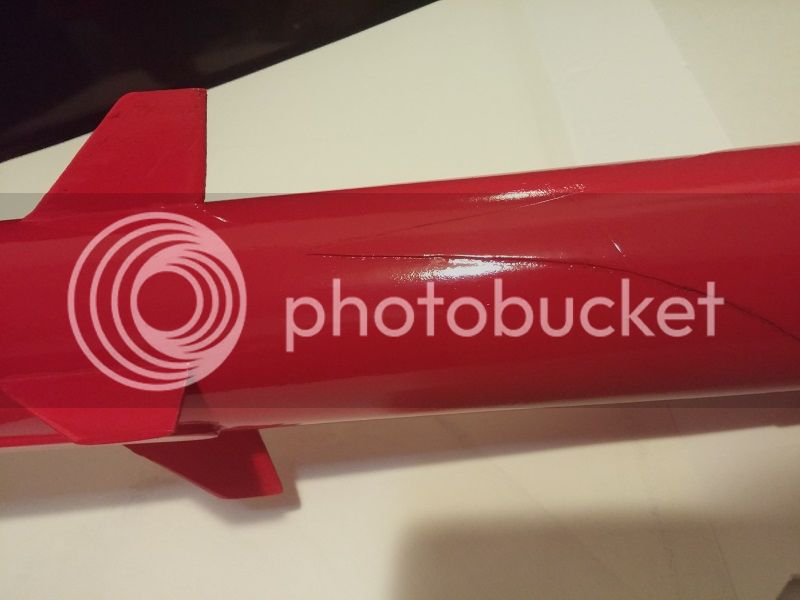
Here is some of the "texture" that I was adding. Didn't stand out as much as I'd hoped, but I think I'll carefully go over these lines with a narrow sharpie to make them stand out.
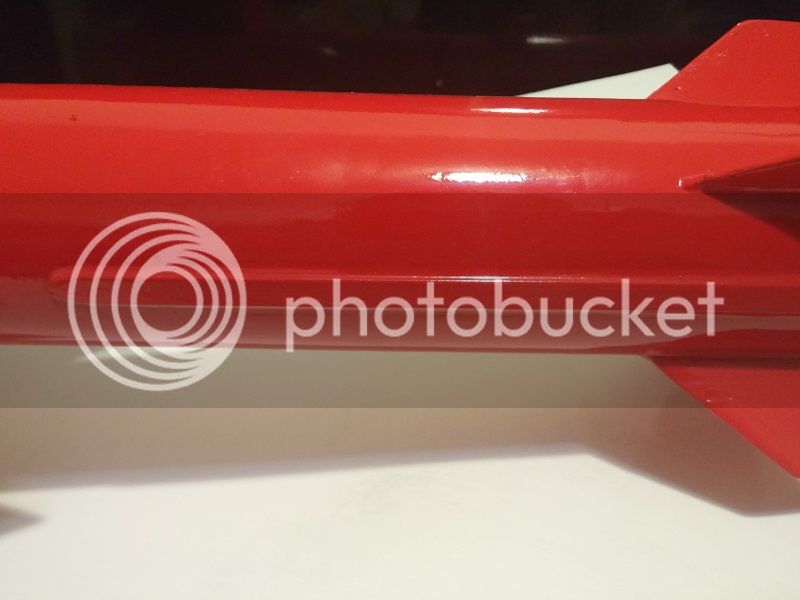
Here are some 1/16" balsa strips that I added for some piping-type things. I may outline these with the sharpie as well.
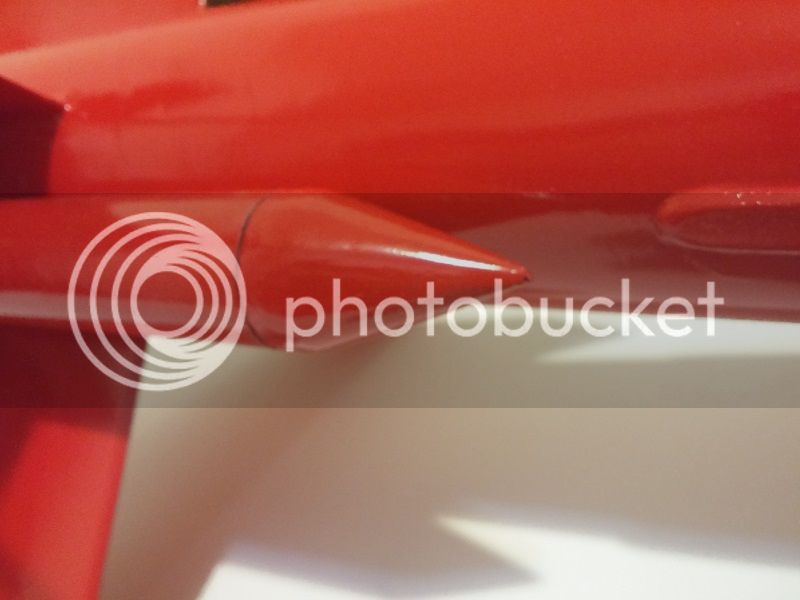
These cardstock nose cones turned out great! Just soaked with ultra thin CA, filled, sanded & primed, then 2 coats of gloss red and they look plastic.
Next is to add a bit of silver on the main fins, then accent some lines. Also I'm going to use a small amount of fluorescent orange for the "cockpit window" so that it appears to be glowing bright red. Just like the robot's eyes in the movie. Hopefully that all turns out as well as I'm hoping.
What color sharpie? Black, I would guess?
Submitted for your consideration: Gold paint pen instead. (I'm just a fan of gold on red.)
Submitted for your consideration: Gold paint pen instead. (I'm just a fan of gold on red.)
Cabernut
Well-Known Member
- Joined
- Oct 15, 2015
- Messages
- 1,384
- Reaction score
- 9
What color sharpie? Black, I would guess?
Submitted for your consideration: Gold paint pen instead. (I'm just a fan of gold on red.)
Thanks for the idea... I hadn't thought of using one of those metallic sharpies...
I may try a bit of silver sharpie if i can find one. For the front, I'll use black though.
Cabernut
Well-Known Member
- Joined
- Oct 15, 2015
- Messages
- 1,384
- Reaction score
- 9
I added the silver components and a touch of orange for the "cockpit window". Speaking of silver, thanks Joe for your silver paint pen idea. I really like how it looks. Way better than just black lines. The silver added to the main fins are supposed to look like large metal blades. It turned out pretty well.
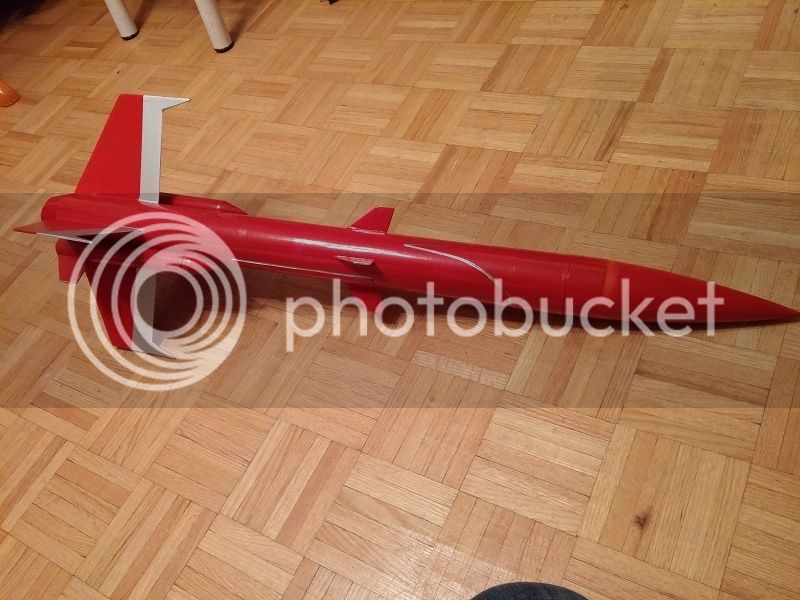
On the back, I added a strip of aluminum foil attached with JBWeld since on it's maiden flight, the part of the main body tube that sits right next to the booster flame got a bit singed. This should help keep the heat off.
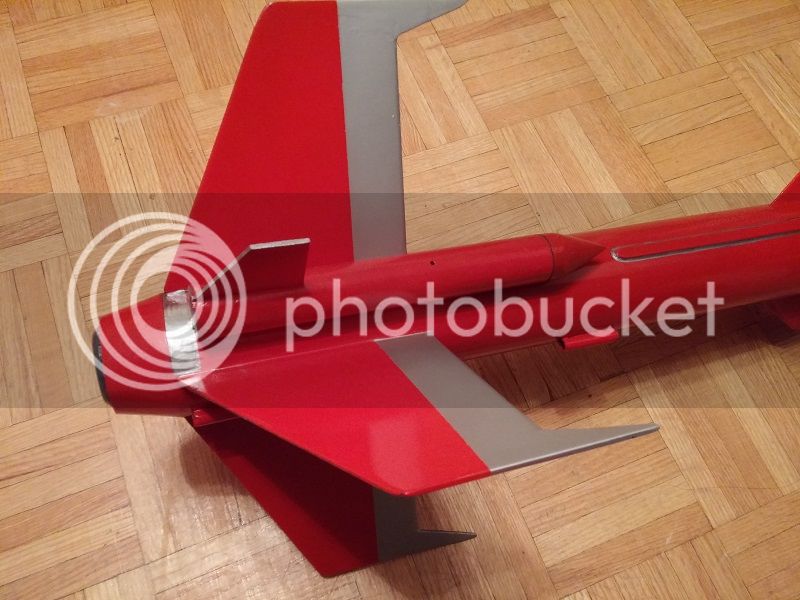
Here you can see how cool a silver paint pen is, it allows you to add detail that otherwise would be way too hard to mask and paint.
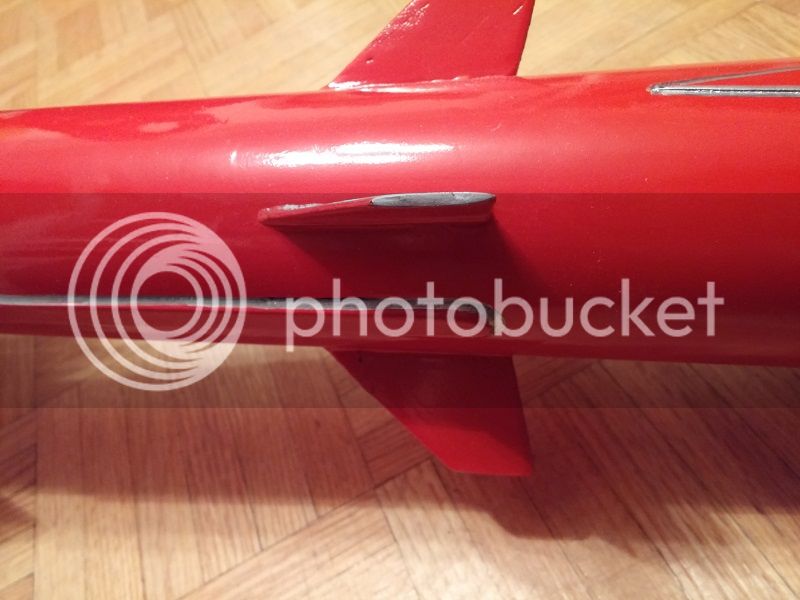
I really would like to try and get another launch in soon. Last time I tried B6-2s in the boosters, and I have a pair of C6-0s that I want to try next. Should be a cool boost and good for approx 1400ft apogee.
Here's a thrust curve analysis comparing a single F15 to a C6x2 + F15 combo. Good punch at liftoff followed by a nice long burn.


On the back, I added a strip of aluminum foil attached with JBWeld since on it's maiden flight, the part of the main body tube that sits right next to the booster flame got a bit singed. This should help keep the heat off.

Here you can see how cool a silver paint pen is, it allows you to add detail that otherwise would be way too hard to mask and paint.

I really would like to try and get another launch in soon. Last time I tried B6-2s in the boosters, and I have a pair of C6-0s that I want to try next. Should be a cool boost and good for approx 1400ft apogee.
Here's a thrust curve analysis comparing a single F15 to a C6x2 + F15 combo. Good punch at liftoff followed by a nice long burn.
Screaminhelo
Shade Tree Rocket Surgeon
- Joined
- Jan 30, 2013
- Messages
- 935
- Reaction score
- 4
Wow, that is nice! The Sharpie really worked out well and I am guessing that the detail pieces that you added really stand out well in person, they look nice in the photos but it looks like the camera washed out the shadows that really make them pop, definitely something to add to my bag of tricks.
Is it sad that I am already thinking about ideas for next time? I have seen so many good ideas and things that i want to give a try!...Please say there will be a SATRFSBO!!!!!
Is it sad that I am already thinking about ideas for next time? I have seen so many good ideas and things that i want to give a try!...Please say there will be a SATRFSBO!!!!!
Cabernut
Well-Known Member
- Joined
- Oct 15, 2015
- Messages
- 1,384
- Reaction score
- 9
...Please say there will be a SATRFSBO!!!!!
I second that. It's gone so well I can't see any reason why there wouldn't be one next year. I've picked up so many great ideas from all the build-off threads that there's plenty to work with over the winter. Cool stuff!
As far as mine, the detail pieces didn't stand out as much as I'd like and I felt if I kept going it might have turned fugly in a hurry. Physical detail and paint pens/sharpies are a couple things to practice and add to my bag of tricks for future builds.
One thing I'm hoping to add post build-off is larger 24mm boosters. 2xD12s + F15 would put it into G-motor territory and I predict would be an awesome liftoff. Two E12s in the boosters would be glorious however at 131g total propellant, out of MPR and into HPR which my local club doesn't launch.
By the way, anyone else notice that these Estes 29mm BP motors are a 162.8% scale of the standard 18mm motor?
Cabernut
Well-Known Member
- Joined
- Oct 15, 2015
- Messages
- 1,384
- Reaction score
- 9
For my birthday I decided to use my club's site for a private launch(who wouldn't?) I decided to give the Maximilian a go. I don't have a clip whip or anything for clusters, so I made one out of speaker wire twisted together. Not a good idea as there's no way to check for continuity separately. Here's why that's important:
One booster failed to ignite and the resulting liftoff was awkward. Spun for a split second before lifting off then arcing over until the F15 took over thrust. The lower than expected altitude resulted in a late deployment and tangled chute which resulted in a hard landing. The only damage was a cracked fin spike and small dent on the body tube end. Nothing major, no zippers, Thank God. Will fix the fin with CA and be good to go again.
Here is the launch from the ground. Landed a good 5-minute walk away in a recently harvested wheat field.
[youtube]oNkS2dlXFqo[/youtube]
Here is the on board 808 cam video. The booster that did light worked flawlessly. I think I'll stick with the -0 motors. The booster that didn't light was released on main eject.
[youtube]MD6NvEiYSOs[/youtube]
So for the 3rd flight, I'll definitely use a proper cluster ignition setup. Lesson learned.
Last edited:
Clusters are fun!
Similar threads
- Replies
- 16
- Views
- 626
- Replies
- 33
- Views
- 2K
- Replies
- 2
- Views
- 380
- Replies
- 5
- Views
- 612


