Carbon Fiber 13mm Star Trooper V.2.0

The Rocketry Forum

Help Support The Rocketry Forum:

This site may earn a commission from merchant affiliate links, including eBay, Amazon, and others.

TopRamen

SA-5
Joined
Aug 9, 2013
Messages
9,955
Reaction score
111
After the clear coat got cooked on my first CF Star Trooper, and the repairs were just plain UGLY, I decided to simply make another body tube, and incorporate the lessons learned into the new one. It took a firm pull, but I was able to pop the fins and the rail guide off the first one without damaging them, so in this thread, I will show how I made both when we get to that part, but we will basically start from scratch, beginning with the body tube.
Before we begin, a quick primer to get anyone just joining my carbon fiber adventure up to speed with the what and why.
I enjoy the Star Trooper design, and it makes a good platform for experimenting with new techniques and materials. That's the what. The why, well that's simple. To simply enjoy building a rocket, regardless of what it needs to be, and to instead make it what I want it to be, and have a ton of fun along the way.:)
The first go around was my very first foray into making a tube from a cloth, around a mandrel, and in my effort to make it as light as possible, I only did about one layer with about a 3/8" overlapping seam.
This would have been fine strength wise, but the heat of the ejection charge on it's maiden flight caused the epoxy and clear-coat to boil into a mess. Most carbon fiber tubes use multiple layers for strength and are best suited to high power applications. They end up thick enough that the ejection charge does not present a threat to the integrity of the airframe, and in many cases use electronics to handle an ejection charge that is not even part of the motor assembly.
For my purposes, I simply want to learn about the properties of CF, and how to use it, regardless of it being necessary or not.
Anyhow, this thread will show how I SHOULD have done it, seeing as how I don't like only getting one flight out of such a fun little rocket.

I decided to try something I've never done before, peeling off the glassine layer on a body tube.
Much to my surprise, the tube went from weighing 3g. on my scale to weighing 0g.:shock::y:
Who knew that most of the weight of a BT is that glassine layer? A lot of folks apparently, as this is common practice in glassing, yet I never had the nerve to try it til now.:confused2:

Star Trooper 13mm Carbon Fiber  v2.0 2016-05-29 007.jpg

Now I have something to wrap my CF onto, that will guaranty the internal dimensions are correct, and it adds little weight. It will also insulate my CF wrapping from the heat of the ejection gasses.
When it it wrapped and cured, I'll seal the inside with CA like I do on all paper tubes to prevent the build up of crud that draws moisture into the tube.

I got my stripped BT onto the mandrel, and next it will be time to cut cloth and apply it using BSI brand 20 minute epoxy, which I experimented with today on the CF for the first time and had appreciable results as far as how rapidly it absorbed into the CF. Previously, I had been using the 15 minute stuff, and it is simply not wet enough to fully absorb into the CF.

Star Trooper 13mm Carbon Fiber  v2.0 2016-05-29 008.jpg

As stated earlier, even though I already have some of the parts made, we'll just either make them again, or I'll share the pictures of the making process, as I document everything in pictures even if I am not doing a build thread.
I think that some of you will appreciate the methods I have used to make components that otherwise would require tools like a bandsaw and such.

I have a lot of other builds going on right now, and as such was not going to do one for this, but enough folks here liked the rocket that I will gladly share what I did to make it, especially now that I can make it better than I did the first time.
The Carbon Fiber was given to me by a member here, and I feel it only proper to share the enjoyment of working with it with everyone. It is a downright enjoyable material, both texture wise and equally so visually.
 
I have just enough Peel Ply left to do this tube. Tfish gave me a sample of it awhile back, and I really had not needed it with the lightweight glass cloth, as the weave was usually finer than the pattern of the peel ply, but the 6oz. carbon fiber has a very coarse texture, and the peel ply is great for it.
Another reason to use it is that unlike glass cloth which is very limp and will lay flat if I simply give it a dirty look, the CF likes to try to lift off of the round surface and go back to being flat, so it needs to be held firm while the epoxy sets up.
If I was to just use parchment paper, it would likely get wrinkles, as the parchment paper slides about too much after you get more than one wrap of it on.
I will use parchment on top of the peel ply to hold the peel ply in place, but I will only need to secure it with a piece of BT-5+ sized tube with a slit cut up the side and then taped in position firmly.
Unlike glass cloth, the CF can be cut with scissors, and not become a nightmare of wispy fibers. Unlike glass cloth, CF is a nightmare for #11 X-acto blades, and I'll try to not even waste them trying to cut it.
I'll wet the tube first, then apply the dry cloth directly to the soaked tube, like I do when glassing, but it will be much easier.

Last of my Peel Ply 2016-05-29 001.jpg


And here's the piece of BT-5+ that will lock everything down for curing:

Bt-5+ 2016-05-29 002.jpgBt-5+ 2016-05-29 003.jpg
 
Last edited:
Well, that was an experience and a half!
I screwed up the first two layups and had to trash them, but on the third, I sacrificed a pair of scissors to add a taper to the cloth and that allowed me to get it proper for the peel ply.
The peel ply was wrapped around it, then a layer of parchment paper, followed by back and forth crossing layers of painters tape to apply compound leverage compression to the wretched thing.
I did not quit til' I was satisfied that I had applied plenty of layers of pressure. I doubt a Vacuum could get a tighter squeeze, and I hope I did'nt overdo it.
We'll see tomorrow!:)

The Wrap 2016-05-29 001.jpgThe Wrap 2016-05-29 004.jpg
 
Last edited:
Working with Cf has inspired me to make an object that resembles a killing cone.
If you have Chickens, Ducks or Turkeys, you know what a killing cone is.
I'll make a mandrel press that feeds the epoxy and the cloth onto a mandrel under great pressure.
The tendency of the CF to be such a pain, I'm going to develop a way to properly roll it onto whatever it needs to be rolled on to.
I will not be defeated, nor will I resort to vacuum bagging.
Compound leverage can crush a Human's skull with 8 winds of duct tape.
I'm sure I can get acceptable results with my LPR CF methods, and no skulls need fractured.
They don't even make SU composite motors this size anymore, so you have to just wish for great things or build fast and light rockets that have enough mass to use inertia to gain altitude, but you are still hurt by delay times.

Hopefully, a manufacturer fills the need.

There obviously was once a need, and I missed out on that period of model rocketry.

In today's times perhaps that need is renewed?

This rocket hits 1956' on a C6-10, and is still in warning territory for "recovery device deployment at high speed" so a composite C6 with 14 seconds of tracking smoke would be sweet!!
 
Last edited:
Good to know! I always carry a can of WD-40 just in case!

I have never had to put that into practice, but I have used the compound leverage principle to great mechanical advantage on many an occasion.
Turning a length of rope or cordage into a turnbuckle happens frequently around here too, as I need all the possible advantages I can get when it comes to making stuff like yard work happen.

WD-40 is actually a pretty good reference to an item that was created by rocketry, as it was originally created to bathe inter-continental ballistic missiles while they were sleeping in their silos.
The skin of the goodies had to be made of bare steel, and thusly was likely to rust right quick if you just buried it in a cave like they did, so they needed a "Water Displacement" material to protect the Missiles. On attempt # 40, such and such, I can't remember his name at the moment, got the correct formulation, and thus, "Water Displacement Formula Number 40" was born.

Thanks WD-40 guy, for all the times I lubed up my bike or skateboard as a kid, with your missile lubricant.:wink:

https://wd40.com/cool-stuff/history
 
Last edited:
Good to know! I always carry a can of WD-40 just in case!


I also meant it as kind of a P.S.A., as you will always have idiots out there who don't know this odd little tid-bit of miscellany, and will try to wrap duct tape around there head to make a youtube video or some nonsense.
The mechanical principle was what I was trying to illustrate, so don't hurt your heads over the information that may have been in slightly poor taste.
Rubber bands can slice a watermelon in two if you have enough of them.

[video=youtube;Q1VoK0Ga36w]https://www.youtube.com/watch?v=Q1VoK0Ga36w[/video]
 
It's like waiting for Christmas around here now.:yawn:

I hope it is worth the wait, and the peel ply is finally my friend and all.
This is a whole new level of construction technique for me, and since I think I have a handle on it, I'll share my failures and successes.


Note: I made sure the shock cord attachment was high enough that if anyone ever brings back some respectable 13mm motors, that this bird will be worthy of being one of the first on Deck to fly with them.

Surely there has to be a market for 13mm Composite Single Use motors again.
Even some of the longer BP 13mm of old were apparently pretty spectacular.
 
I have never had to put that into practice, but I have used the compound leverage principle to great mechanical advantage on many an occasion.
Turning a length of rope or cordage into a turnbuckle happens frequently around here too, as I need all the possible advantages I can get when it comes to making stuff like yard work happen.

WD-40 is actually a pretty good reference to an item that was created by rocketry, as it was originally created to bathe inter-continental ballistic missiles while they were sleeping in their silos.
The skin of the goodies had to be made of bare steel, and thusly was likely to rust right quick if you just buried it in a cave like they did, so they needed a "Water Displacement" material to protect the Missiles. On attempt # 40, such and such, I can't remember his name at the moment, got the correct formulation, and thus, "Water Displacement Formula Number 40" was born.

Thanks WD-40 guy, for all the times I lubed up my bike or skateboard as a kid, with your missile lubricant.:wink:

https://wd40.com/cool-stuff/history

WD40 is awesome stuff, and penetrates fairly well. As a lubricant, however, it's not great.
 
WD40 is awesome stuff, and penetrates fairly well. As a lubricant, however, it's not great.

Very true. A lot of folks around here don't know any better, and they use it on their guns. It makes the bluing wear away quite well.:facepalm:
 
Thanks to using the stripped BT section, the tube requires no further internal fitting, and both nose cone and a spent motor case fit perfectly!
I'm glad that I prepped the mandrel properly size wise, and that all the wrapping of tape did not shrink the tube, which was something I worried about after I had like 6 layers of tape on it.:rolleyes:

Anyway, it turned out great, and in my haste to get that third try on there, I did not notice the seam stitching underneath my painters tape while doing the layup, so it will have a "unique" look on the seam side, however I will gently sand it down to blend it in with the rest of the surface. This is 13mm, and it will be going slow enough that this will not affect it's survivability in flight.

Overall, I'm ten times happier with the way this turned out compared to my first tube.:)

Star Trooper Carbon Fiber v.2.0 2016-05-30 001.jpgStar Trooper Carbon Fiber v.2.0 2016-05-30 002.jpg
 
A gentle sanding with 320 grit paper and the tube weighs 5g. That's 2g. more than if I had just used the stock body tube without removing the glassine layer. Considering it will not require paint, only a clear coat or CA finish, it is pretty good.


Star Trooper V.2.0 Weight 2016-05-30 003.jpg
 
Last edited:
Who cares about weight anyway when you have a bullet proof, 13mm rocket!

One day, when you have the resouces, you need to take a shot at vacuum bags. You are correct that the tape provides plenty of pressure but with a complete vacuum schedule, you are able to eliminate excess resin. I believe that you will find the process engaging and the challenges rewarding.

I have watched some videos about it and it does look like the ideal way to go.
Maybe after I get my lathe done, it will be necessary to build a vacuum assembly to do the nose cones efficiently. I can't see wrapping tape around a non-cylindrical object like a cone being feasible.:confused:
My first few cones will have to do without though, and simply get each layer wetted out by hand, as I need to get caught up on some of the other projects I have going on.
 
So that's really all there is to it for the BT, so here is how I did the fins.

One layer of CF is rather flimsy, but without a band saw, I really had no way to cut fins from slabs of layered CF other than a hacksaw, and that sounded like a real good time indeed, so I came up with a much simpler solution.
I wetted out a square of CF that would be large enough in area to make 12 cut outs from, by simply using my fin template and leaving a little extra room at the edges. I let this dry, and when is was cured, I cut twelve rectangles out with scissors. I simply held my template to each blank and cut slightly larger than template fins shapes.

Carbon Fiber Fin Method 2016-05-24 001.jpgCarbon Fiber Fin Method 2016-05-24 002.jpg

I stack sanded these to get them all the same then separated the stack into three individual fins of 4 layers each.

Carbon Fiber Fin Method 2016-05-24 003.jpgCarbon Fiber Fin Method 2016-05-24 005.jpg

Then the obvious part, I epoxied the mating surfaces and set them under my box of books on my granite flat surface to cure. I used a couple of strips of balsa to keep them aligned on the leading edge, and one on top to force the most pressure to the center of each fin. After about an hour, I checked them to make sure they had not shifted, and they had not, and were setting up pretty firm, so I removed the balsa for the rest of the cure and left the box of books back on top of them. Later that day I had my fins, but do to using PC Superpoxy, the cured very slowly and exhibited some flexion when I began to sand the edges, so they went back under the weight for another 12 hours or so.

Carbon Fiber Fin Method 2016-05-24 006.jpg2016-05-24 001 2016-05-24 001.jpg
 
Here's how I handle the shock cord mount.
I made a pin from a tiny section of fiberglass rod that I got out of a discarded umbrella. The pin will go through the airframe, and then serve to reinforce the rail guide riser. These are dry fit pics, and as you can see, everything fits just tight enough to stay together without adhesive.
Before sanding and shaping, the pin weighs 0.2g. .
The original version had the pin, but it was only the width of the airframe. This way is much better.
I have more fiberglass rods of various sizes, and some CF arrow shafts, so one of those will be used in a similar fashion to make the shock cord anchor on the 24mm version.

Star Trooper 13mm CF Shock Cord Anchor 2016-06-04 002.jpgStar Trooper 13mm CF Shock Cord Anchor 2016-06-04 003.jpgStar Trooper 13mm CF Shock Cord Anchor 2016-06-04 004.jpgStar Trooper 13mm CF Shock Cord Anchor 2016-06-04 006.jpg
 
Here's how I handle the shock cord mount.
I made a pin from a tiny section of fiberglass rod that I got out of a discarded umbrella. The pin will go through the airframe, and then serve to reinforce the rail guide riser. These are dry fit pics, and as you can see, everything fits just tight enough to stay together without adhesive.
Before sanding and shaping, the pin weighs 0.2g. .
The original version had the pin, but it was only the width of the airframe. This way is much better.
I have more fiberglass rods of various sizes, and some CF arrow shafts, so one of those will be used in a similar fashion to make the shock cord anchor on the 24mm version.

View attachment 293042View attachment 293043View attachment 293044View attachment 293045

Wow! Very nice! Where did the rail guide come from? Does it fit the micro rails?

Also I wasn't aware of a 13mm SU C6-10...do you know what speed the rocket sims on that? I'd guess that they didn't sell too well since it makes your rocket disappear for good! From my mini launch experience, the A10 is likely the best for high altitude (and speed) while still giving you a chance to see/track it...I really love that motor; however a C6 would really be impressive!


Thanks Ken.

I just made the rail guide out of carbon fiber using the same method used on the fins. 3 layers instead of four though.

Yeah, this thing really cooks on an A3-4, and it would be sweet if they made a A3 with a 5 or 7 second delay.

The rail guide is sized for Makerbeam rail.

It gets seven seconds of airtime longer than OR predicted it would get, so for this "Version 2.0", we are adjusting things like the streamer design to get it back safely every time.

[video=youtube;8bloYEvuGGs]https://www.youtube.com/watch?v=8bloYEvuGGs[/video]
 
Last edited:
I understand your dilemma...same as mine - there are too many gaps in the motor power and delay for minis. It would be great if Estes made an A3-2T (for me), an A3-6T (for you) as well as an A10-4/6/8T.

However I think we both agree that mini motors are BIG fun! :wink:
 
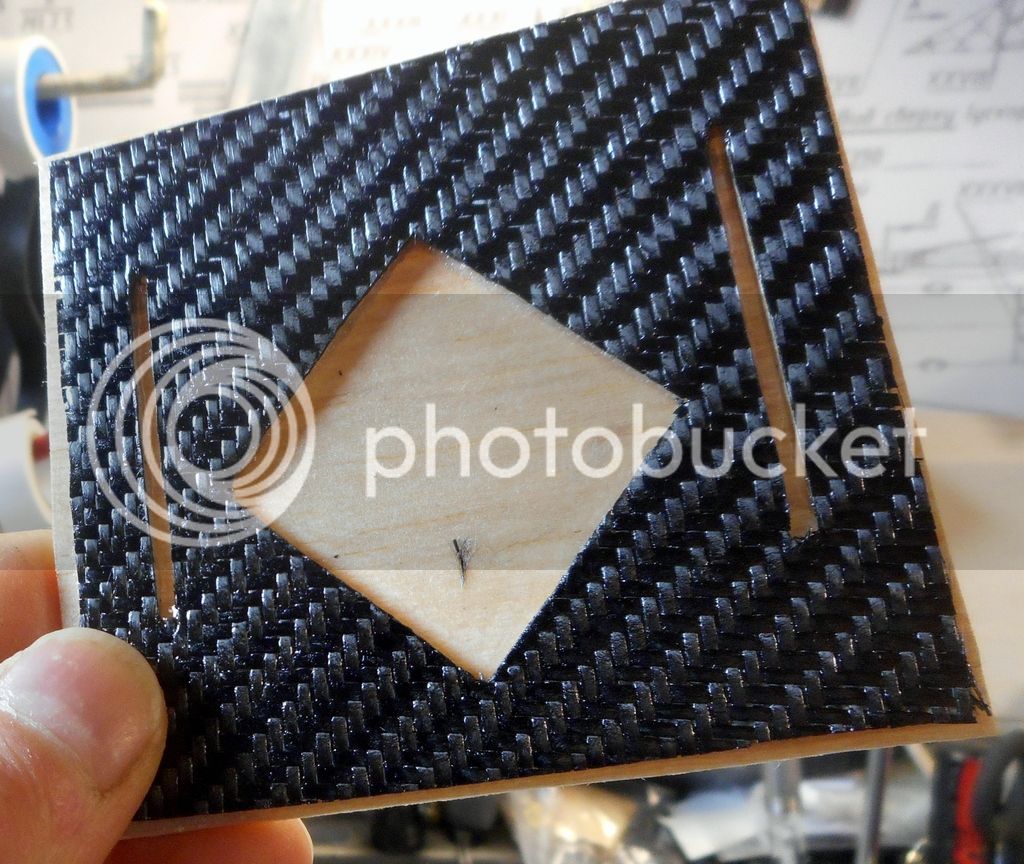
Now I can make hollow carbon fiber tubes by molding CF around the sub-components of something like this that I can make freehand with a wooden template.
If I use JB weld on CF, it gets pretty incredible, and I already have a bunch of research directed in that direction. The ability to fine une the parts during dry fitting becomes the most important factor to limiting the use of heavy construction adhesives and hardware.
In theory, I could make anything structural out of carbon fiber using puzzle methods like notches and such.:)


Tearing into rockets 2016-06-06 008.jpg
 
Last edited:
Spars and Ribs inside fins pretty soon, and since those are the flat parts, I'll be able to make them with templates all day long.
Print me up some faceted fins already.
I'm going to master foam!!!!
I'm already redesigning my SA-5 to take full advantage of my enhanced skillsets.
There are great things afoot indeed!

An entire 4 dimensional rocket factory that you make on-site!
Battery power or USB.:wink:
 
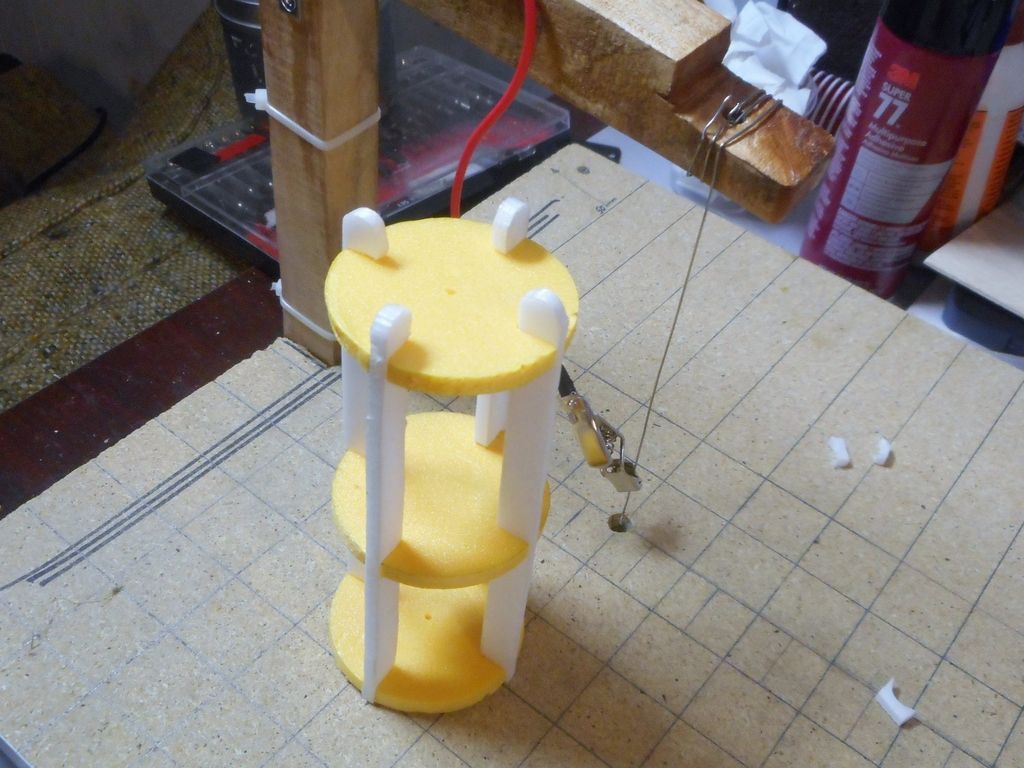
I'm constructing a special assembly stand/jig for mounting the fins, so the finished product will not be had until that side project is complete.
 
I think that one of the fins on my first version was canted.
Thusly, I am building a simple machine of carbon fiber aspect that will allow me to make this version a thing of perfection.
I got the plans from Mr. Macklin awhile ago, but when I realized that it needed to be built perfectly in order to work, I back-burnered the ideas of building it myself, as I don't have the proper tooling to work wood to that precision and aspect.
Now that i can print templates and make anything with CF, then sand it to exact dimensions and measure with my digital caliper, this is eaily doable, and will pay for itself in the use I get out of it.
Being made of CF, it will last for centuries to come.
It should be done within a week, then I'll complete the assembly of the rocket, which now is only waiting for it's jig.
The rocket will get interchangeable recovery gear this time, so I can fly the smallest motors with a Chute'.


Finished that one. The next one and the rest of the components can now be sized around this working part.
I fitted it on my testing jig board and it moves correctly.:D

CarbonFiberMacklinFinJig 2016-06-16 001.jpgCarbonFiberMacklinFinJig 2016-06-16 003.jpgCarbonFiberMacklinFinJig 2016-06-16 004.jpgCarbonFiberMacklinFinJig 2016-06-16 011.jpgCarbonFiberMacklinFinJig 2016-06-16 010.jpg
 
Got the next most critical components made today. The rest of the shapes are pretty simple and don't require drilling, so I should have this done on schedule, within a week of beginning it.

FinJigParts 2016-06-17 004.jpgFinJigParts 2016-06-17 003.JPGFinJigParts 2016-06-17 005.jpg
 
Back
Top