LOC 4-29SS Build Thread - Hans Style

The Rocketry Forum

Help Support The Rocketry Forum:

This site may earn a commission from merchant affiliate links, including eBay, Amazon, and others.

HHaase

Well-Known Member
Joined
Aug 3, 2014
Messages
880
Reaction score
338
Ok, since there just doesn't seem to be any complete build threads, I'm going to give on a try for this beast of a rocket. Let's try to break the trend, and get one done!

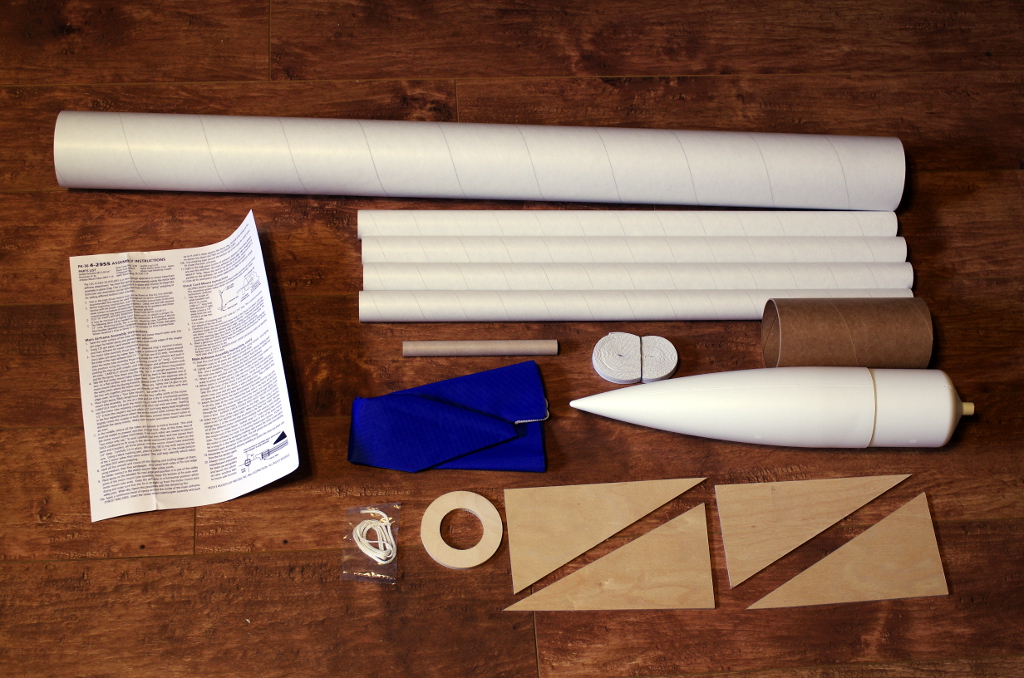
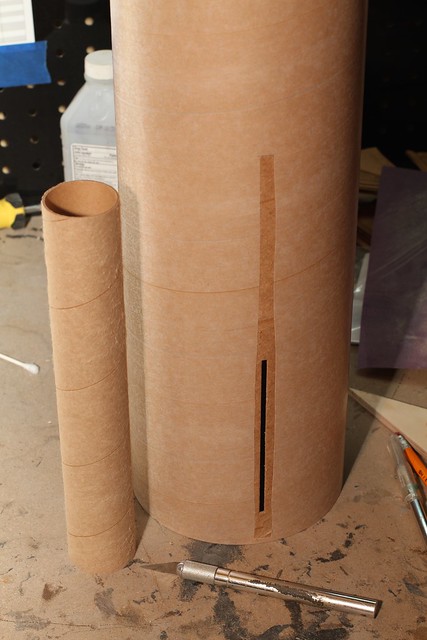
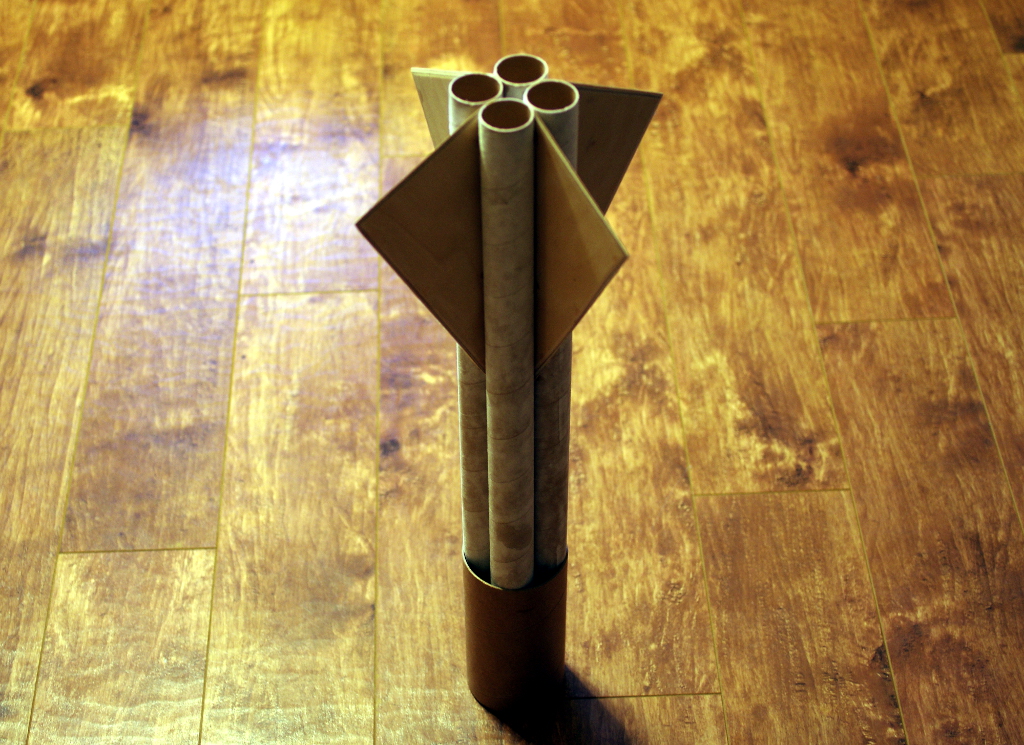
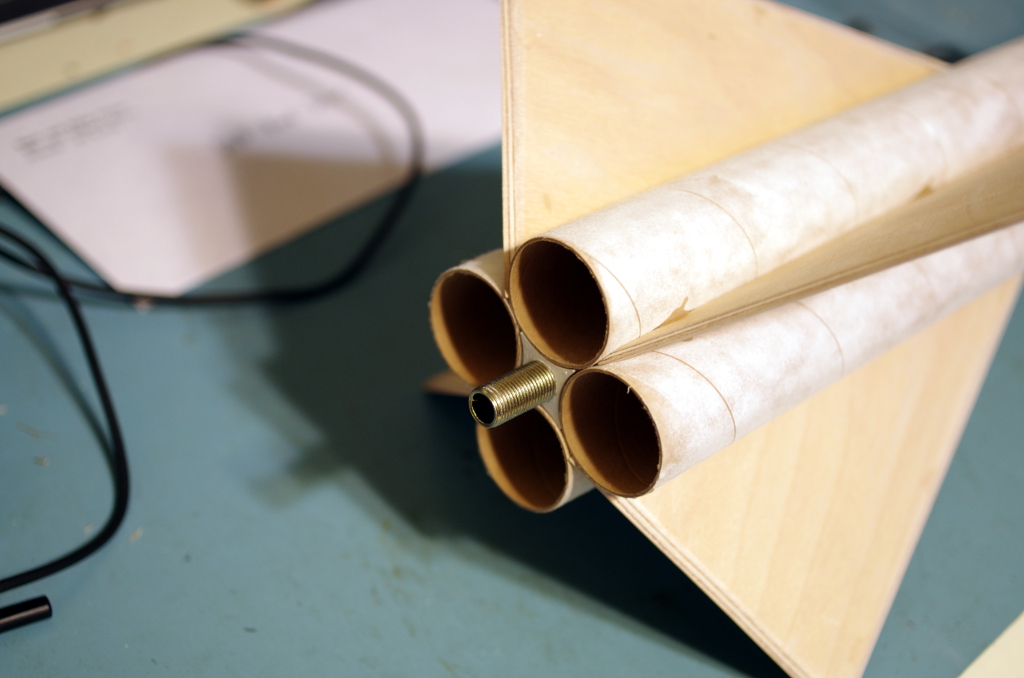
Anyway, the LOC 4-29SS, for a quick rundown of the kit before we get going. This is a 3" body tubed mid to late 90's design from LOC, and is a cluster-only flyer. The 4-29 part of the name stands for the 4x 29mm motor mounts that make up the lower section of the rocket. The SS? Strangely enough it stands for "Slip/Slide". It's made to be easily separated into the lower and upper sections, and the instructions say you can get additional lower halves for pre-loading.

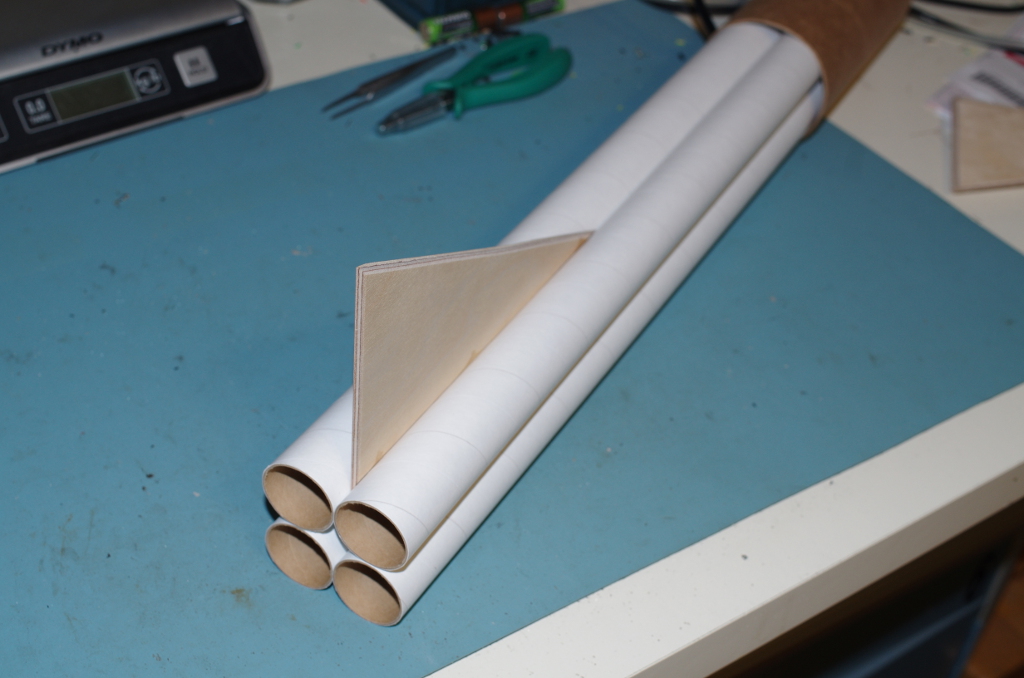
The kit comes with everything you need for a basic flyer. Plastic nose cone, 3" upper tube, 4x29mm lower tubes, 36" nylon chute, elastic shock cord, fins, plastic nose cone, launch lug, one coupler, and a thrust ring/bulkhead. Motor retention in the instructions is via friction fit. Recommended motors are 4 F's or 2 G's. No decals are included, and instructions are just text with very few drawings of limited use. No decals are included, which is a shame because the artwork on the bag card is pretty impressive.

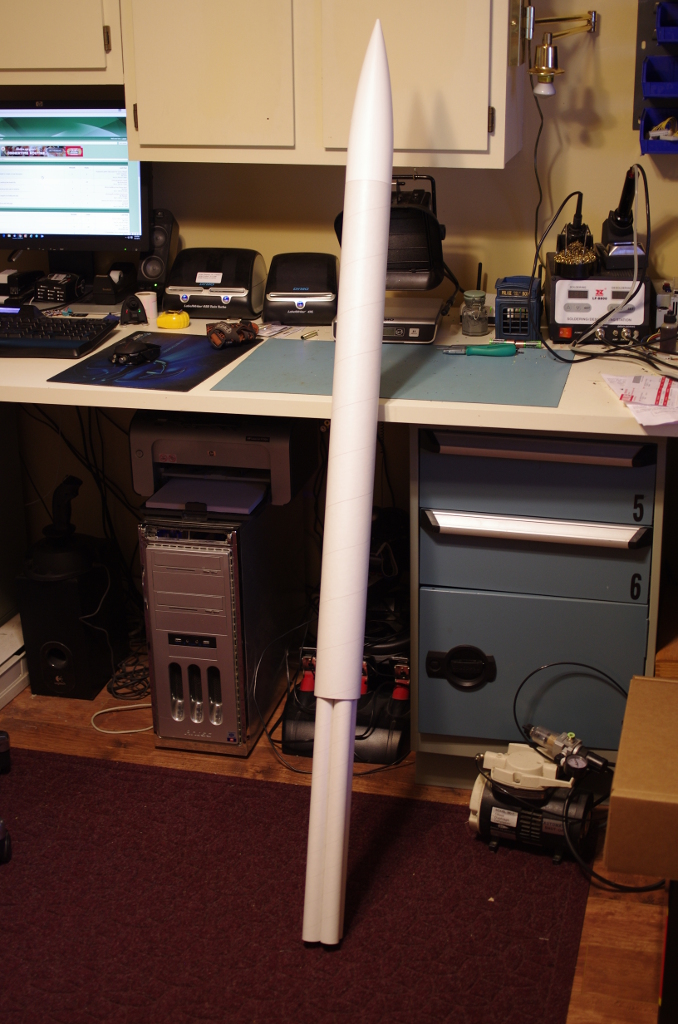
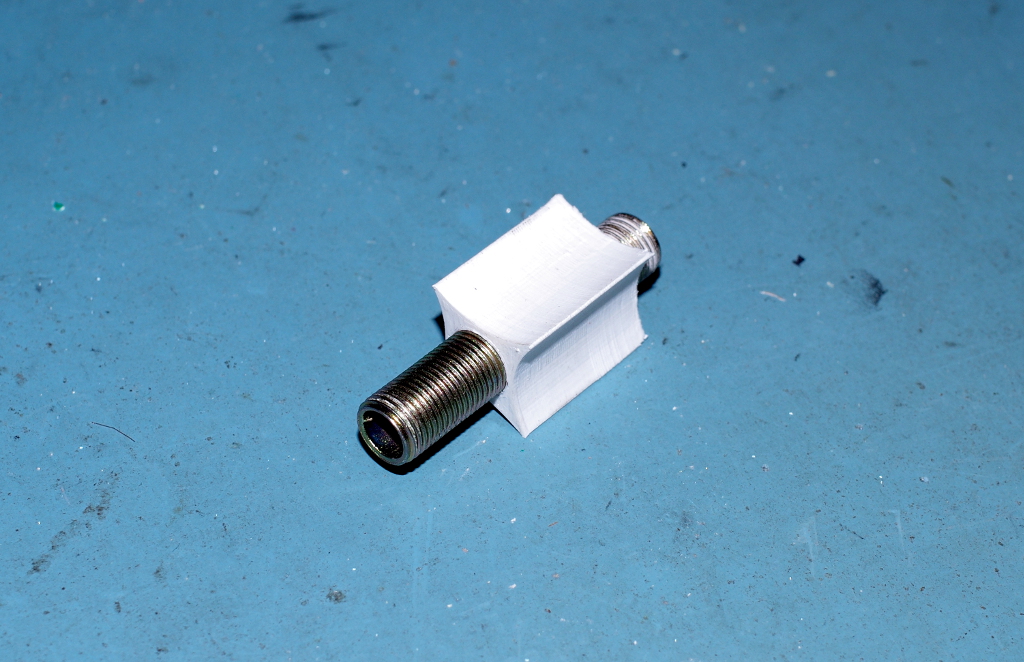
My plan on this one is to build it for potential air starts, dual deploy, and no way in hell I'll be doing friction fit (I'm really bad at it). I'll be using my trusty Raven for altimeter and starter duty, and since I'll probably need the nose weight, I'll see if I can get my eggfinder in there too. Will be a slow start, been really busy this week, but I need to get some rocketry done.

And since I'm sure somebody will ask .... I don't plan on doing a Stovi just yet. For those who don't know, that's a similar kit from LOC but with 7 x 24mm motors.
 
My build did not need any nose weight (and I did laminating on the fins).
 
Wow, been this long since I started the thread? Lets get some building done! First things first, the general layout of the kit. Nothing overly complex about the build if you're going stock, except the funny lower portion of the sustainer. Box contains the following....

3" main body tube
3" coupler
4 of the 29mm lower body tubes/motor tubes
4 plywood fins
nose cone
36" flat cut ripstop chute
3" bulkhead with center hole
Elastic shock cord, plus a smaller string (Can't remember what it was for).
and a 13mm tube for the launch lug.

The instructions are not ESTES quality by a long shot, but that's not a concern here as I'll basically be ignoring them anyway. No decals provided.

429-001.JPG


First steps all center around gluing together and squaring the four motor tubes. I started by tacking together pairs of the tubes with some CA then rubber-banding them together.
I'm actually a couple steps past this, but waiting for the camera to charge so I can get some more photos. Not that I'm tremendously past this, but it's progress.

429-002.JPG
 
The string is for the shock cord mount. Tie a knot in each end and make a 1" loop with a knot at the other end to make the ends even. Pot the ends in epoxy in a puddle below where the nose cone shoulder sits in the body tube. I've never pulled one out yet...
I was wondering when you'd get back to this. I decided to add a LOC AV bay to mine for the Marsa 54...

Adrian
 
I was wondering when I'd get back to it too. Business has been good lately, but it does take away from hobby time.

Anyway, back to the LOC......

After getting the tube pairs tacked together, the best way I could find to square and attach all 4 was to use the coupler to hole them in place. Tacked with CA again, then I slid the coupler down to the other end and tacked there. This got me a nice square set of motor tubes.
429-003.JPG


And once the motor tubes were all set, I could start mocking up the whole rocket a bit to see what it's going to look like. To be honest, I kinda think it would look better with a shorter forward body tube and longer motor tubes. But that might make for some Cg issues. Still .... quite a lot of volume in that main body tube. I think I'll be sourcing myself another coupler and splitting it somewhere. Those LOC av-bays do look kinda nice I must admit.

429-004.JPG


Having access to a sander at work made it nice and easy to put bevels on all the fin edges. First time I tried, I just did the leading and trailing edges as usual, quickly noticed on a test fitting that you need to also bevel where the fins meet the motor tubes. Felt weird doing that, I'm so used to square edges.

429-005.JPG


First one tacked into place. I did decide to move the fins about a half inch forward on the motor tubes. Mostly just because I wanted to, no solid reasoning there. Maybe it will help prevent damage on landing. Everything is still just CA tacked right now, I haven't broken out the epoxy yet. Trying to decide exactly what I'll be doing with adhesives on this one.
429-006.JPG
 
If they're all just still tacked together, you might consider pulling them back apart and stripping the glassine off of the 29mm tubes, from the bottom to just above the fins. That'd give a lot more bite to whatever adhesive you choose to use.
 
You know, I keep forgetting about that glassine layer since I've been focusing on TTW and fiberglass kits lately, where it isn't as much of a concern. I probably won't split it all apart though. There's plenty of surface area between the tubes. But I will definitely scuff-sand it where the fins attach. Should be plenty strong due to how much contact area there is between the tubes and fins.

-Hans
 
I wouldn't worry about peeling the whole layer. What i've been doing is slicing the glassine on the sides of fin slots and peeling off just that part. That could work well here without taking anything apart.

16343286646_26fd85d7bb_z.jpg
 
I got stuck peeling it all off anyway. I got silly, put a couple fins on wrong, and had to pop them off. Did enough damage to the glassine that I just decided it was easier to peel it all off.
 
A good non-friction-fit retention method for the 4-29ss is to epoxy a threaded insert between the 4 motor tubes. Then just use a matching bolt and flat washer to ratain all 4 motors at once. Simple, lightweight, and cheap! I did 3 inserts to hold the 7 motors in my LOC Ultimate. Alternatively, epoxy a piece of allthread and use a nut and washer.

Love them clusters!
-Ken
 
cool beans! im scratch building a 429ss, basically because I had the parts.
one thing I did before glueing the mmt's into the main bt is glue a plug in the forward end of 2 of mmt's. this way iffen I want to fly on 2 motors, I don't have to plug the other 2 with spent motors.
and when I fly on 4 motors, just remove the ejection charge from 2 motors that go in those tubes.
 
Back at it! After peeling off the glassine, and subjecting my workspace to a thick layer of sanding dust that will be here for quite some time, I have everything tacked together again with the fins properly oriented! I'll probably run some thinned titebond II along the full length of the motor tubes, and stick with my trusty G-Flex epoxy for the fins.

429-007.JPG


As to motor retention, I stole an idea from my previous "learn me" thread on the 4-29SS, and added a 3D printed component to clean up the install. Using some threaded hollow lamp rod will both give me positive motor retention while also letting me run wires up to the avionics bay for air starts. So I'll get all the fun of clusters, plus the fun of multi-staging, all in one fun rocket.

429-008.JPG


I'll also be epoxying this assembly together and epoxying to the rocket once I settle on a length of threads for motor retention. I may also make a funnel shaped piece to put inside and help guide wiring along, as I have a few ideas of doing this same piece on the forward end of the motor tubes too.

429-009.JPG
 
The threaded lamp rod is a great idea! I may steal that for some of my planned cluster builds.
 
The high power 29mm casings have a .368" thick thrust ring. For the amount of lamp rod to leave out, I'd suggest that, plus .1" for a washer and .375" for a nut (I'd probably use a keps nut). Then round it off to 3/4" just because.
 
Those numbers make sense, I think I can work with that.

Time to start thinking how I want to lay out the avionics. Not sure if I want to split the body tube in half or not to do a traditional mid-tube avionics bay. Plenty of volume to work with in this kit, that's for sure. Just tricky due to wanting that ability to do air-starts.

-Hans
 
You know, the solution was staring me right in the face whenever I logged into this forum and saw a "Jolly Logic" ad on the top. Chute-Release!!

This way I can keep my Raven low in the stack, and it can handle the air starts and apogee charges. I'll blow the main out with the Raven, and have it tied with the chute release. I've got it all in my head now how to handle it, just need to get some parts.

-Hans
 
Been a busy summer, but spent the past couple of evenings getting the fins properly epoxied into place. Even a little bit of progress is still progress.
 
Ok, here's how I'll be handling the electronics bay. Main av-bay will be kinda low on the rocket, as its primary purpose is the apogee charges and air-starts of the 2nd stage. So I want it right above the motor tubes.

I printed all these things out on the 3D printer, lets me do some crazy shapes fairly easily.
429-010.JPG


The sections with the threaded rods are going to get epoxied into these two motor tubes. This will provide sealing out of any ejection charges, and also give me a solid mounting location.
429-011.JPG


Then the lower bulkhead plate will slide down on top of them. Two holes for the threaded rod. Plus a centerline hole both for venting and also for running the air-start wiring up between the motor tubes. This solves my other major problem of locating and securing the avionics bay.
429-012.JPG


I know you're probably concerned about the CG being too far aft, but the rest of the build is going to take care of that problem as well. We'll get to that when we get to that. Lots of work left to do.
 
Did you add a stuffer-tube of sorts up from the lamp rod to the aft AV bay closure? Just wondering if it's going to be a big deal to fish the starter wires up through for your airstarts...if not too late maybe sticking a long thin cardboard tube in place (like a hunk of BT-5 maybe?) to make that a snap.
 
I don't see much need for a stuffer tube in there, the 4 motor mount tubes run next to each other will function pretty much the same way. It's only about 24", so worst case I can just get myself some thin metal rods and fish them up with that. Won't be a problem at all running wires through.

Doing some measurements on things, I have about 20" or so from the top of my av-bay to the bottom of the nose cone. I'm going to need a chute shelf in there, so I'm thinking of doing that with a baffle. Never actually used one before so I have a bit of research to do. Shouldn't be too hard from what I can see.

Should also be getting a few parts in tomorrow from Apogee, so I can start working on the mounting tube in the nose for my eggfinder. This will be an easy modification, done it before in my Painkiller 3. You'll like how it goes together.
 
Been a busy fall, finally some rocket project time.

I had actually finished the nose cone a long time back, but never posted how it goes. I cut off the plastic back end, and use a plywood bulkhead instead. This gets the eye for the 'chute, and a 29mm motor tube with estes retainer. I have a 29mm sled for my eggfinder that goes into this motor tube. Nice and solid mount, keeps the antenna away from any metal, helps with balance, mounts a tracker in an otherwise un-used area.

429-014.JPG


I also decided I want to give it a try with a baffle. This'll give me a more logical mounting point for the main recovery line and also let me keep the avionics bay modular. Since the plan is to use a Jolly Logic Chute Release I'm not worried about a traditional dual deploy setup here. 3D printed from ABS plastic, but should still hold up just fine. I may put a plywood bulkhead on the bottom though 'just in case'. The way it's built I have plenty of surface area to epoxy the 1/4" eye bolt to the baffle but also plenty of structure to distribute forces throughout the baffle and into the body tube.

429-013.JPG
 
Settled on a concept for the avionics bay. Since it's not splitting at that location, only has to hold the altimeter and seal it off from the ejection charges, and doesn't have any significant structural loads, I can really cut back on what I add in there. So instead of covering the whole bay with a coupler I'm just going to use a short section epoxied to the upper bulkhead to act as a 'gas check', and to keep the bulkhead straight. It will also let me have much better access to the altimeter and everything when prepping the rocket.

Still need to epoxy that 1" length of coupler to the upper bulkhead, and epoxy the baffle into place, but we're getting close to flyable condition now. Actually, once that bulkhead is done and I get some recovery lines attached, I'd be able to fly with motor charges pretty darn soon.

So that also means I need to come up with a theme for painting this rocket. I've been using sci-fi type ideas for a while now. My Painkiller Micro was made in Imperial Fist colors from Warhammer 40k. My Painkiller 3 was painted up like a VF-1S from Robotech/Macross. My Scion got the same colors as Capt. Tagon's most recent uniform in Schlock Mercenary. I need a good colorful theme for this one. Having a vinyl cutter in-house now will make that a lot easier too. Hmmmmmmm

429-015.JPG
 
So that also means I need to come up with a theme for painting this rocket. I've been using sci-fi type ideas for a while now. My Painkiller Micro was made in Imperial Fist colors from Warhammer 40k. My Painkiller 3 was painted up like a VF-1S from Robotech/Macross. My Scion got the same colors as Capt. Tagon's most recent uniform in Schlock Mercenary. I need a good colorful theme for this one. Having a vinyl cutter in-house now will make that a lot easier too. Hmmmmmmm

Harlock? Gargantia? Sidonia?
 
YAY! Mailman brought me some fresh epoxy! Trying something 'new' this time, called FlexEpox by Total Boat. Datasheet makes it look like the stuff is same as the West Marine G-Flex 650 I had been using previously. After mixing up a 1/4oz batch I'm inclined to agree it's the same exact stuff. This is a good thing as I like the bottles better and already know how it works. VERY thick consistency and a 40 minute pot life, but it still runs a bit and self levels fairly well. Makes it great for centering rings.

Or, for my new baffle! I also had left some gaps in the middle of the baffle to allow me to epoxy it to the threaded section of the eyebolt. Took the opportunity to finish get the av-bay cap epoxied together too. Next step will be sorting out the mounting on my Raven. I'm thinking of making a small sled for it, to help protect all the bottom side components, and make it easier to move around. I like the power perch but it's still a bit clunky of a mounting system.

429-016.JPG
 
Back
Top