Berthasaurapod - another build thread

The Rocketry Forum

Help Support The Rocketry Forum:

This site may earn a commission from merchant affiliate links, including eBay, Amazon, and others.

EXPjawa

Well-Known Member
Joined
Jan 27, 2015
Messages
2,218
Reaction score
94
Location
Middlesex, NY
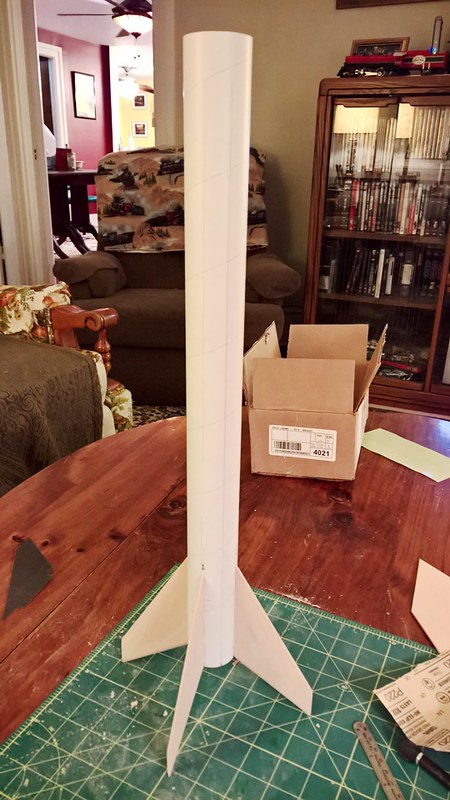
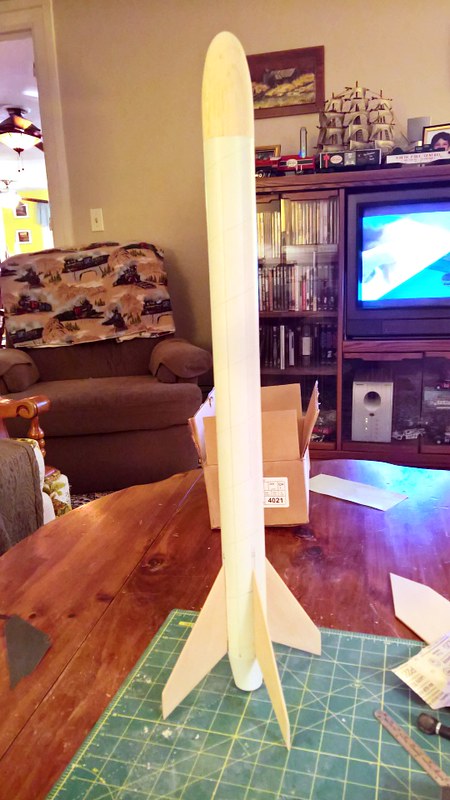
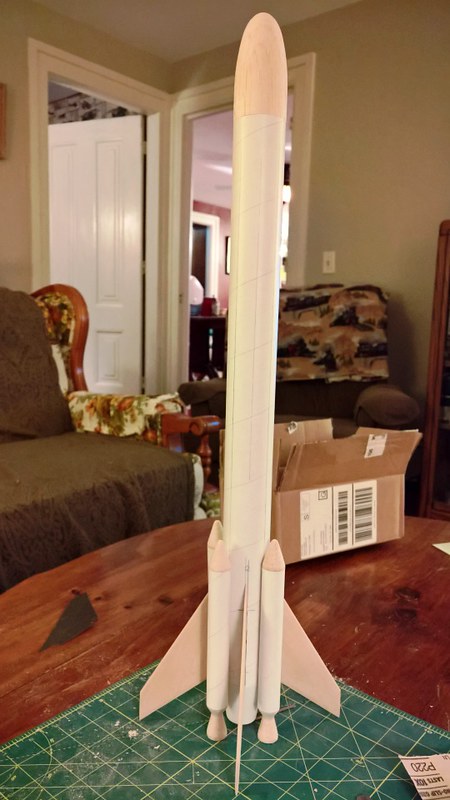
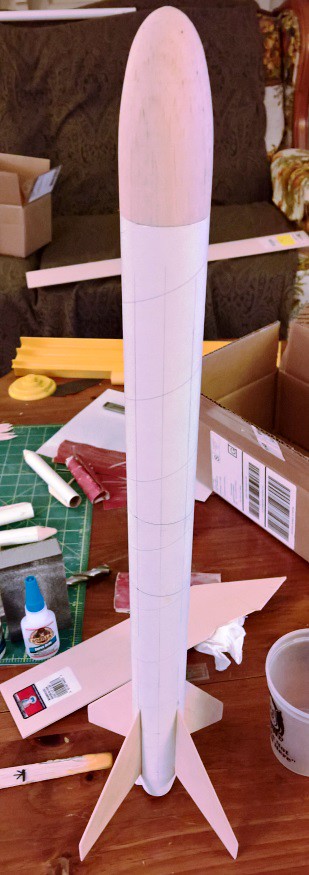
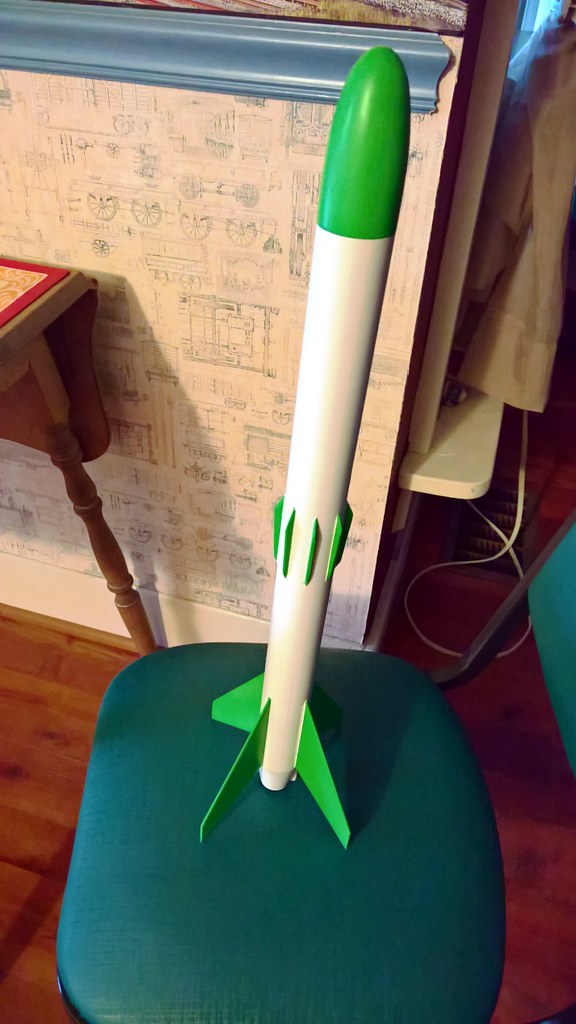
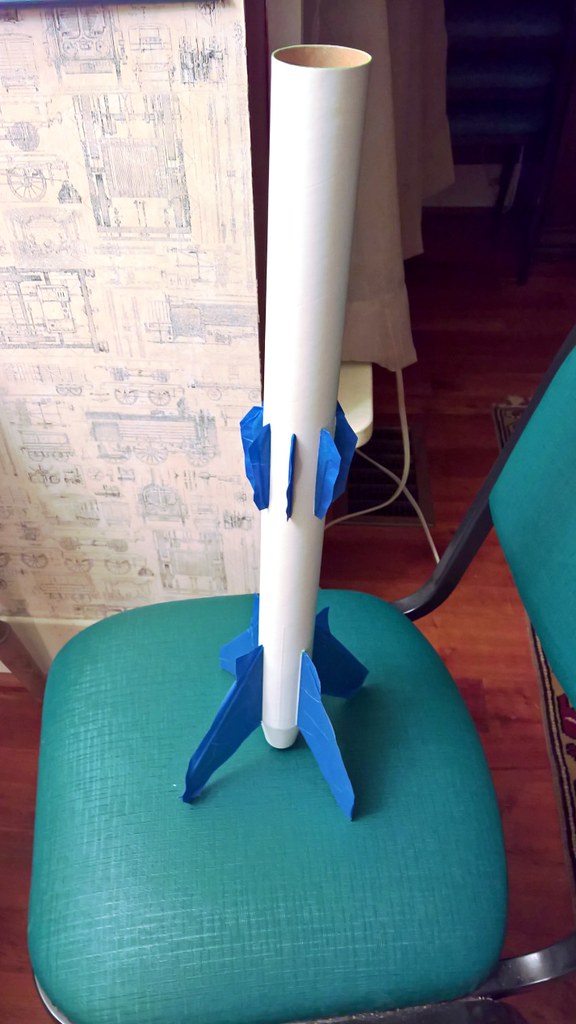
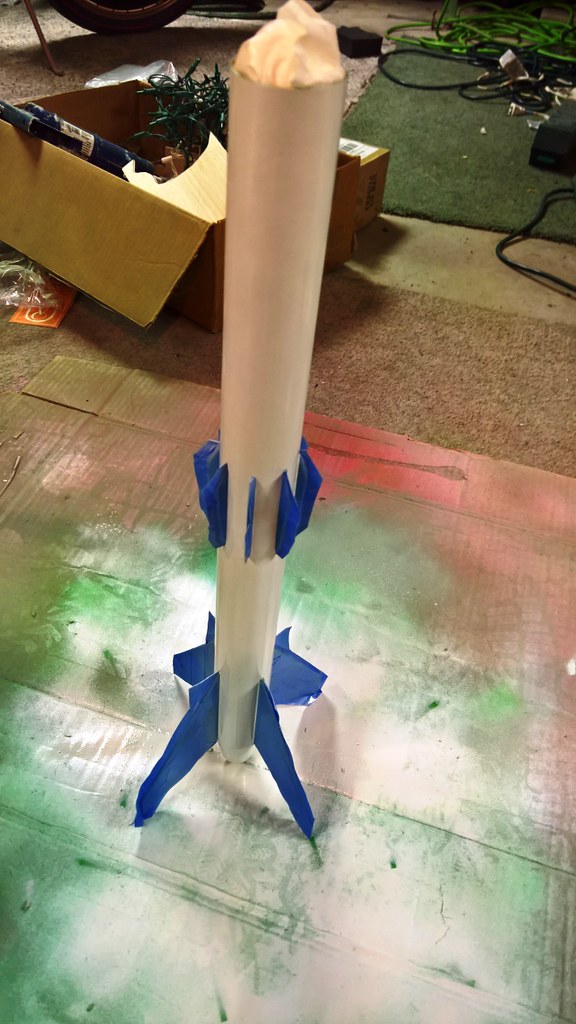
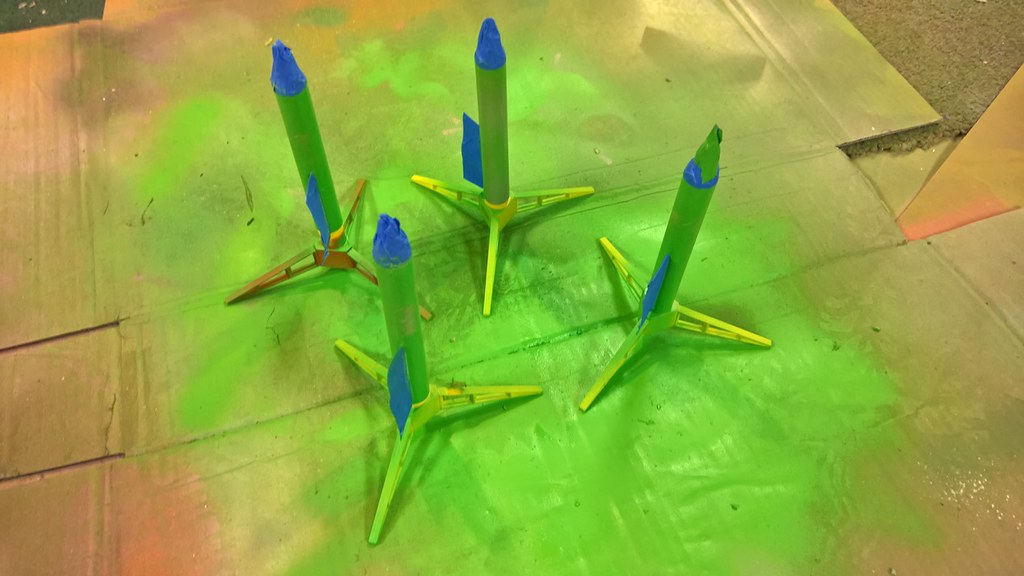
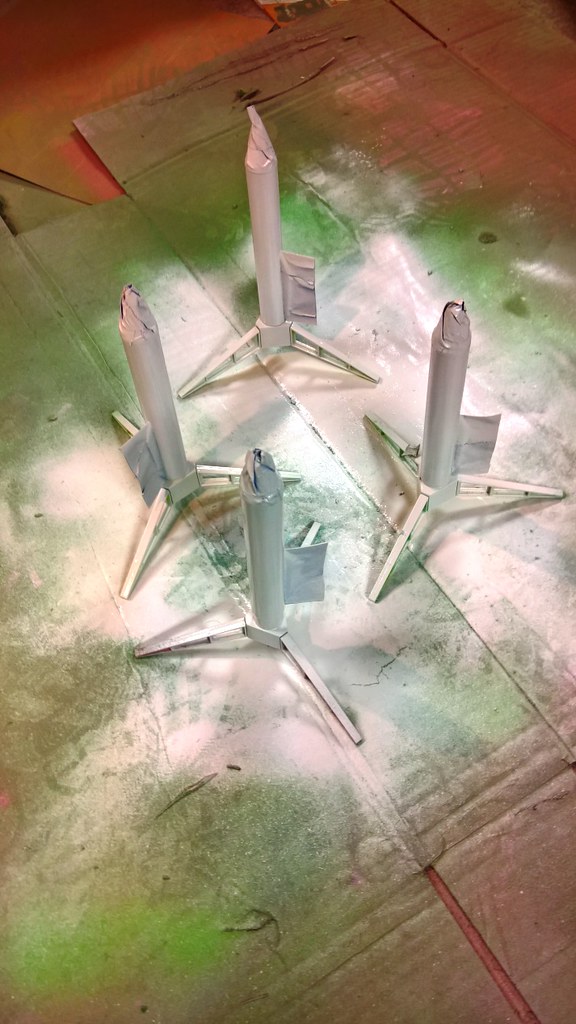
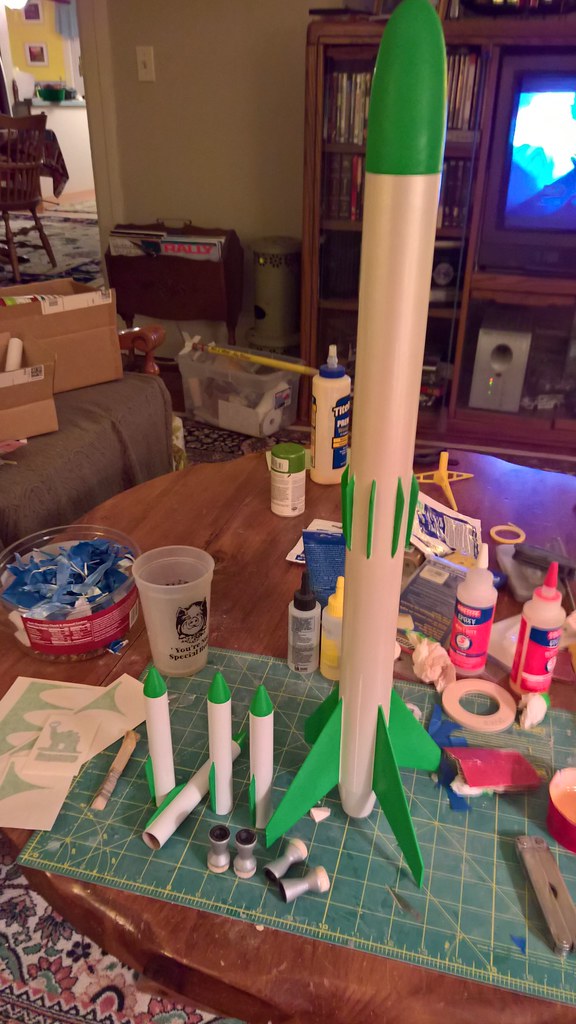
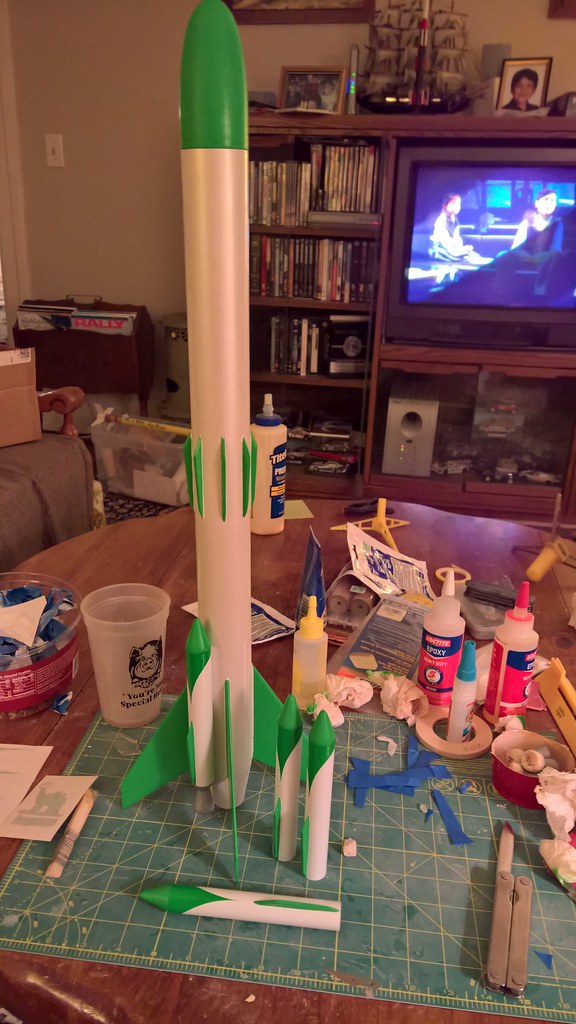
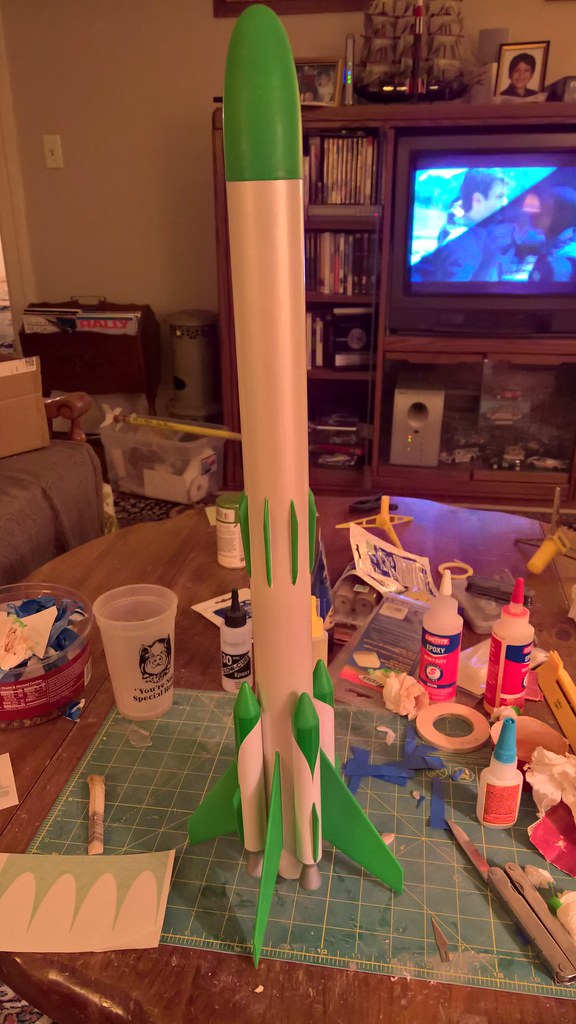
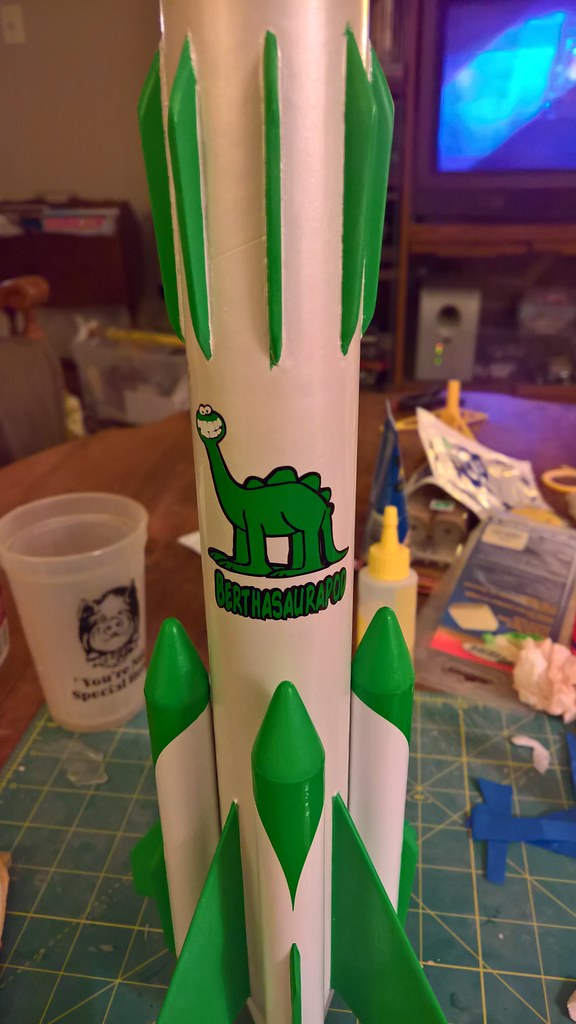
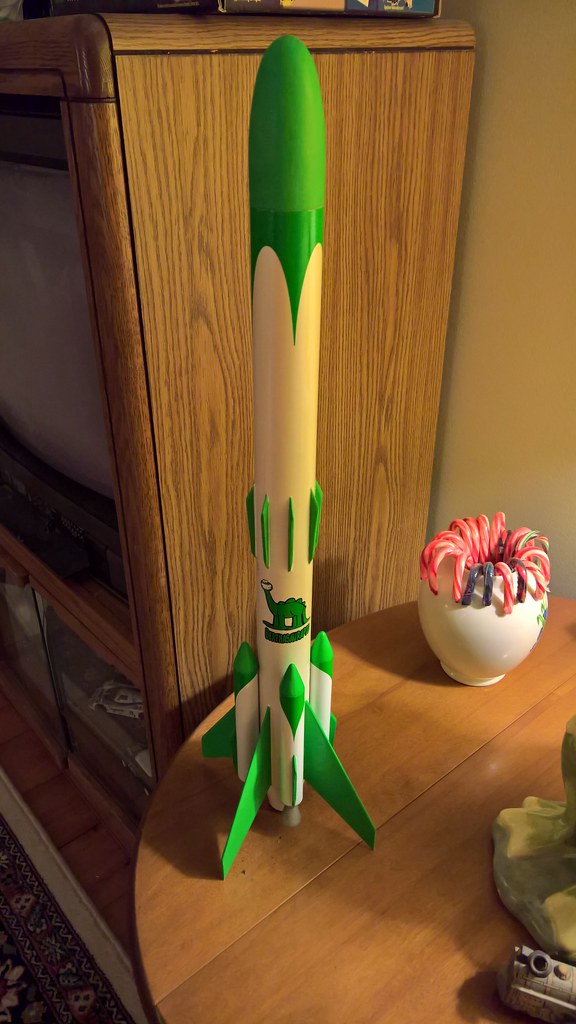
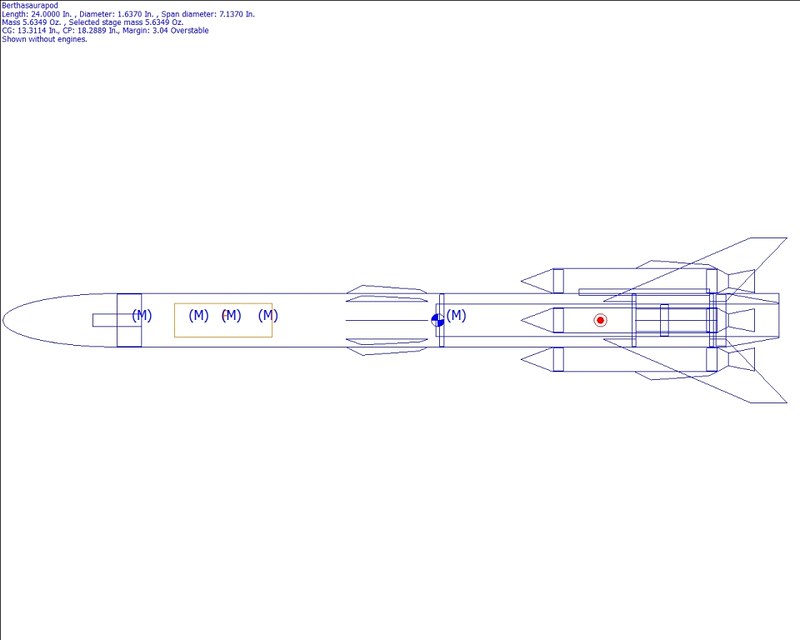
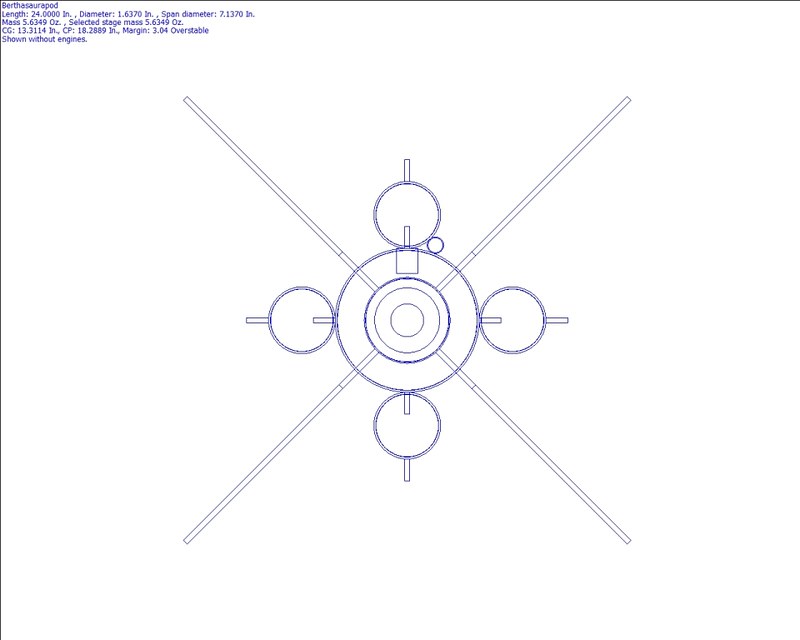
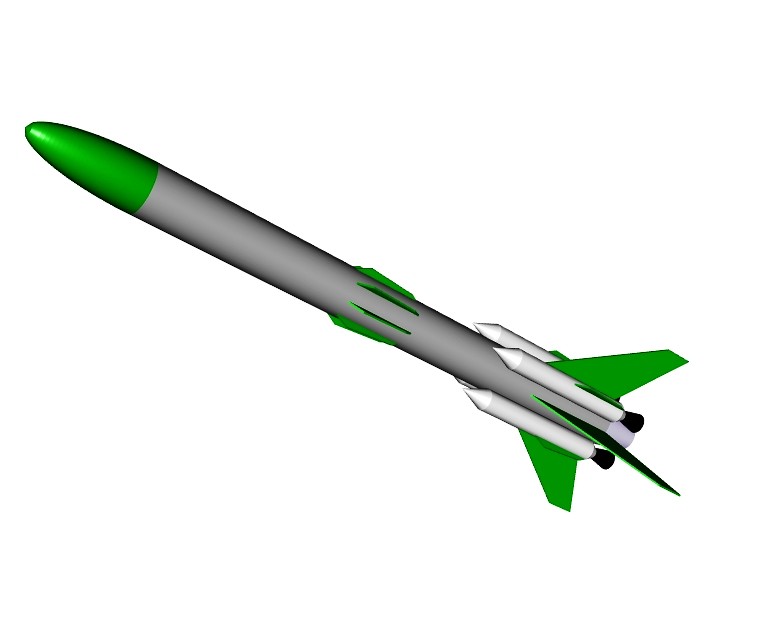
What is a Berthasaurapod, you ask? Excellent question. In this case, its a modified Big Bertha type design, with SRB pods added. Why Berthasaurapod? I don't know, it was the first thing that popped into my head at the time, and it amused me. Anyway, as noted, the design is an evolution of the Bertha configuration. I was going for something sort of sci-fi. I am not using a Big Bertha kit as a basis, and no actual BB kit parts are used here, that was just the starting point for the Rocksim file. What I have retained from the original BB is the nose cone (by that, I mean the original BNC-60L, not the later PNC-60MS), the tube type and the overall length. But since the fins are shorter, the tube is longer than the 18" part in the kit. Anyway, this is what it will look like:

24964261064_05739713e5_c.jpg
25568619996_166d2bafd7_c.jpg
24964260494_0518cf1134_b.jpg


This is what I'm starting with:
24964260294_93c9305a30_b.jpg


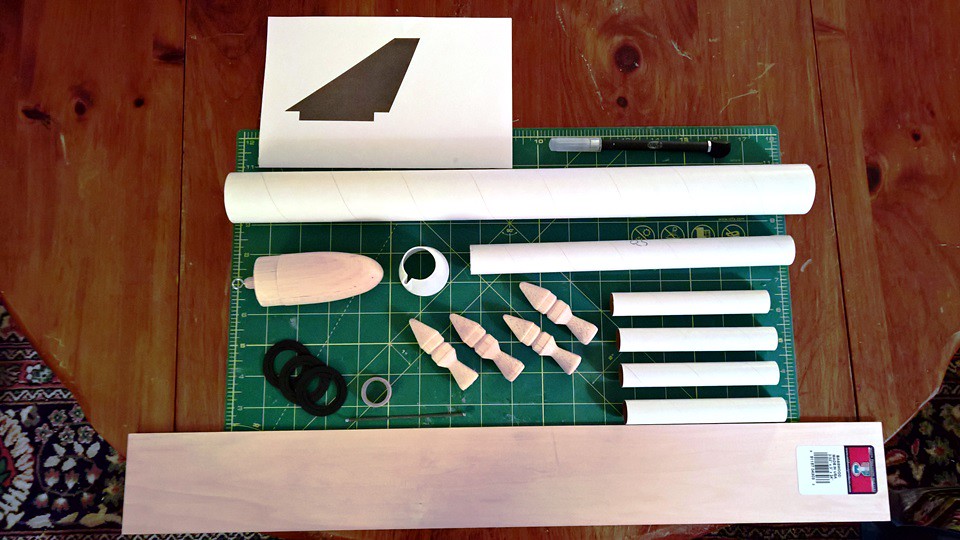
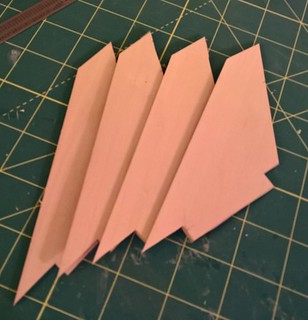
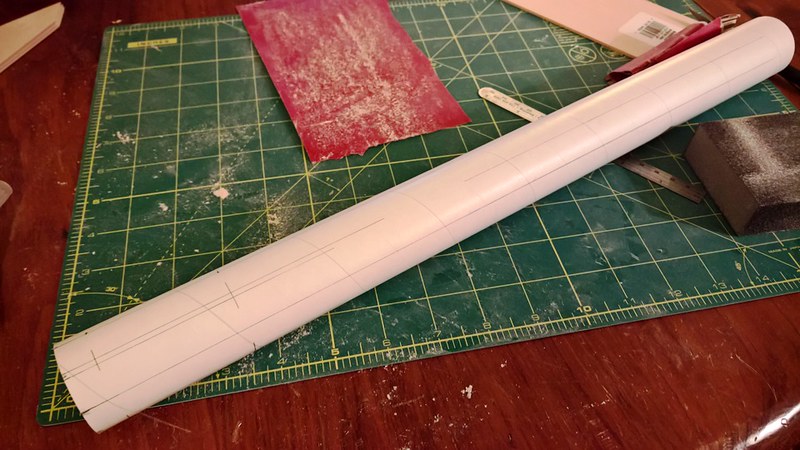
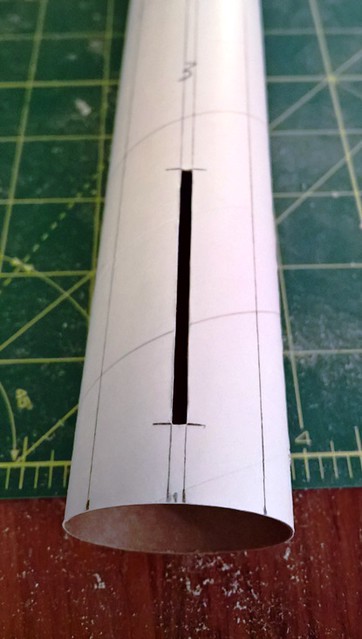
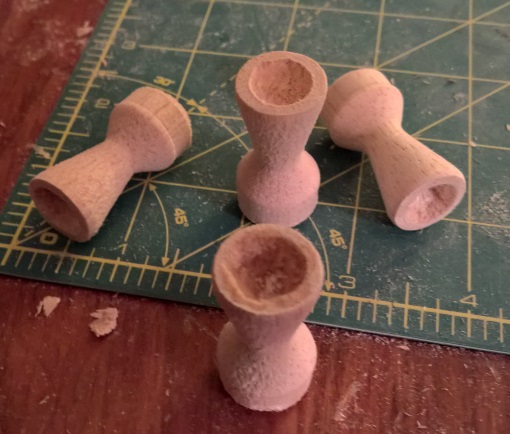
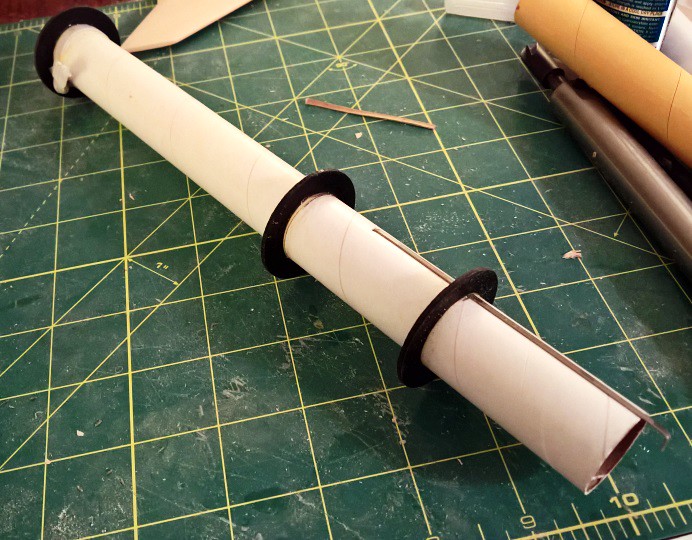
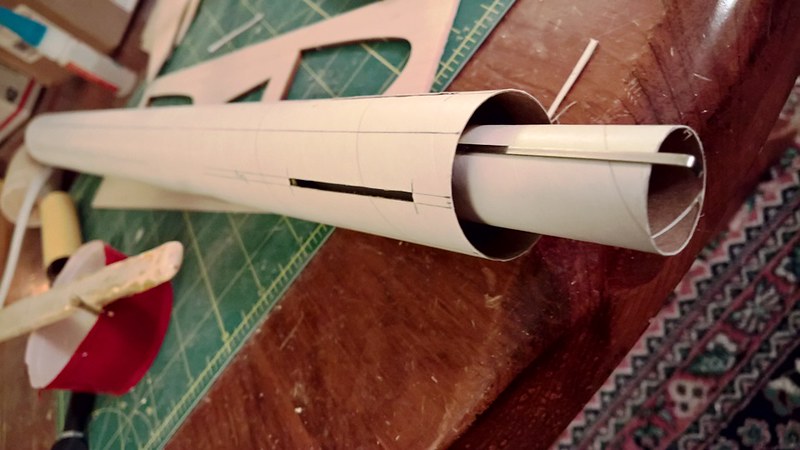
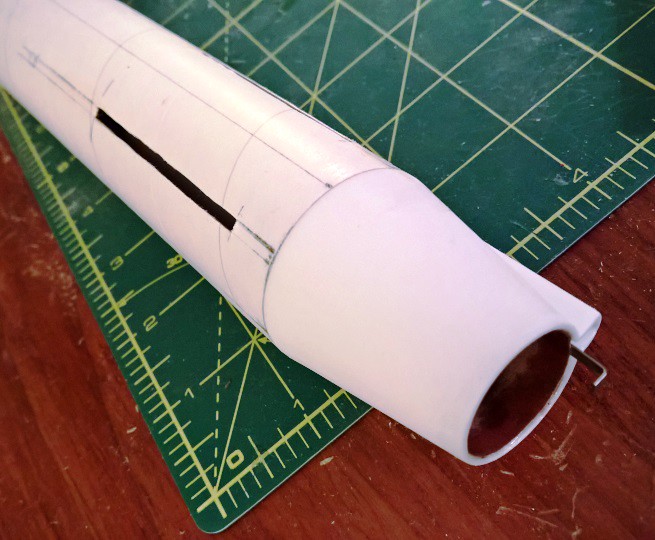
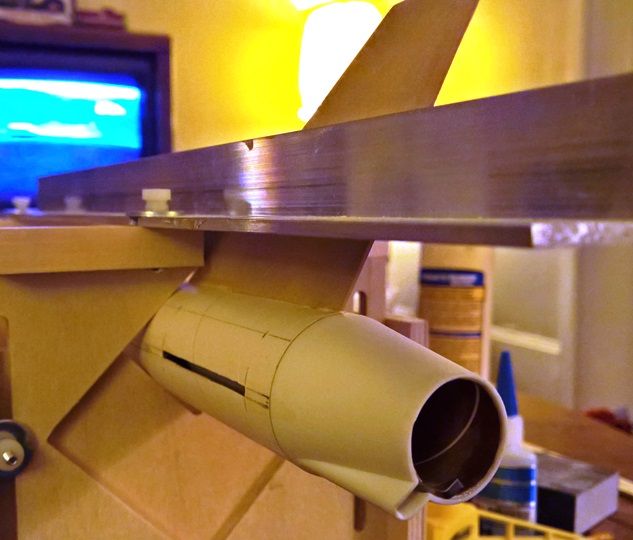
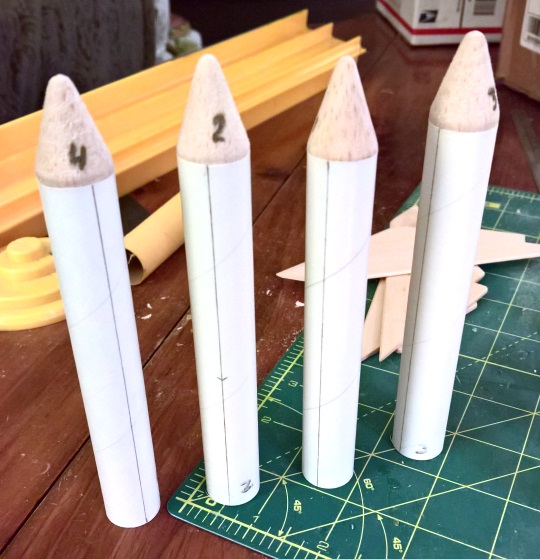
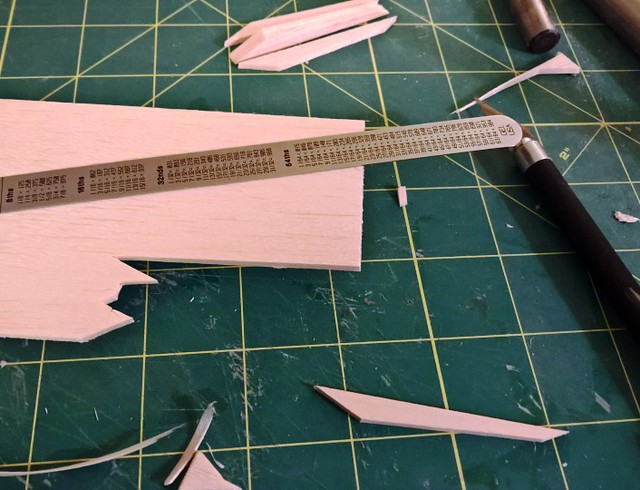
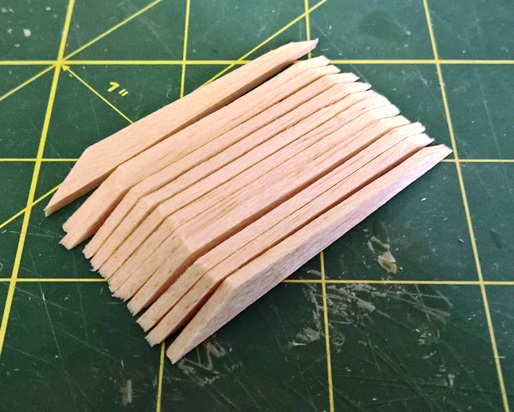
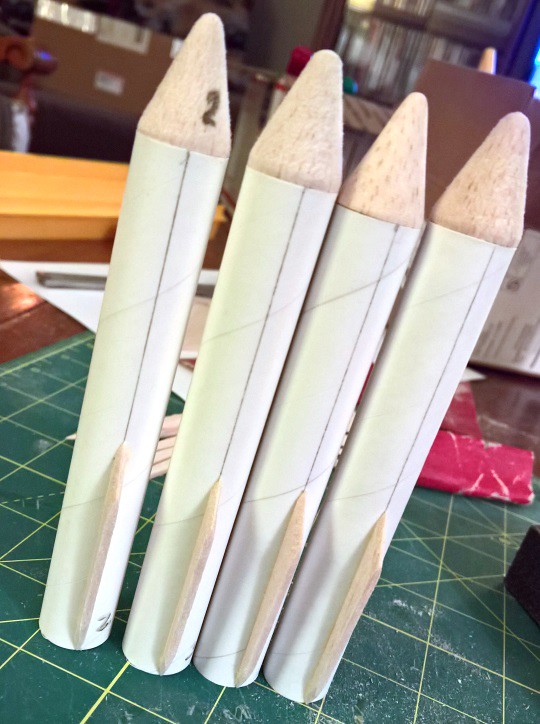
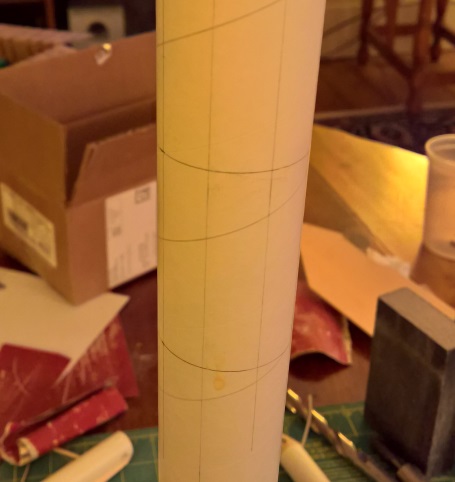
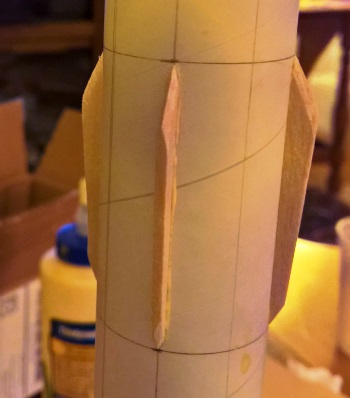
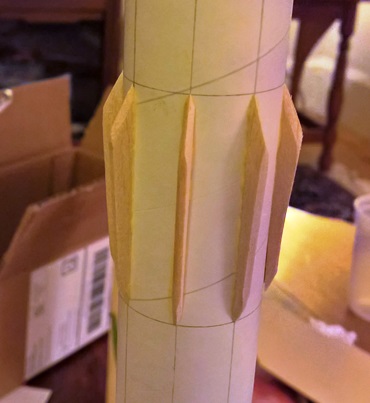
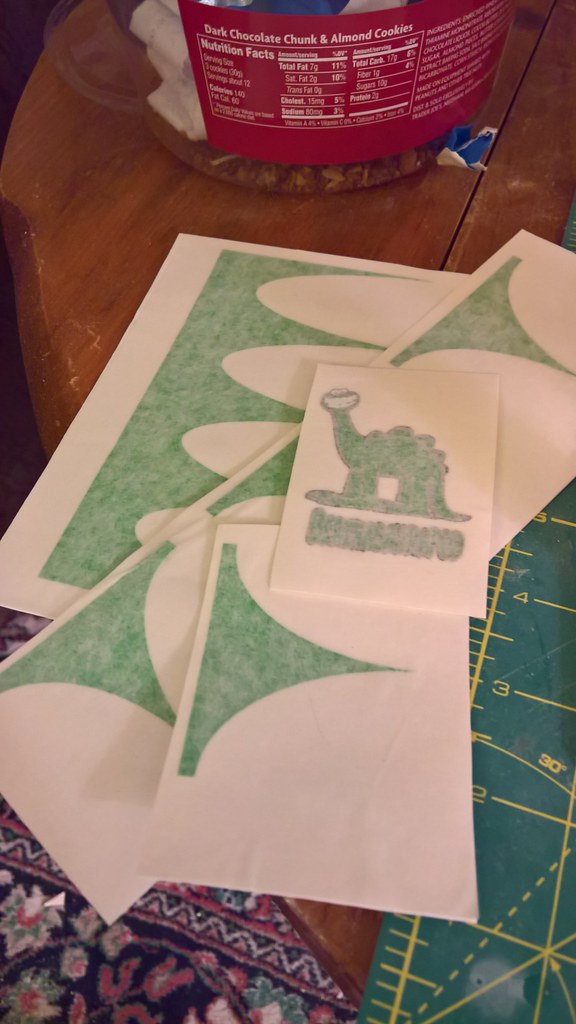
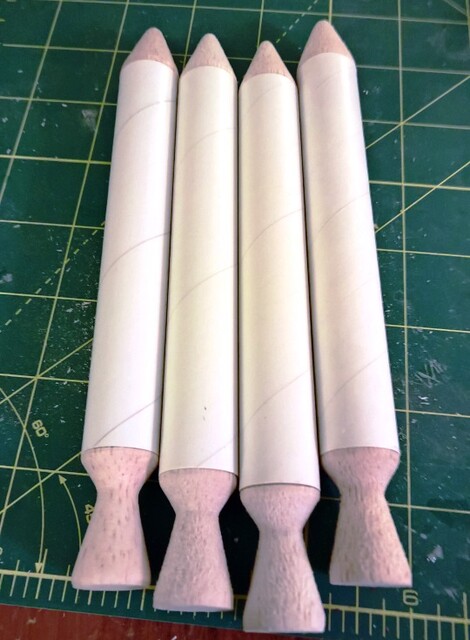
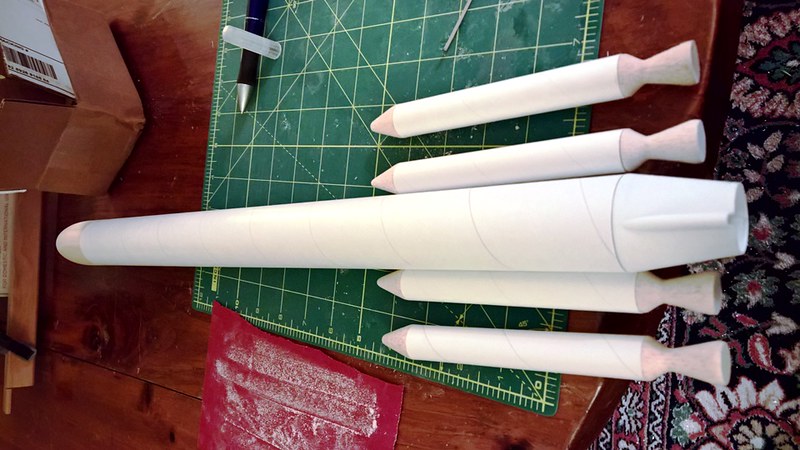
The pods are 5" segments of #7 tube, and with the cone/nozzle sets, were purchased from Semroc. I've got a BNC-60L, from BMS, a boat tail from an Astron Sprint XL, a cut-to-length piece of BT60, BT50, centering rings, motor block, retaining hook, and 3/32" thick basswood. You can see the fin pattern print out from Rocksim, although there is another (not shown) for the small strake fins.
 
The first thing I did was cut the nozzles and cones apart using a razor saw:
25594721475_8e7e9ce471_b.jpg


A little sanding and trimming made them all match reasonably well. Obviously, the SRBs are aesthetic only and will not house mini engines or anything like that. The #7 tube segments were purchased in a precut lengths, so all I have to do is put the cones and nozzles on them:
25594720145_48de4e52c9_z.jpg


And, while I'm at it, put the cone and boat tail on the main tube for a picture:
24964259054_2aae1e07b1_c.jpg
 
Well, no. In fact the fins have been cut:
24983066484_45d308363f_n.jpg


After that, I marked out the body tube:
25352991670_c1e4a5ca77_c.jpg


Slots cut:
25352985730_5801ff5fac_z.jpg


Then I came back around to sanding the fins:
25352993850_d5311713b8_c.jpg


The fins in the tube:
25021888203_3dee4ede10_c.jpg


Then adding the cone and boat tail:
25281039239_4a604c0819_c.jpg


Then one step further, setting the SRBs in place:
25281036959_8650a7ddfe_c.jpg


Next steps are to assemble the motor mount and install, then start gluing things up.
 
You could always drill out those balsa nozzles to fit some micro motors, more for the launch flames than for the thrust.
 
You could always drill out those balsa nozzles to fit some micro motors, more for the launch flames than for the thrust.

That would be interesting, but even that would leave a fairly thin wall section on the necked-down portion of the nozzle. I didn't really appreciate how small the Micro Maxx motors are until I got some the other day...

Anyway, an update:
I did core out the ends of the nozzles with a series of drills. I then CA'd the inside so that I could try to get a smoother cut surface with the drill, though I'm not sure that helped. Either way, when painted, it ought give the effect I'm looking for:
25808342926_ceb4306666_o.jpg


I built up the motor mount. I'll spare the step-by-step, since there's nothing novel about it:
25739299481_9f5ba1bba8_b.jpg


Mount installed, then the boat tail added:
25533709070_bf4a1e356a_c.jpg
25203891174_aeec18113c_b.jpg


At this point, I can start gluing on fins. Suffice it to say, I started attaching fins.

25203890524_dc3915fb2b_o.jpg


I must have been pretty accurate with my cutting this time, since very little sanding/fitting was required to get good tab fit on all of them. As of this writing, 3 of the 4 are attached. While waiting for the fins to set, I had some time, so I turned my attention back to the SRBs. The first step was to find good fits between the tubes, cones and nozzles. Since not everything is identical, I mixed and matched until I was happy with how everything fit up. My intent is to mostly assemble the rocket and the SRBs, paint them separately, then finally attach them after painting. To achieve this, I will put a thin masking tape on the glue lines, then I can still glue tube to tube without paint in between. I have some 1/16" wide masking tape I used for painting RC car bodies, which ought to work well. Anyway, the SRB tubes with cones glued on:

25533707300_3cdd5f4b20_o.jpg


I'm not going to glue the nozzles in until last, because I drew a reference mark for alignment inside the rear ends of them. I'll need the nozzles out to use it. Next, I set about cutting out the strakes, or mini fins, that are on each SRB and wrapped around the mid body. There's a total of 12, which I cut from 3/32" balsa. I first made one from basswood to use as a cutting guide. That was hard enough to (carefully) run the hobby knife along and cut trim the balsa.

25739296551_4ff0d410d9_z.jpg
25834402745_06bc9ac774_o.jpg


Once all 12 were cut out and trimmed, I sandwiched them all together and used a sanding block to even them up. I then used the same block to sand a taper on both leading and trailing edges of the strakes. Four of these were glued to the SRB tubes, the other 8 set aside for the main body tube once the fins are all on.

25739295001_8d29dc83db_b.jpg
 
Fins on:

25763330162_547b249a1f_b.jpg


The next step is to mark out the mid-body for aligning the strakes. Admittedly, the markings look like I'm laying out a roll pattern, which gives me another idea...

25763329802_c439ce42e2_o.jpg


I then glued the strakes on in two groups of four, mostly so I could see what it looked like with just four of them.

25251400674_25150a7fdf_o.jpg
25583535970_ec9ec01712_o.jpg


Gluing these on was quite a bit easier than normal fins. All I had to do was line up the tips with the markings and press them to the tube. Their height to thickness proportion made them almost self-squaring. Now the next step will be to fillet everything, which I'll do with the Titebond 2 that I've been using right along.
 
Actually, yes. Some time back, I'd actually shot the main assembly with a coat of white after priming, though I apparently never posted that. More recently, on Sunday, I masked off the body tube so I could spray the fins and nose cone with a coat of Grabber Green. And, last night, I sprayed the noses & strakes of the SRBs with the same green. Now, I just need to pick up some more white paint and I can remask & finish the final paint work. Then, its just a matter of attaching the SRBs...
 
Actually, yes. Some time back, I'd actually shot the main assembly with a coat of white after priming, though I apparently never posted that. More recently, on Sunday, I masked off the body tube so I could spray the fins and nose cone with a coat of Grabber Green. And, last night, I sprayed the noses & strakes of the SRBs with the same green. Now, I just need to pick up some more white paint and I can remask & finish the final paint work. Then, its just a matter of attaching the SRBs...

One picture could have saved all those words. :wink:
 
That's the Duplicolor engine paint, which is a near match to one of the green vinyl choices at Stickershock. That is not the Ford color from about 1970 by the same name, nor any of the paints formulated to match that (like Testors Grabber Green). That color has more blue in it.
 
The white paint on the main rocket body is actually meant to be a base coat. So, the green was masked off to allow further painting:

29739415802_704d1ffbbd_b.jpg


And the top coat is sprayed:

29225686934_902e7fa45e_b.jpg


Its hard to tell in this picture, but the pearl white top coat has to be sprayed over a white base. Despite the fact that the can claims "2-in-1" primer & paint, this stuff has very little opacity. I sprayed it over grey primer on my Cygnus build (intending it to be pearl white like above), only to have it come out as an odd pearly silver. Not what I wanted, but kind of neat. It looked like a silver ceramic coating, like Jet Hot coating on exhaust headers. Anyway, on to the SRB's. As mentioned above, they were previously sprayed with green. Last night, I masked their nose cones and strakes, then sprayed with white.

29739417212_f31efce7a7_b.jpg


29225688904_9568336afb_b.jpg


In this case, the gloss white is their final color. SRBs are "supposed" to be white, and I wanted a subtle contrast between the SRBs and the main body. Once the paint is dry, the masking can come off and I can start attaching them to the core rocket.
 
Paint masks removed (I painted the SRB nozzles months ago):

29573204580_cd04cf715e_b.jpg


Also months ago, I had Mark Hayes make some decals for the project:

29753083512_3774d22235_b.jpg


A scalloped wrap for the main tube, with smaller wraps for the SRBs. Plus a logo decal inspired by Johnny Hart. Incidentally, the Trader Joes Dark Chocolate Chunk & Almond cookies shown above are awesome.

SRB pods wrapped, and the first attached:

29783898501_06d1b16c90_b.jpg


I used a gel CA to attach them; I needed something that would set fairly quickly, but have enough cure time to let me adjust the position as needed. I had to eyeball these in place. I'd previously marked the centerline of the pods on the inside (that's why the nozzles aren't on yet) and aligned them to marks on the end of the main tube. Those marks were under thin masking strips, which allowed a glue surface for the pods to the core without gluing on top of the paint. I used 1/8" vinyl masking tape, which is normally for masking RC car bodies. Both the core and the pods had a masked line for gluing, which can be seen faintly above.

29866511915_bc340a7bcf_b.jpg


All four pods on, and the nozzles pushed in place. I'll glue them later. And the "feature" decal:

29866498665_0e7eeef3e5_b.jpg


Finished, at least aesthetically, save for a clear coat:

29831484386_b01b979644_b.jpg


The only other item that is needed to fly is a parachute...
 
I really like that Pearl White. I'm hoping you've got good painting weather this weekend for the clear coat.
 
Back
Top