Estes Ram Jet #1994

The Rocketry Forum

Help Support The Rocketry Forum:

This site may earn a commission from merchant affiliate links, including eBay, Amazon, and others.

Cabernut

Well-Known Member
Joined
Oct 15, 2015
Messages
1,384
Reaction score
9
Last edited:
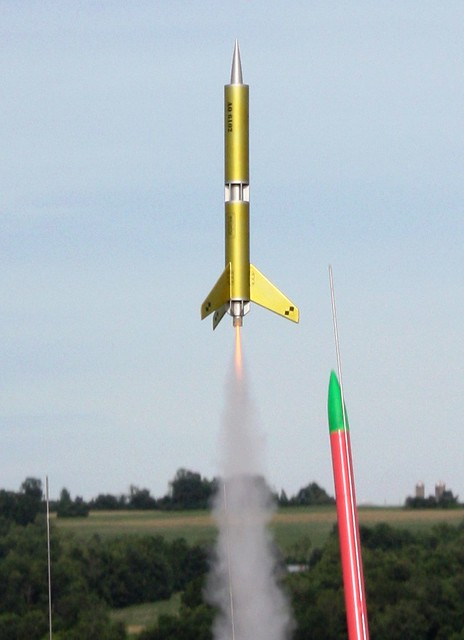
Man! That was an exciting rocket!


Mine found a home in a Tree back in 91'.:(
 
Nice job. I still have my original, which has been flown/repaired a bunch of times. It needs to have the motor mount repaired now, the hook wore out the body tube with enough launches since it didn't have a motor block. How did you treat the outer tube in the sim? In my Rocksim file, I made it essentially a full-length ring tail, which is how I think it behaves. In flight, it seems to have a bit of drag as a ring tail would - the altitudes appear relatively low for the mass.
 
Nice job. I still have my original, which has been flown/repaired a bunch of times. It needs to have the motor mount repaired now, the hook wore out the body tube with enough launches since it didn't have a motor block. How did you treat the outer tube in the sim? In my Rocksim file, I made it essentially a full-length ring tail, which is how I think it behaves. In flight, it seems to have a bit of drag as a ring tail would - the altitudes appear relatively low for the mass.

The center tube has to be done as an Inner tube, then the Outer tube is the actual body tube. You need three, one is the forward body tube, the middle area is a body tube that is the dimensions of the inner tube (this is where the inner fins/vanes get attached to), but only the length of the exposed area, then you have another large tube. for attaching the fins.

Now if you're really dedicated, you could even "paint" the inner portion of the larger body tubes (using another pair of "Inner tubes" that have been colored).
 
See, that's why I asked, and where I did mine different. I started out sort of similarly, but wound up redoing so that the core tube is the main body tube, and the fore and aft outer tubes are applied as a pair of ring tails. Rocksim treats a tube applied as a ring tail differently, aerodynamically speaking, than a standard tube. It seemed that the sim assumes all of the air flows around the outside if the outer tubes are the main body, whereas with a ring tail, I am guessing it assumes that air can flow through it instead. That is, of course, the case with the actual model. What I do know is that with the outer body as ring tails, the drag is increased and the output appears more realistic. I do think that with ring tails that long, the drag isn't as high as it is with a short ring at the rear. I expect that the length straightens the airflow back out, where a short ring tail just induces turbulence.

I also took the basic sim that came up with and upscaled it to BT80 tubing (for the outer tubes), which is 24mm powered. Due to tube size availability, that one has a proportionally slightly greater gap between the inner and outer tubes, and is probably more ring tail like as a result. But that model flies quite well also.
 
For a simulation version in OR, I made the inner tube as the body tube and used a pair of tube fins the same size and diameter as the outer tubes. Seemed to sim pretty close to the advertised 800ft. It's hard to be sure since there's a lot going on there aerodynamically.

This one is on my short list for upcoming builds. It really is a cool design.
 
Updated to include the OR decal files as well - might save you some time if you want to try your own.
 
Very Nice job with Open Rockets sim.

I still have my original Ram-Jet, along with a single D-12 UpScale, 3-D12 3X Clustered Upscale and Micro Maxx 3X DownScale. All are great flyers.
Hope you have as much fun building and flying all kinds of various scale Ram-Jets as I have.

4 Ram-Jets_Micor,Std, 1D& 3Dcluster_08-00.jpg

MM 231Lp10a_Ram-Jet on pad_11-17-12.jpg

130l1-sm_3X Ram-Jet_3D Liftoff_09-95.jpg
 
Played with the file a little...

Mods include: Launch lug, engine hook, "internal paint", and I altered the nosecone and graphics some.

Estes Ram Jet (1994) (mod) detail.jpg
 

Attachments

  • Estes Ram Jet (1994) (mod).ork
    150.7 KB · Views: 122
Played with the file a little...

Mods include: Launch lug, engine hook, "internal paint", and I altered the nosecone and graphics some.

View attachment 282337


Launch Lugs are located on the outside of this model. They are located INSIDE the ourter shell one at the bottom inside edge and the base of the Upper outer airframe, aligned with the internal support struts.
 
Launch Lugs are located on the outside of this model. They are located INSIDE the ourter shell one at the bottom inside edge and the base of the Upper outer airframe, aligned with the internal support struts.

I went with what I saw in step 9...

Estes Ram Jet (1994) Instructions c.jpg

One difference I noticed is based on the photograph of the rocket on the face card and in the catalogs is that the Launch lug should be rotated to be located between the other set of fins (hiding it behind the body tube when viewing the "RAM JET" decal from the side).
 
Last edited:
Oops! Sorry for the mis-info... I forgot moving the Launch Lug location to inside the outer airframe was my modification Doh! Guess old memories need to be checked;)
 
I placed the lugs internally on my upscale as well. What a PITA it is get the thing onto the rod without being able to see the lugs easily! I have remove the rod from the pad so I can slide it in horizontally so that I can see where the rod is going. But it looks good without them on the outside.

Side note - do we have a Ram Jet gallery? I could've sworn there was, but couldn't find it. FWIW, the search tool on this site is also a PITA. When I entered "Ram Jet" as a search term it didn't find this thread either...
 
Oops! Sorry for the mis-info... I forgot moving the Launch Lug location to inside the outer airframe was my modification Doh! Guess old memories need to be checked;)

Not a problem... When I first saw the sim, and didn't see the LL, I checked the instructions to verify where it should be.
 
Oops! Sorry for the mis-info... I forgot moving the Launch Lug location to inside the outer airframe was my modification Doh! Guess old memories need to be checked;)

Not a problem... When I first saw the sim, and didn't see the LL, I checked the instructions to verify where it should be.

Side note - do we have a Ram Jet gallery? I could've sworn there was, but couldn't find it. FWIW, the search tool on this site is also a PITA. When I entered "Ram Jet" as a search term it didn't find this thread either...

Ram Jet is composed of two, three-lettered words. I've read that the search function needs 4 letter words to prevent it hitting on things like "the" in every result.

I searched for Ram Jet 1994, and things started popping up... Then I added Estes to the search, and more specialized stuff started popping up... When I added gallery, I got lucky...

https://www.rocketryforum.com/showt...-1994)-Gallery&highlight=Ram+Jet+1994+gallery

Can you guess who the last poster was EXPjawa (July 2, 2015)? Does this look familiar? :wink:

19144373448_b96471370f_z.jpg
 
Last edited:
Well, I was sure I'd posted there - I just couldn't find it... :blush:

I didn't know you had posted there until I found the thread... That's the funny thing about the search function here (and the annoying thing about trying to find that "pic that LOL" thread).
 
With the recent re-introduction of the Estes Saturn V, I was looking back at the old 1991 catalog(full of awesomeness) and was reminded of this cool unique rocket. I looked over to my pile of BT tubes and thought "hmm, I wonder if I should try upscaling this one?" Not many tube combinations match the proportions very close until I worked up to 2.5" inner and 4.5" outer and remembered my Partizon is a long 2.5" with a 4:1 ogive nose cone. Just need to add the plethora of vanes and huge f'in fins, then surround with 4.5" tube of some sort... :cool:

On a side note: Is it just me or does it seem like RocketReviews' rocksim files are almost always off?
 
Rocksim files on RocketReviews are only as accurate as the skill level of the individual user that created it allows. Some I've found are quite good, others are crap. Many of them are victims of Apogee's "polished" default for surface finish, many have materials way out of whack, many have simply incorrect sizes, proportions, etc. Take them for they're worth - a starting point only, and really should be thoroughly sorted through. A real close match of tubing proportions would be to use BT70 for the core and 4" tube for the outside. That would probably be my next version if I did an even bigger upscale. In fact, I've done a RockSim model as such, which used full-length vanes to help stiffen the structure. I'll post it later if I remember to...
 
On a side note: Is it just me or does it seem like RocketReviews' rocksim files are almost always off?

I've noticed that too. Problem is that there is no standard that anyone has to adhere to. That's why I like my sims. They have to adhere to MY standard, and that's pretty high.
 
On a side note: Is it just me or does it seem like RocketReviews' rocksim files are almost always off?

LOL, not everyone has K'Tesh's ninja skills, and there have been a lot of improvements on what RS and OR can do since first deployment.

That said, it's a shame that many manufacturers' sim models are terrible, too. Wrong size parts, wrong placement, sometimes horribly wrong weights. I'm looking at you, MadCow!

ON TOPIC: This is one heck of a cool thread on one heck of a cool model.
 
LOL, not everyone has K'Tesh's ninja skills, and there have been a lot of improvements on what RS and OR can do since first deployment.


Ok... I liked that. It's not the first time I've heard it... but now I'm embracing it.

I guess, I just happened upon OR at the right time, 'cause so many of those .rkt files I've seen are simply atrocious.
 
... so many of those .rkt files I've seen are simply atrocious.
Indeed. First example that came to mind was the Vagabond .rkt file. Fins are obviously waay off.

You should add your new and improved version to your OpenRocket Files thread. That is one heck of a resource.

By the way, what shade of orange is supposed to be the official orange for the Ram Jet? The instructions call for "bright orange". Kind of reminds me of the General Lee.
 
I seem to be in another building frenzy. Finished up a Cosmic Interceptor, nearly finished a BT-50 BBII, and cut fins for this the other night - all 21 of them :eyeroll:

Now cutting tubing...

I have some 220# kevlar cord standing by, I wonder if I should use that on this one. I like the idea considering a BT-20 is kinda cramped. Since there are no CRs to tie the kevlar to, how I could go about attaching it here?

punch three holes along one of the fin roots and "stitch" or weave the kevlar through the holes, then the kevlar can be glued into the fin root as part of the fillet. Just make sure you can still get the motor all the way in. Lots of ways to hide the attachemet on a RamJet as they have a tube in tube design.
 
punch three holes along one of the fin roots and "stitch" or weave the kevlar through the holes, then the kevlar can be glued into the fin root as part of the fillet. Just make sure you can still get the motor all the way in. Lots of ways to hide the attachemet on a RamJet as they have a tube in tube design.

Wow thanks! I think I'll try that now.
 
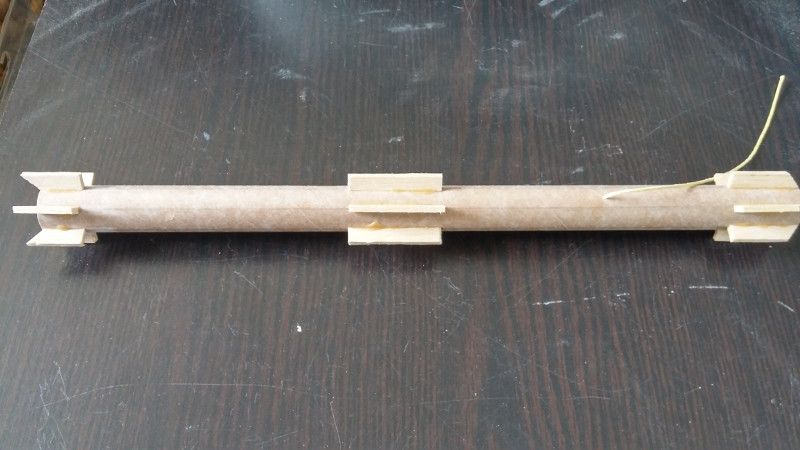
18 little fin vanes take quite a while to glue on and make sure they're straight. When they're this small there aren't a lot of tools that can help. A test of patience.

First two


Fast forward to done.


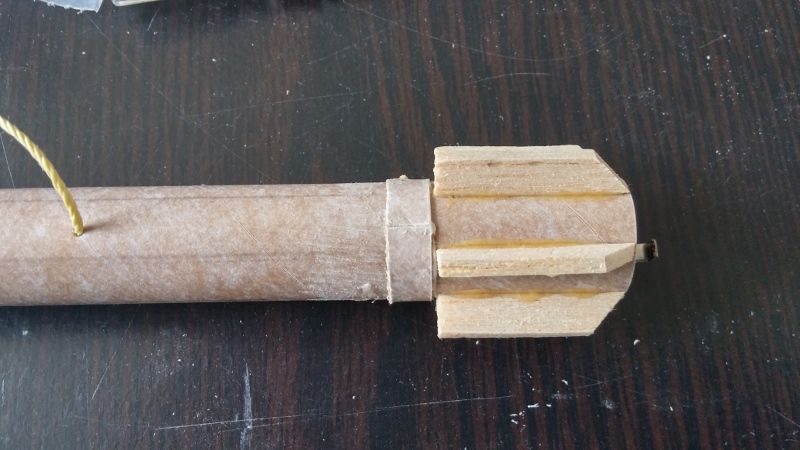
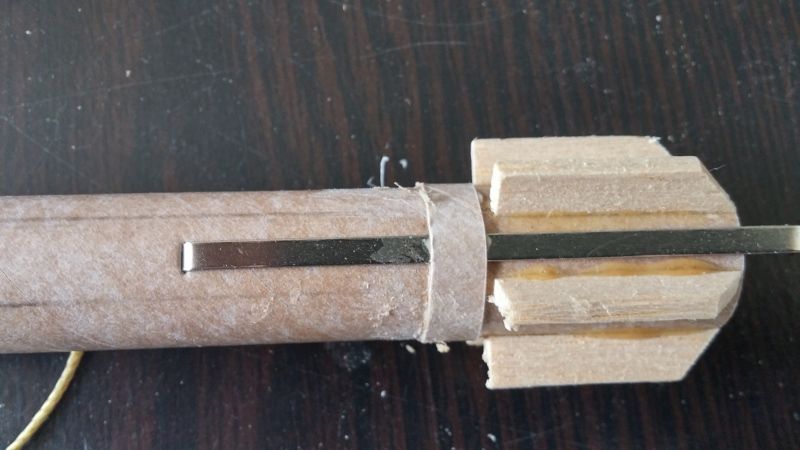
Since I didn't have a normal engine hook retainer band, I made one from a section of BT-50 cut to fit. I placed it so that the seam was directly opposite of the metal hook.


It may look a little rough so far but most of this is going to be covered up by the outer tubes anyway.
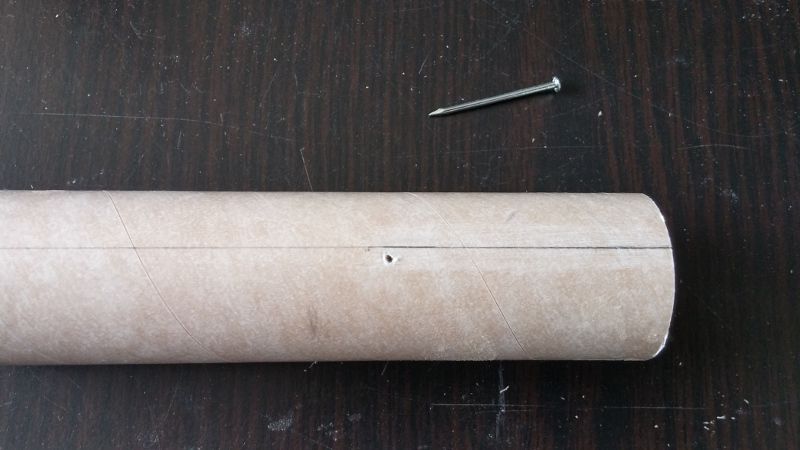
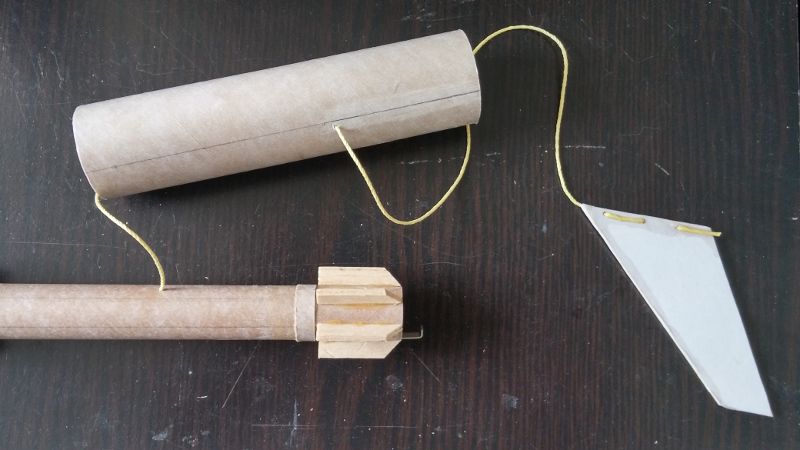
Speaking of outer tubes... Here I used a 1/16" nail to punch a perfect sized hole for the kevlar cord right next to the front of the fin root.


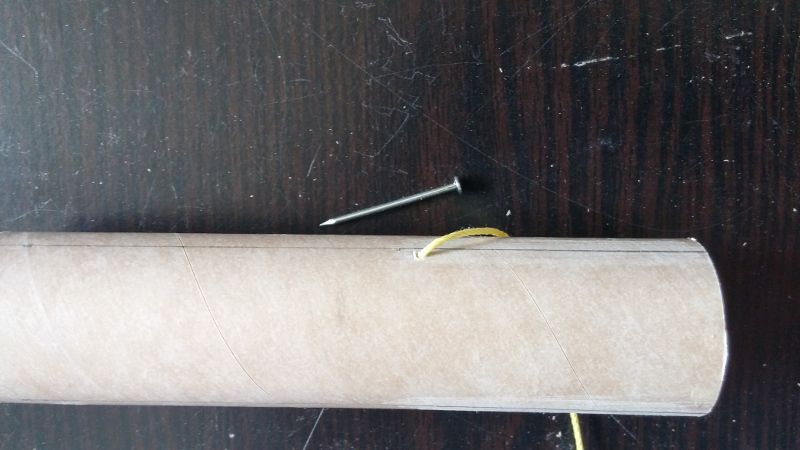
Then I threaded the cord through from outside, in.


Then into the hole on the inner tube, well ahead of where the engine will be. Going to drip some thin CA around this hole to strengthen it as well.


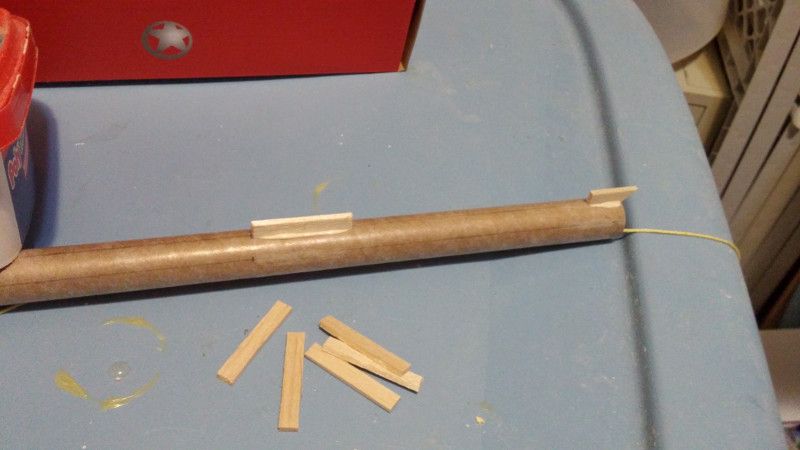
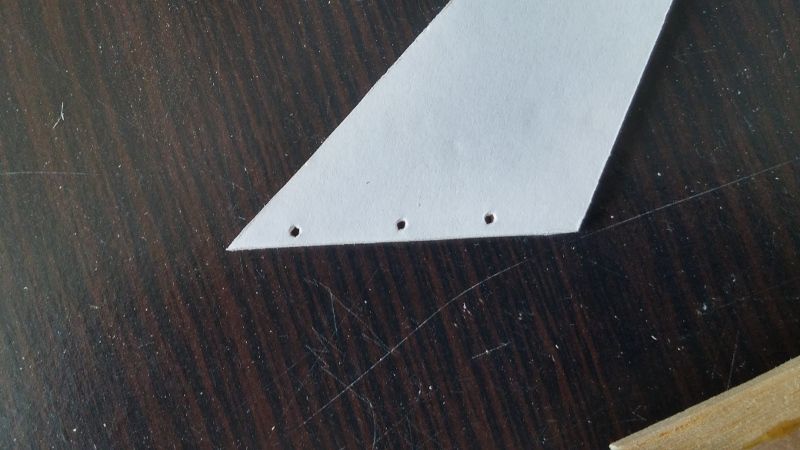
Here are the three holes *gently* punched into the papered fin using the same 1/16" nail.


Once threaded through, I used thin CA to glue it in place and tamped it down to keep it flat as possible before it set in.


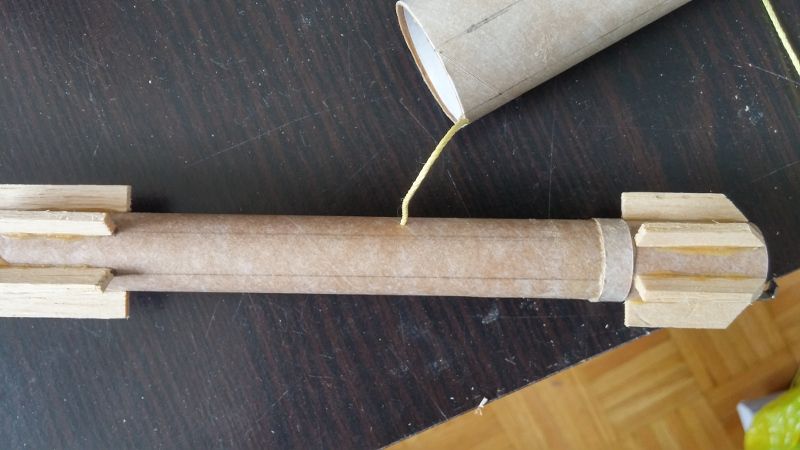
Here it sits, threaded through, ready for the outer tube to go on. I'm going to stop here and put some nicer fillets on the vanes as well as apply some thin CA where needed.


One thing to note: The fit between the vanes and the outer tube was a bit loose so I glued in small strips of paper to the interior ends of the outer tubes to tighten up the tolerance.
 
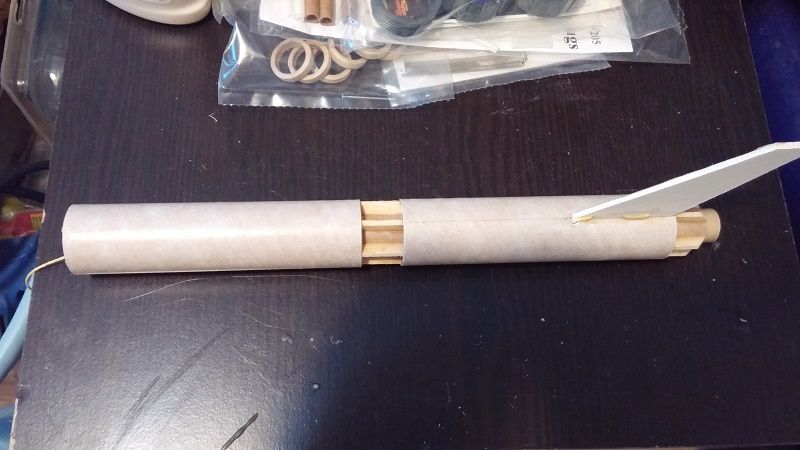
Outer tubes in place and the first fin going on


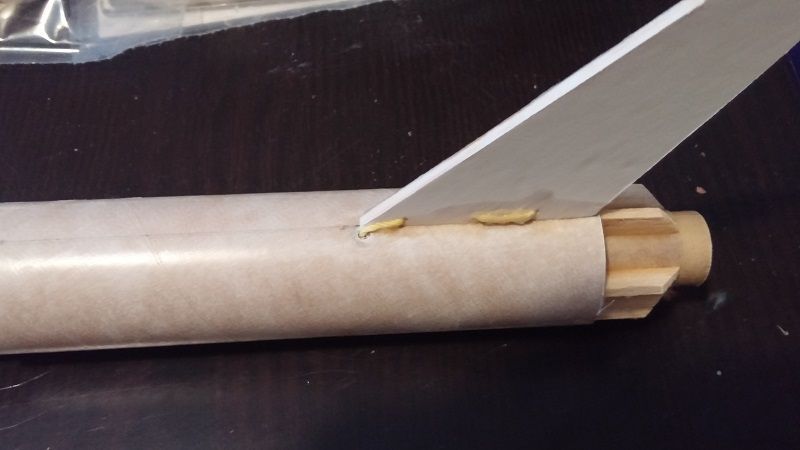
Here is a close-up of the threaded cord through the fin and CA'd in place.


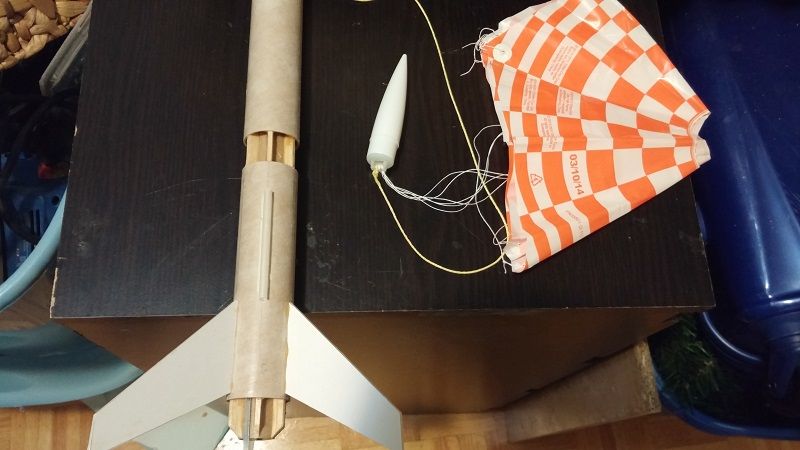
Remaining fins, launch lug, and recovery system in place. I like how these Estes chutes give you a handy cut-out line for a spill hole.


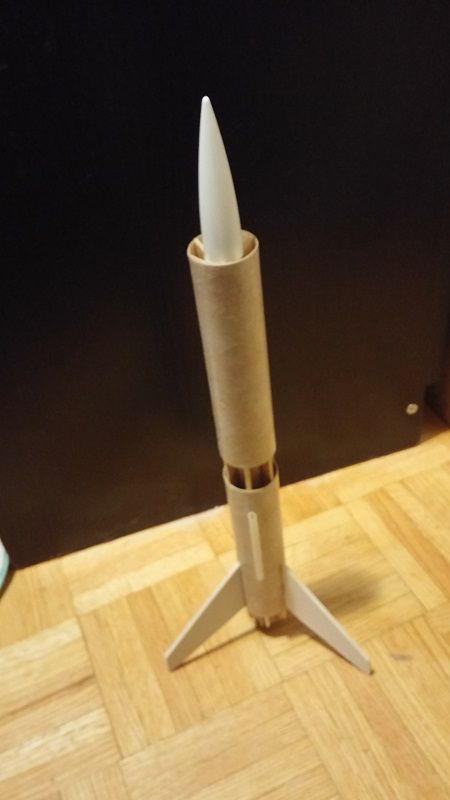
Physically complete! I just ran out of primer so I have four naked rockets currently waiting for a good paint day.


This rocket is deceivingly complex to build. 18 little vanes that have to be just right take a lot of patience. The balsa I used is the really soft kind so I soaked each vane in thin CA to toughen up the edges a bit.
 
punch three holes along one of the fin roots and "stitch" or weave the kevlar through the holes, then the kevlar can be glued into the fin root as part of the fillet. Just make sure you can still get the motor all the way in. Lots of ways to hide the attachemet on a RamJet as they have a tube in tube design.

I just saw this, and thought of another solution, and then some variations (too late for your build, but perhaps not for someone else...)

Tie a loop of Kevlar, and place the engine hook over it, so the loop is trapped under the hook, but on the motor tube. Then punch a hole for the kevlar to enter the motor tube, and Bob's your uncle. To reduce heat damage to the kevlar, you could move the reentry point to just behind the region that the parachute and nosecone shoulder would be.

Another variation would be to place the loop of kevlar aft of the engine hook retaining ring with the ring slid over it.

Another variation would be to add a thrust ring with a notch on the outside of the thrust ring that a loop of kevlar could be secured to.

And finally the last version I can think of, the punch/sew method, but use the inner vanes instead of the main fin.

BTW... when we gonna see the final build?
 
Last edited:
Back
Top