

Owen Eldridge
Well-Known Member
- Joined
- Oct 15, 2013
- Messages
- 190
- Reaction score
- 2
Speaking of the Space Shuttle, its the 30th anniversary of the Challenger Disaster.
Speaking of the Space Shuttle, its the 30th anniversary of the Challenger Disaster.
I don't mean to hijack your thread. You did an awesome job with the Zooch Shuttle!! Can't wait to see some flight pictures!
Speaking of the Space Shuttle, its the 30th anniversary of the Challenger Disaster.


Looking great! After this painting, are you happy with how the ET bottom shroud looks now? I bet it looks just fine.
") Here's the second SRB
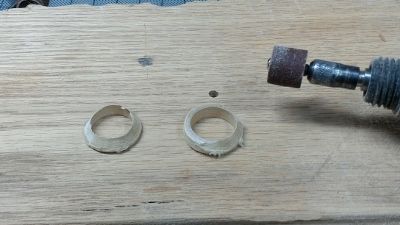
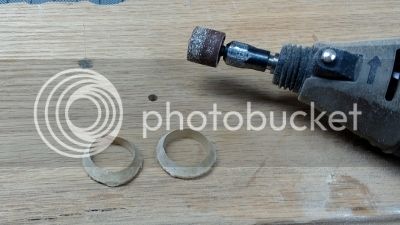
Here's the second SRB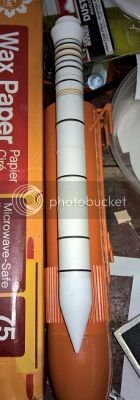 Figure the side that's stuck on tape is the side that's gonna be glued between the SRB and ET so who cares. Still gotta sand those little PITAs but very slightly. Will get those on tonight when I get home.
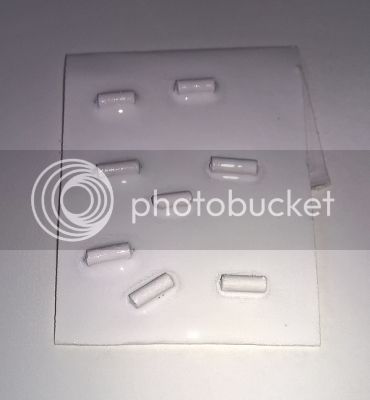
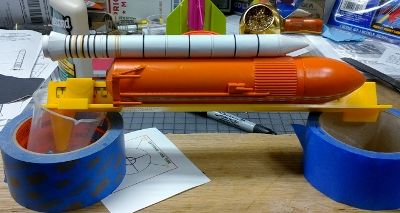
Not exactly. My wife has a stack of cookbooks in the kitchen, which is where I do all my builds, and I use them to make little stair step shapes on each side that seems to hold everything in place really well. Very similar to how you're using the wax paper and bowl.I figure Mushtang probably has one made or in the works with all the shuttles he's building!
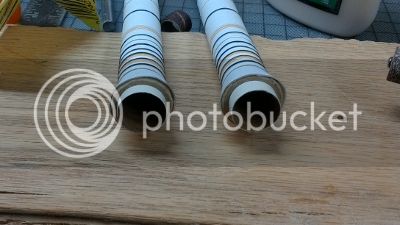
I remember that, and on future builds I did paint first. It would be impossible to mask those little suckers wouldn't it? But I have always painted a long dowel first and cut pieces off of it as I needed. That keeps one side of them from being bare, although your plan to hide the non-painted side should be great. Nobody would really see under them anyway.Also cut all the SRB 1/4" attachment dowels. I sanded the first and then thought of paint. Later I read Mushtang's post stating he wished he'd have painted first. Then I had a thought, grabbed some masking tape and looped in on some spare cardstock. Stuck the dowels down on that and then ran out back real quick and hit them with white.
.jpg")
.jpg")
.jpg")
.jpg")
.jpg")
.jpg")
.jpg")
.jpg")
.jpg")
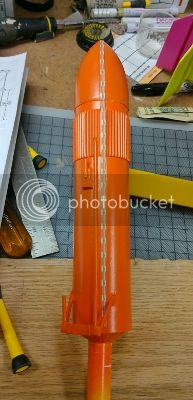
Ok am going to try from computer for these last few pics since Photobucket is down and I need to pack for Seattle! So I painstakenly sanded the little support PITAs for the SRBs and then attached between the ET and SRB
View attachment 281005 View attachment 281006 View attachment 281007
After that, I completed the parachute assembly. I noted that there were only supports enough +1 to complete the outside of the chute. I've had issues in the past, with tears, so I made supports for the opposite side out of some packing tape.
View attachment 281008 View attachment 281009
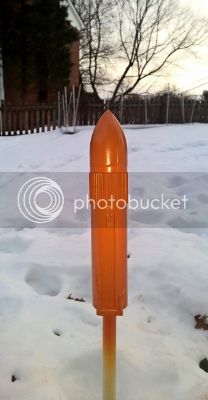
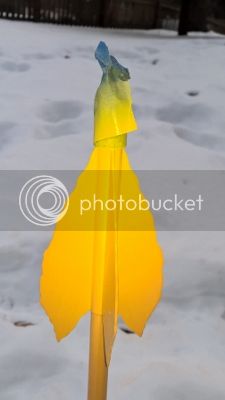
Finally I inserted the flame fins and for the first time got to see the final product!! YEAH!
View attachment 281010View attachment 281011View attachment 281012View attachment 281013
What an awesome ride this has been! To all that have contributed to my success....a sincere Thank YOU! I am sorry to see this thread come to a close as it has really been a thrill! When I get a chance to actually launch, I'll post the outcome.
It's beautiful! You did a really great job on this kit! Well done you.What an awesome ride this has been! To all that have contributed to my success....a sincere Thank YOU! I am sorry to see this thread come to a close as it has really been a thrill! When I get a chance to actually launch, I'll post the outcome.
the Lifting Body tends to knife through the air..but is another neat kit. Fun to build and fun to fly!
https://www.rocketryforum.com/showt...Zooch-Lifting-Bodies&highlight=lifting+bodies
Rick it's all your fault man! I couldn't help myself! I bought a lifting body kit a little bit ago! So I didn't have to pay shipping I added the Freedom 7 Redstone to the order. Now I WILL be studying those pictures of yours to get an idea of what I want to do. It won't be the stock white after seeing all your pictures. Where is your build thread so I can study that?
You HAVE to post a picture if they actually draw the Batman!!


Hooray! Here's my screen confirmation after I ordered the rocket. Note the special instructions at the top.
View attachment 281071
Here's what showed up at my door today.
View attachment 281072
This is awesome! Thanks Sirius!!
thought you might like the videos that Dr. Zooch made for his Lifting Body!
Part 1
[video=youtube;S4lJ67Jg3_g]https://www.youtube.com/watch?v=S4lJ67Jg3_g[/video]
Part 2
[video=youtube;JBIyI5p53ww]https://www.youtube.com/watch?v=JBIyI5p53ww[/video]
Quick reply to this message Reply Reply With Quote Reply With Quote Multi-Quote This Message

Welcome to the club. Always a crowd pleaser, and hard to catch the Orbiter on video. Mine usually circles to land very close by the ET/SRBs on the chute. The last time I launched it at our Cub Scout rocket launch, one of the smarty-pants parents jokingly commented, "isn't the Shuttle supposed to keep on going into space? Why is it landing?" There's one in every crowd.My Recommendation: BUY AND FLY the Zooch Shuttle!... Highly Recommend!!!...
Welcome to the club. Always a crowd pleaser, and hard to catch the Orbiter on video. Mine usually circles to land very close by the ET/SRBs on the chute. The last time I launched it at our Cub Scout rocket launch, one of the smarty-pants parents jokingly commented, "isn't the Shuttle supposed to keep on going into space? Why is it landing?" There's one in every crowd.
I can see that being said by a few indeed!! funny. I just showed my Pack the video from the HPR this weekend and got them excited to build and come out to a club launch event. Hopefully we can get it all squared away. I will definitely fly this then as well. You all were spot on about getting addicted to this little model!You all were spot on about getting addicted to this little model!
I wish I knew why and what it would take to get it flying.Now try and build a bigger one. Heh. My 1.5x scale version looks great, but flies like crap.
I had to have the three nose cones turned specifically for me, but the guy had already turned some Shuttle ET and SRB cones so he had the dimensions, and scaled them up easy enough. I really thought scaling up 1.5x would be just slightly bigger, but it's much bigger! It flew on a D and the orbiter just wouldn't fly. It would either tumble, or nose dive. Currently the nose of the orbiter is destroyed but I can cut and glue up another one pretty easily. The trick is getting the nose weight right and I'm not sure that's even possible.oh man. You gotta go an say something like that! You know it's gonna get me itching and thinking about it! Not sure if I'm a good enough modeler to scale my own shuttle though and keep it flying. Maybe a kit if I could find one that would fly on a G or H. That'd be totally awesome..

Enter your email address to join: