smapdiage9
Well-Known Member
- Joined
- Mar 14, 2009
- Messages
- 442
- Reaction score
- 3
Whenever I start a new project I like to create a thread for it just for posterity's sake; most of the information I'm able to gather from the internet comes from finding threads other people used to archive their trials and tribulations, so I have to pay back into the system whenever I learn things. Here I am going to document the hopefully non-disastrous attempts at using a mini-hybrid rocket motor.
This is an incredibly expensive and relatively low performance way of building and flying an E motor, but it is valuable and entertaining as a way to learn a little about hybrids (which I've never flown) and gives me a platform to do a small amount of propellant research (which I've never done).
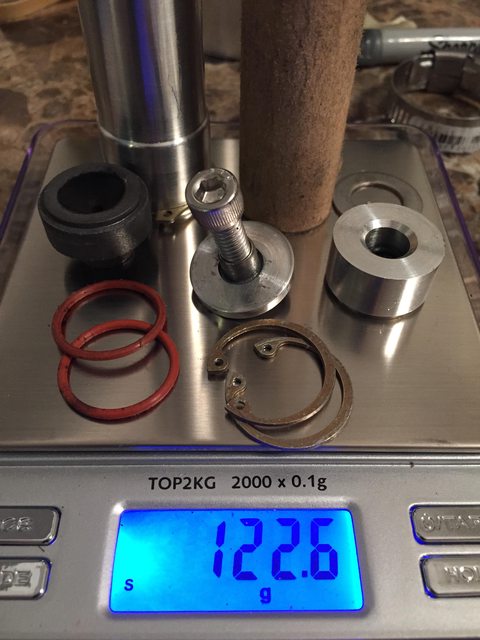
The mini hybrid motor kit gets you the aluminum parts here, snap rings, piercer, and a graphite nozzle. Everything else is on you.
Here's my BOM so far:
Mini Hybrid lightweight motor hardware $94 (+$7.95 S&H) Micronitrorocketry.com
Propellant Mandrel: Precision Ground 3/8” Aluminum Rod 12” Length $15 Amazon
018 Silicone O-Ring 100 pack $8.16 Amazon
009 Buna-N O-Ring 100 pack $2.08 Amazon
3M Super 77 Multi-Purpose Spray Adhesive $5.82 Amazon
Scotch Postal Wrapping Paper 30”x30’ $5.49 Amazon
DuPont Krytox Grease 0.5oz Tube $14.99 Amazon
16g Whip Cream Chargers (15 ct) $34.49 Amazon
Please note that by shopping around you will likely get better prices on whip cream chargers and mandrels, I am simply someone who has made peace with his Amazon dependency and doesn't care anymore. The expensive as heck Krytox grease can also possibly be ignored by simply using a new o-ring each firing, but I've never used krytox so I figured why not check it out.
Mini vs Micro: As I understand it the primary difference between mini and micro motors is that mini uses the larger 16g nitrous chargers and micro uses the smaller 8g nitrous chargers. The guide notes that because the chargers are filled to approximately the same pressure, just at different volumes, each motor will produce about the same amount of thrust though the mini should burn twice as long.
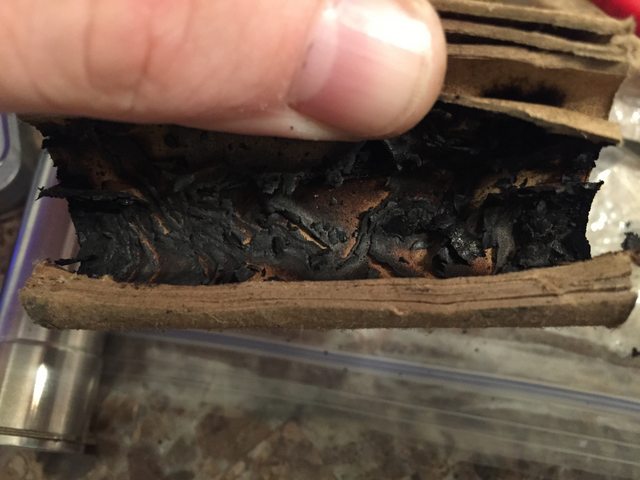
Fuel Grains: I’m going with simple a paper grain since it’s super easy to start with, there are also some research recipes in the guide so be careful where you post details of the file. I rolled four 7-8" wide lengths of paper grains, which was pretty easy (if messy with spray glue) and should yield about 8 firings worth of fuel. Next time I will just use watered down wood glue (way cheaper and easier to control). After letting them dry for a day a cut them into ~3.1" lengths using a mitre hand saw, and sanded the faces smooth and flat with a power sander. This was overall super easy.
Pre-heater Grains: Everyone recommends using 18mm blue thunder reloads. I don't have any and they seem expensive, but I do have a bunch of 24mm reloads kicking around so I sacrificed one F39 grain and used an xacto knife to cut it into several pre-heater grains.
Burst discs: The Micronitro guide recommends using soda bottle plastic (PET) or ping pong balls and cutting correctly sized circles out with a punch. The website sells a punch for like $30, but I decided it would be easier and faster to cut some out on my laser cutter. I sliced the top off of a thin plastic water bottle and created some flat strips out of it, then cut out various sizes of circle to ensure I'd find one that made a good seal between the O-Ring and the piercer carrier. I ordered some flat sheet of PET from amazon, but it's thicker (0.020") than the guide recommends so we'll see how it works.
Assembly of a motor for firing is a little tricky:
Put a fuel grain in the bottom with an O-ring on either side, slide the nozzle in behind it, nozzle washer, and install the bottom snap ring. (Easy part)
Use a 3/4" dowel to tamp down the fuel grain and O-ring from the top side.
Assemble the preheater/piercer: APCP grain goes in the bottom side, top side gets a burst disc, O-ring, and the brass piercing nozzle. Those last three parts sit loose until they are compressed during final assembly, and they are very easy to shake out of place. Be careful!
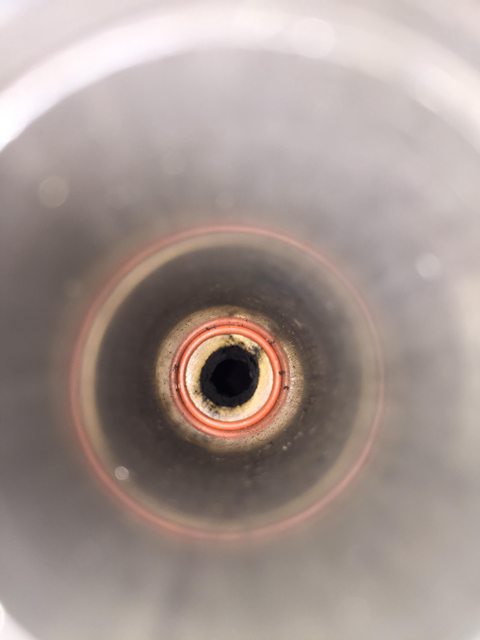
Wrap some masking tape around the nitrous cartridge to ensure it fits snugly then slide it in carefully- too fast and you'll bump into the piercer and release your nitrous, but if you hold the motor horizontally then the piercer will fall out of place and you'll have to disassemble the whole thing and start over. Here is the assembly in question, halfway down the motor tube on top of the fuel grain:
Add the screw plate and install the snap ring on the top side.
Screw in the pusher screw from the top which slides the nitrous cartridge against the piercer.
Just before flight/fire prep you'll screw it in to puncture the cartridge, and nitrous pressure will be held back by the thin plastic burst disc and sealed by the upper (small) O-ring. Wear protective gear!
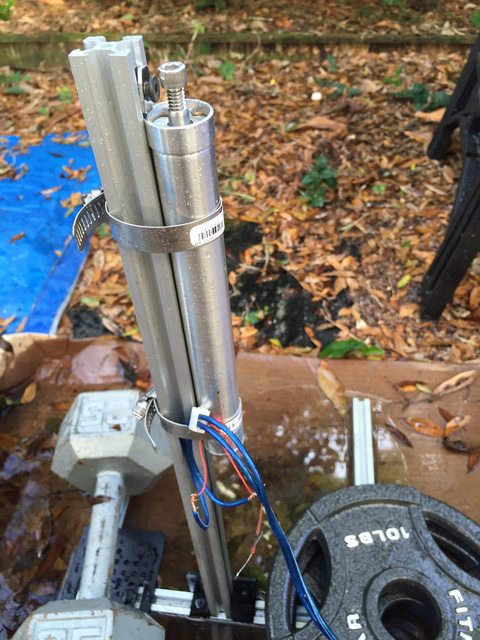
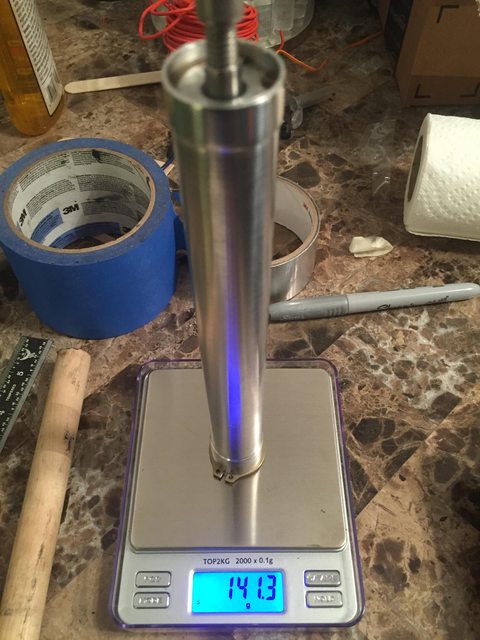
Assembled motor ready to fire:
So now that I've verified that my water bottle burst disc holds pressure effectively, I'm ready to test fire. I need to hit the hardware store today to get some pipe clamps so that I can hold the motor against something heavy as an improvised test stand. Video to follow.
This is an incredibly expensive and relatively low performance way of building and flying an E motor, but it is valuable and entertaining as a way to learn a little about hybrids (which I've never flown) and gives me a platform to do a small amount of propellant research (which I've never done).
The mini hybrid motor kit gets you the aluminum parts here, snap rings, piercer, and a graphite nozzle. Everything else is on you.
Here's my BOM so far:
Mini Hybrid lightweight motor hardware $94 (+$7.95 S&H) Micronitrorocketry.com
Propellant Mandrel: Precision Ground 3/8” Aluminum Rod 12” Length $15 Amazon
018 Silicone O-Ring 100 pack $8.16 Amazon
009 Buna-N O-Ring 100 pack $2.08 Amazon
3M Super 77 Multi-Purpose Spray Adhesive $5.82 Amazon
Scotch Postal Wrapping Paper 30”x30’ $5.49 Amazon
DuPont Krytox Grease 0.5oz Tube $14.99 Amazon
16g Whip Cream Chargers (15 ct) $34.49 Amazon
Please note that by shopping around you will likely get better prices on whip cream chargers and mandrels, I am simply someone who has made peace with his Amazon dependency and doesn't care anymore. The expensive as heck Krytox grease can also possibly be ignored by simply using a new o-ring each firing, but I've never used krytox so I figured why not check it out.
Mini vs Micro: As I understand it the primary difference between mini and micro motors is that mini uses the larger 16g nitrous chargers and micro uses the smaller 8g nitrous chargers. The guide notes that because the chargers are filled to approximately the same pressure, just at different volumes, each motor will produce about the same amount of thrust though the mini should burn twice as long.
Fuel Grains: I’m going with simple a paper grain since it’s super easy to start with, there are also some research recipes in the guide so be careful where you post details of the file. I rolled four 7-8" wide lengths of paper grains, which was pretty easy (if messy with spray glue) and should yield about 8 firings worth of fuel. Next time I will just use watered down wood glue (way cheaper and easier to control). After letting them dry for a day a cut them into ~3.1" lengths using a mitre hand saw, and sanded the faces smooth and flat with a power sander. This was overall super easy.
Pre-heater Grains: Everyone recommends using 18mm blue thunder reloads. I don't have any and they seem expensive, but I do have a bunch of 24mm reloads kicking around so I sacrificed one F39 grain and used an xacto knife to cut it into several pre-heater grains.
Burst discs: The Micronitro guide recommends using soda bottle plastic (PET) or ping pong balls and cutting correctly sized circles out with a punch. The website sells a punch for like $30, but I decided it would be easier and faster to cut some out on my laser cutter. I sliced the top off of a thin plastic water bottle and created some flat strips out of it, then cut out various sizes of circle to ensure I'd find one that made a good seal between the O-Ring and the piercer carrier. I ordered some flat sheet of PET from amazon, but it's thicker (0.020") than the guide recommends so we'll see how it works.
Assembly of a motor for firing is a little tricky:
Put a fuel grain in the bottom with an O-ring on either side, slide the nozzle in behind it, nozzle washer, and install the bottom snap ring. (Easy part)
Use a 3/4" dowel to tamp down the fuel grain and O-ring from the top side.
Assemble the preheater/piercer: APCP grain goes in the bottom side, top side gets a burst disc, O-ring, and the brass piercing nozzle. Those last three parts sit loose until they are compressed during final assembly, and they are very easy to shake out of place. Be careful!
Wrap some masking tape around the nitrous cartridge to ensure it fits snugly then slide it in carefully- too fast and you'll bump into the piercer and release your nitrous, but if you hold the motor horizontally then the piercer will fall out of place and you'll have to disassemble the whole thing and start over. Here is the assembly in question, halfway down the motor tube on top of the fuel grain:
Add the screw plate and install the snap ring on the top side.
Screw in the pusher screw from the top which slides the nitrous cartridge against the piercer.
Just before flight/fire prep you'll screw it in to puncture the cartridge, and nitrous pressure will be held back by the thin plastic burst disc and sealed by the upper (small) O-ring. Wear protective gear!
Assembled motor ready to fire:
So now that I've verified that my water bottle burst disc holds pressure effectively, I'm ready to test fire. I need to hit the hardware store today to get some pipe clamps so that I can hold the motor against something heavy as an improvised test stand. Video to follow.
Last edited:

 op:
op: