TLP Nike-Ajax Two-Stage Conversion

The Rocketry Forum

Help Support The Rocketry Forum:

This site may earn a commission from merchant affiliate links, including eBay, Amazon, and others.
Took a slight step sideways and decided to go ahead and laminate the interstage strut components. Very little additional weight but lots of strength so decent trade off. In background is tip-to-tip on sustainer fins as planned.

ImageUploadedByRocketry Forum1452657983.007964.jpg
 
Woke up before 5 (per usual) and took a few minutes to get the above cut out. In addition did final fit sanding on interstage coupler. No pictures right now, but suffice it to say, I'm feeling really good about how the mechanical fit/function of this is working out. While I continue with the tip-to-tip on the sustainer I'll begin to work the electronics/wiring issues in conjunction with the nosecone changes/adds.
 
A bit of miscellaneous assembly as I move the sustainer lamination along. One thing I almost missed was the difference between the Aerotech and Cesaroni closure length. Getting this right is critical as the mating of the sustainer into the interstage coupler is a key issue to physical stability of the assembly. The Aerotech closure is just a bit over 1/8" long while the Cesaroni closure is 1/4". Since I want to fly long-burn Cesaroni 24mm motor in the sustainer that dimension was critical and I will be adding a 1/8" FG closure ring above the butt the Aerotech closure in the sustainer motor mount to match the same spacing. So to get the exact spacing on the sustainer aft centering ring, I did a friction fit on the AT motor and inserted the MMT into the fore interstage to get the correct positioning.

Capture.JPG IMG_2508.jpg IMG_2512.jpg

Other items were a bit of "bling" associated with the scale details. First was the addition of the three interstage struts and second were some interface/termination rings on the aft of the sustainer and the fore of the booster.

IMG_2511.jpg IMG_2510.jpg
 
Well, achieved a milestone as now all fin lamination is complete. Still have much filling and sanding to do, but beginning to look like the kit placard. In the picture below, it really isn't put together completely as I haven't installed the sustainer MMT yet as I want to add a plenum between the CR's so I can do a "serviceable shock cord" and I don't have a drill in the hotel room.

IMG_2514.jpg

After the first couple of filling/sanding rounds, next big thing to tackle is installing all the wiring tunnels on the sustainer. TLP specifies a lot of shaping to get the scale right. I'm OK with that, but I think I'll be more successful doing the shaping after I get the balsa strips installed instead of trying to deal with the long, skinny pieces individually. I'm bad with balsa and split/break it all the time. So I'll do some rough cutting of the end angles, attach to tubes and then sand to shape.

IMG_2513.jpg

BTW, did a quick weigh-in and I'm at 12oz total, 6.3oz for the booster, 5.7oz for the sustainer. Nosecone electronics/mount will add another ounce and two thin-mil chutes & shock cords another two ounces or so. Then another ounce for filler/paint. So say 16oz which isn't bad as I've seen Rocksim's range from 11.5oz stock to 22+oz for another two-stager.
 
Last edited:
OK, no work on the wiring tunnels. Probably #1 I'm procrastinating on detail shaping/sanding I don't like to do, but #2, after looking more closely at the nosecone, I took a big deviation on the way I want to do the staging control. My initial thought without looking (because I don't like to deal with tight space electronics) was to use a purchased bulkhead like one from Chris Atterbery. But this kit's nosecone is purely LPR--small shoulder, funny shape, thin polystyrene. Saying that, I like the nosecone size/shape so I began to improvise. First after installing the forward fins, the diameter of the nosecone was really too small, so I added three wraps of FG to equalize (obviously fill and sanding needed to complete). Next after cutting off the bottom of the NC and seeing how flimsy the plastic was, I decided to also use FG to build up the structure with a wrap inside the cone. Now I'm left with building a custom bulkhead and sled assembly. With the shape and the way I want to mount the bulkhead, I'm left with little space. That coupled with sims that are taking the sustainer to 5000+ feet, I decided to punt and just use the nosecone for a BRB tracking radio and move the staging electronics to the interstage coupler...

IMG_2524.jpg IMG_2527.jpg

I figured out about three ways to do this, but finally opted to cut a hatch in the aft bulkhead and CR. Inside this hatch will be a slide-in tray and bulkhead that will hold the Perfectflite Minitimer and LiPo battery. It will lay inside booster coupler and the center motor support tube. I know this all looks pretty rough right now, but it's OK. I know how I'm going to build and secure the tray--it's gonna come out good. As they say, all's well that ends well!

IMG_2521.jpg
 
Doesn't look like much, but a couple hours work over the last two days. About half an hour to spread the SuperFil and about 90 minutes sanding time (mostly by hand :(). That is the problem with smaller diameter stuff--especially those with 12 fins/finlets. At least now I'm through with the first level fill and ready for wiring tunnel application.

ImageUploadedByRocketry Forum1453481608.869970.jpg

Also had some time to plan, measure, cut and shape the two sleds. The U-shaped on the left is for the interstage coupler (1"x3"). Right side L-shaped is for insertion into the nosecone (1.25"x2.5").

ImageUploadedByRocketry Forum1453481767.450026.jpg
 
Last edited:
It looks like you still need to put on the system tunnels on the second stage. I remember doing a lot of sanding on those to get the proper shape. Sandman makes a nice decal for the first stage (provided that the first stage is olive green).
 
It looks like you still need to put on the system tunnels on the second stage. I remember doing a lot of sanding on those to get the proper shape. Sandman makes a nice decal for the first stage (provided that the first stage is olive green).

I haven't seen any original pictures with decals on the booster. Only on the sustainer. And yes, wiring tunnels mentioned in my last post.
 
Kicking back at a timeshare this week so no building until next weekend at least. In the meantime, while doing decal research I found flights for these two scratch built versions.

[YOUTUBE]EOA3-uGR0eY[/YOUTUBE]

and,

[YOUTUBE]BSjaLF-Xmeo[/YOUTUBE]
 
Got a package from Wildman today. Included among other things a CTI 6g 24mm motor. Below illustrates dimensionally where I'm going with the sustainer stage.

ImageUploadedByRocketry Forum1455157420.861660.jpg
 
Last edited:
Contrary to popular belief, progress continues (slowly) on this build. Upper stage conduits now shaped and installed. Close to moving to base coat stage on both sustainer and booster.

IMG_2863 (1).jpg
 
I haven't seen any original pictures with decals on the booster. Only on the sustainer. And yes, wiring tunnels mentioned in my last post.

Nice Build.
Watching with interest.
I've built several TLP kits, nice kits, the Pershing and this one.
Bit of a challenge but worth it.
I'm waiting to install a second stage ignition system before I fly the Nike Ajax.

That interstage needs all the reinforcement you can give it as it is fragile and the sustainer will develop a lean as it lifts layers of the paper bulkhead up.

I've not seen any thing but technical data on the booster.
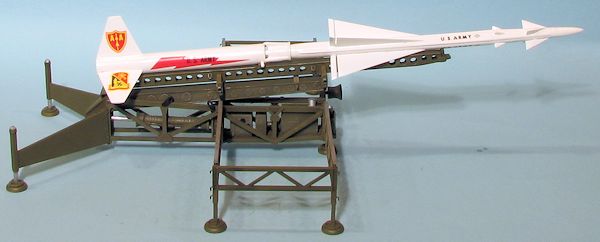
But the Renwal kit I had as a kid had some very colorful markings and emblems.
mim-3_08.jpg

najaxe.jpg


TLP Nike Ajax.jpg
 
Last edited:
Nice Build.
Watching with interest.
I've built several TLP kits, nice kits, the Pershing and this one.
Bit of a challenge but worth it.
I'm waiting to install a second stage ignition system before I fly the Nike Ajax.

That interstage needs all the reinforcement you can give it as it is fragile and the sustainer will develop a lean as it lifts layers of the paper bulkhead up.

I've not seen any thing but technical date on the booster.
But the Renwal kit I had as a kid had some very colorful markings and emblems.
mim-3_08.jpg

najaxe.jpg


View attachment 294104

Thanks for sharing all this. Good input. Correct to be concerned about the interstage coupler, but I do feel pretty good about it at this point. I made many changes in this section (see post #11) and it is solid as a rock.
 
Last edited:
Thanks for sharing all this. Good input. Correct to be concerned about the interstage coupler, but I do feel pretty good about it at this point. I made many changes in this section (see post #11) and it is solid as a rock.

Yep - Looks like you have the interstage coupler plenty strong.
I'll have to reinforce mine.
Those three interstage struts...one or two tend to lift up from the bulkhead they sit on, sometimes pulling the top layer of paper from the surface of the bulkhead with it...tilting the whole sustainer slightly.

Yeah, I actually used lite-ply on the bulkheads. That, along with the 24mm tube running the length of the interstage coupler, really make the struts and paper shroud "trim" vs structural.
 
The best builds are the ones that take the longest!
Looking great from my vantage point!
 
Back
Top