Super Cobra - a build thread

The Rocketry Forum

Help Support The Rocketry Forum:

This site may earn a commission from merchant affiliate links, including eBay, Amazon, and others.

EXPjawa

Well-Known Member
Joined
Jan 27, 2015
Messages
2,212
Reaction score
84
Location
Middlesex, NY
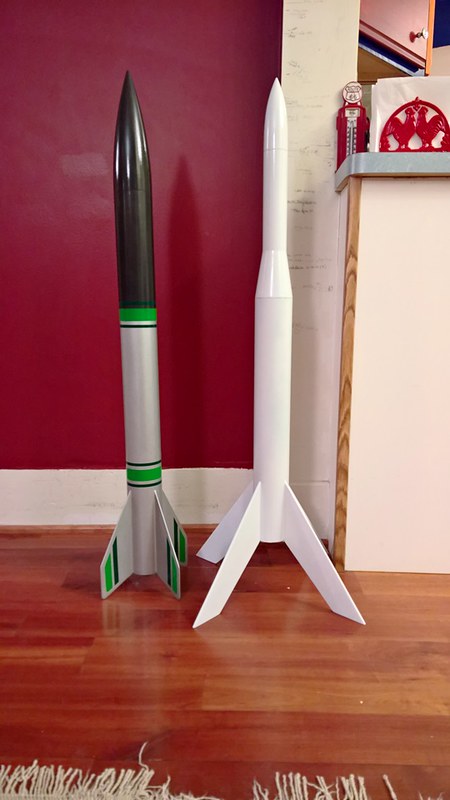
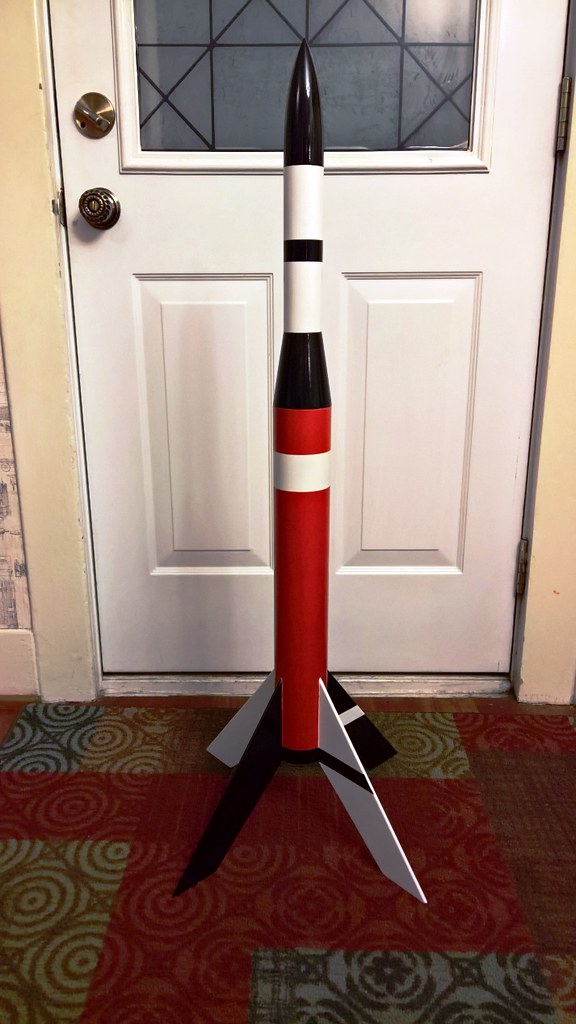
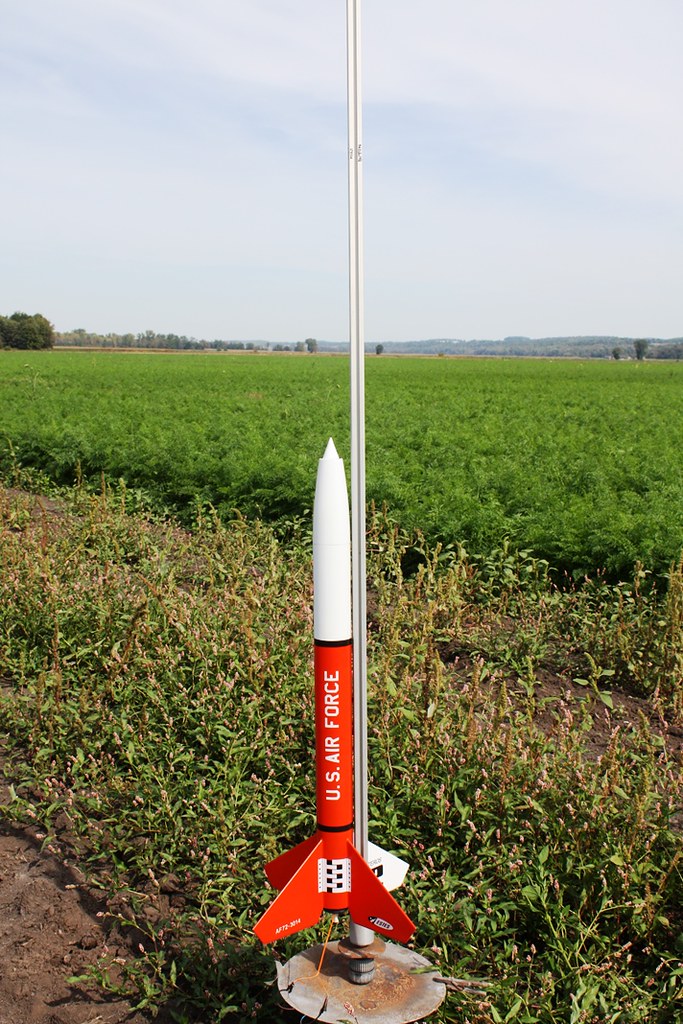
I don't typically do build threads much - usually I don't take enough time in the actual building process to take photos, and it seems like few people actually read them, if the number of comments are any indication. Still, I think that this project is worth documenting. A while back, I built a clone of the Estes Astron Cobra, which is, of course, one of their earliest cluster motor models. It introduced me to clustering as well. I decided to do it one better and build an upscaled Cobra - that's what this thread is all about - but it took a while for everything to fall into place.

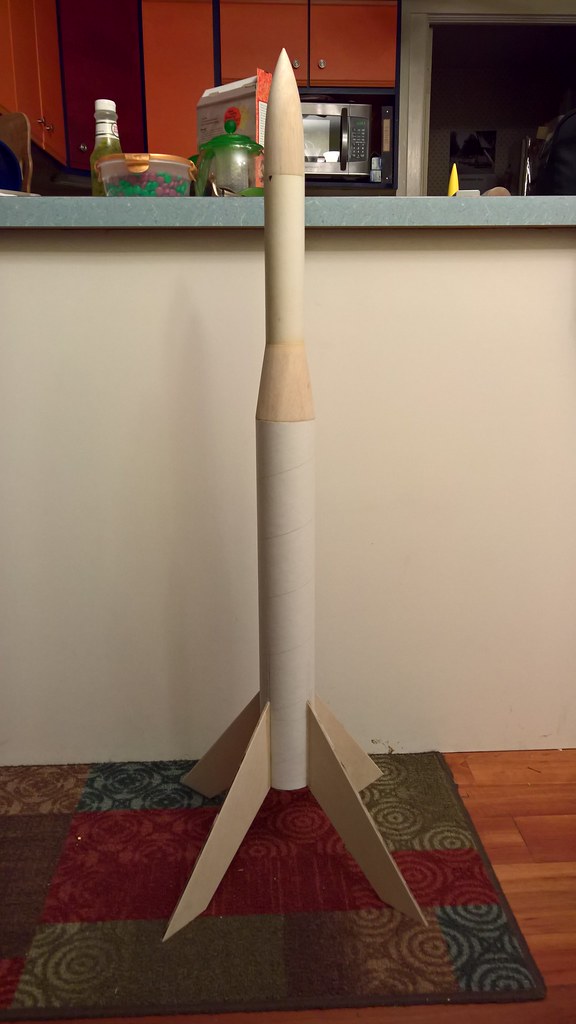
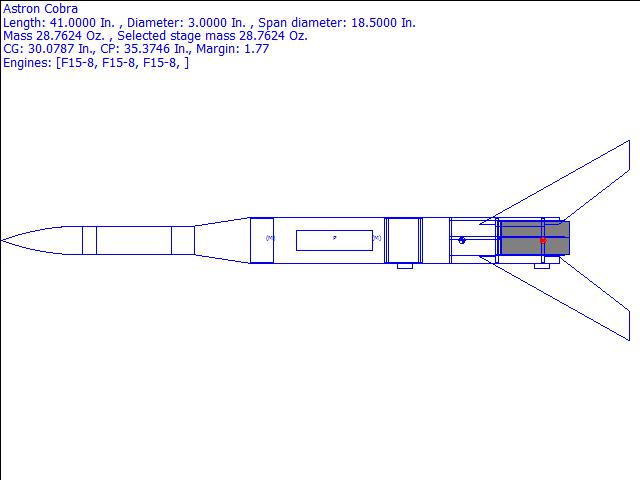
The first step was deciding how big to go. The initial design went to 2.6" main tube and clustered three 24mm mounts. But I did that with an upscale of the Astron Ranger, so was looking to do something different. The second design makes use of thinner wall 3" tube for the lower body, and Aerotech 1.88" tube for the upper. This gives me just enough room to cluster three 29mm mounts, but is light enough to fly on clustered E16 or F15 motors. As such, I consider this to be "midpower", since the combined thrust of three BP isn't really that high. I may go past that at some point, but that's not a current criteria.

Anyway, here's the design, done with Rocksim:
22565452884_c1e3977b54_o.jpg


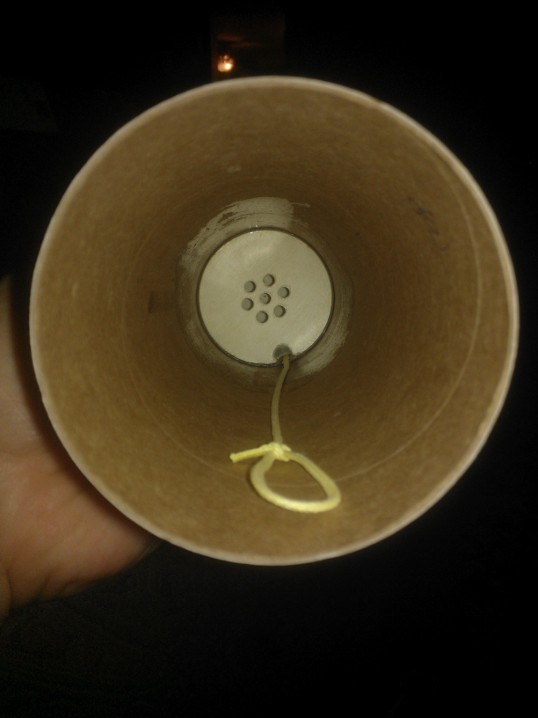
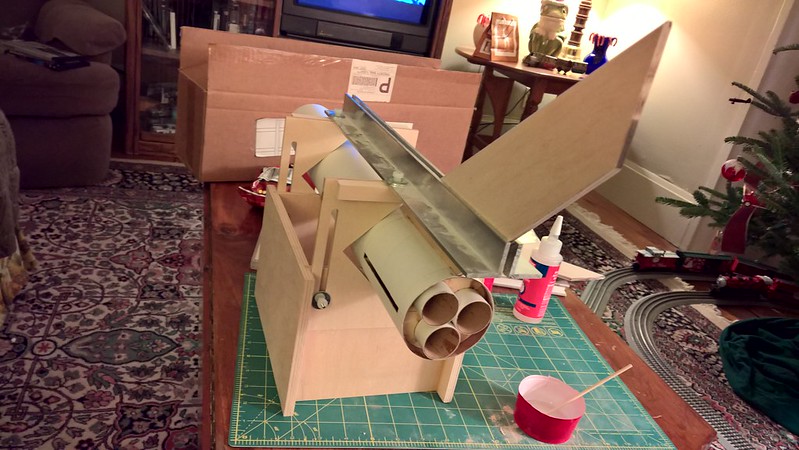
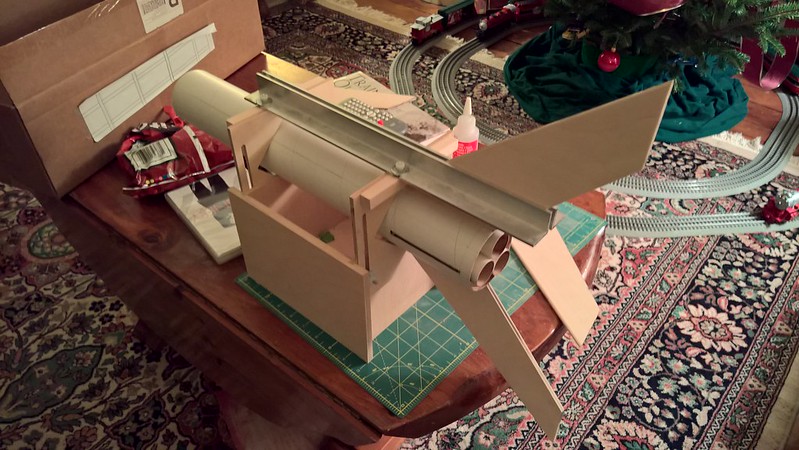
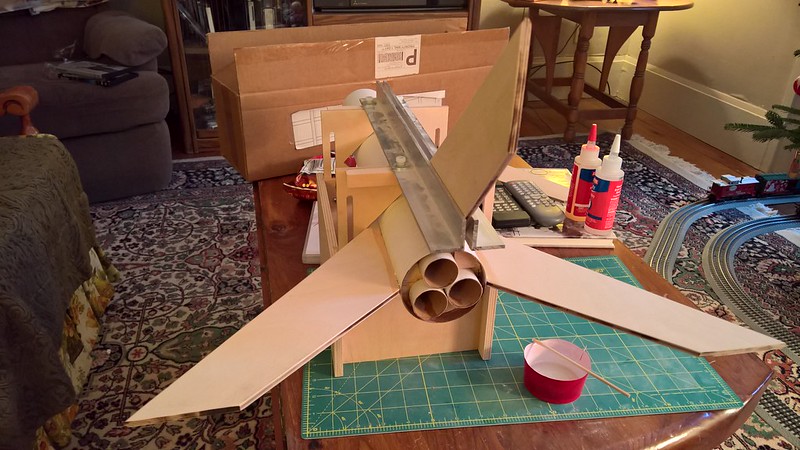
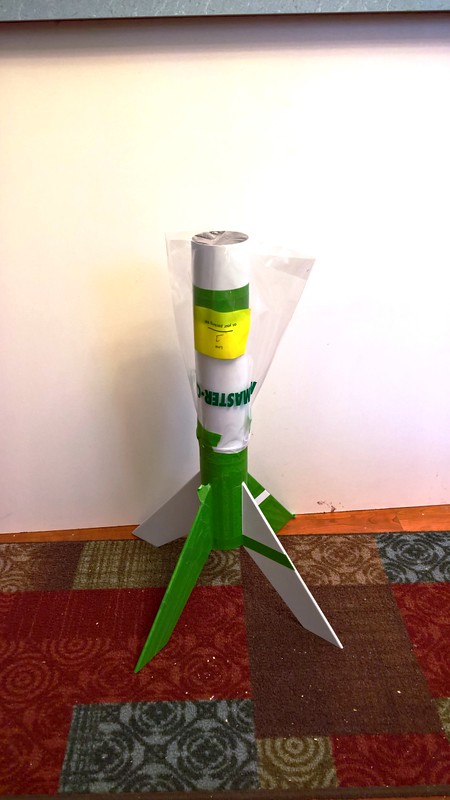
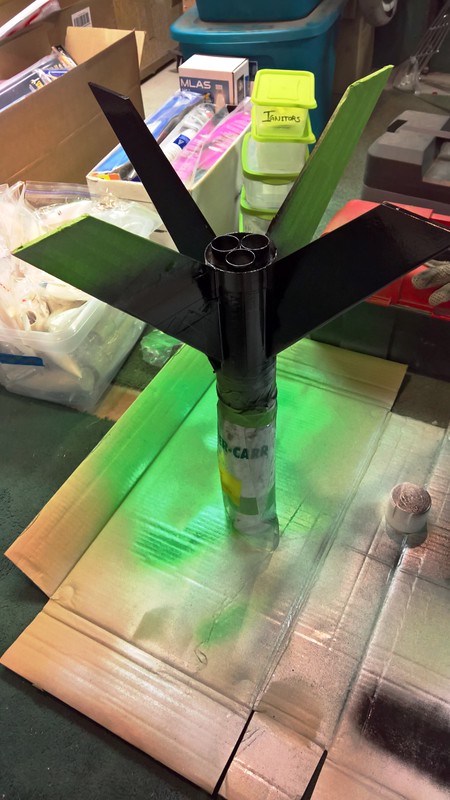
I bought the tubing for this a while ago, but had been sitting on it until a few things fell into place. The first - I needed centering rings for three 29mm tubes inside of Leviathan-sized tube. I could get fairly heavy ply rings for LOC 3", but not for the Estes size. But BMS came to the rescue after a few folks asked them to make rings for PSII tube sizes. I finally got what I needed, and got to point in my build plan where I could do something with them. Here are the bits collected so far:

22799453677_5f3615fbb3_b.jpg


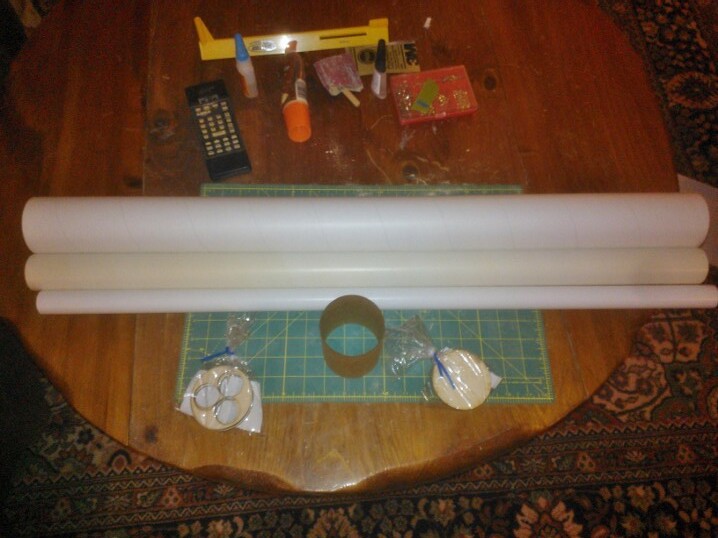
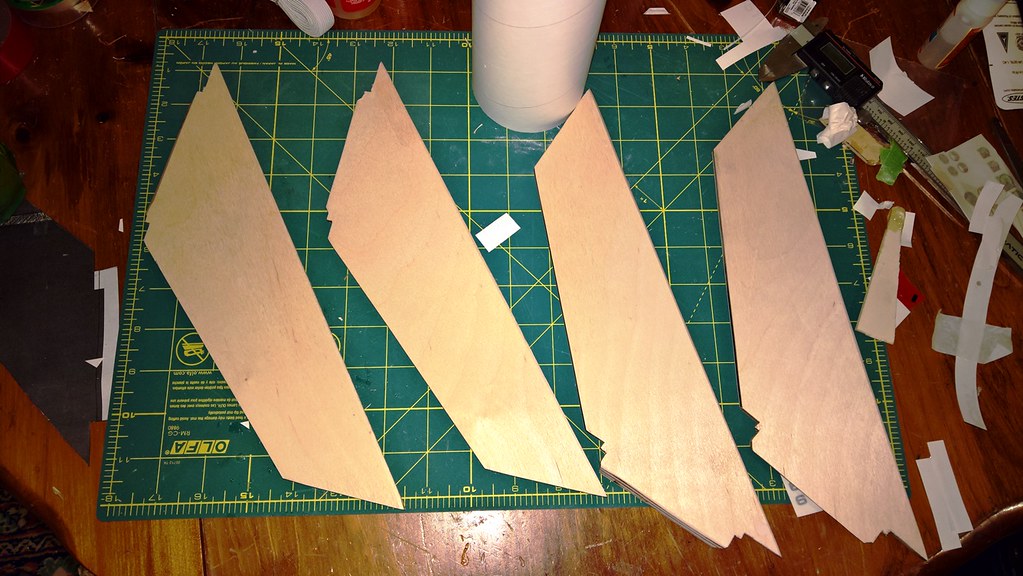
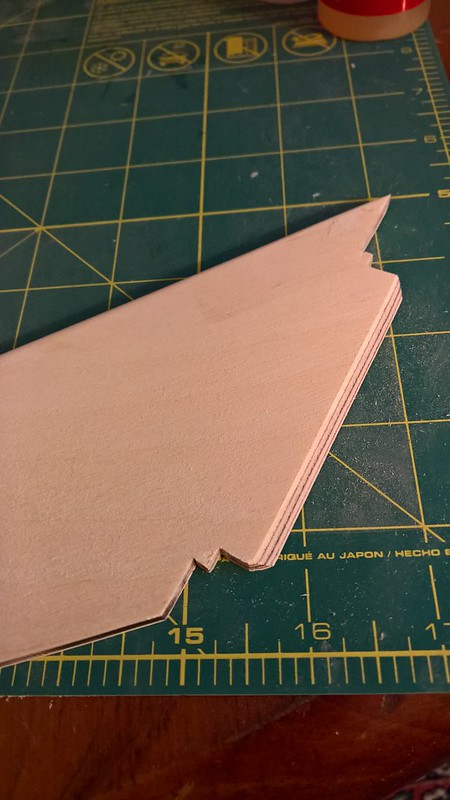
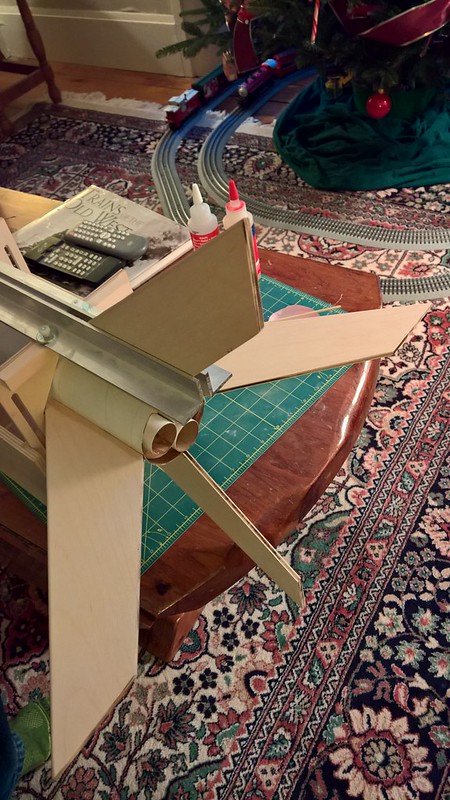
And trimmed to size, to give a better idea of what's what:

22897789370_733a73b1a9_b.jpg


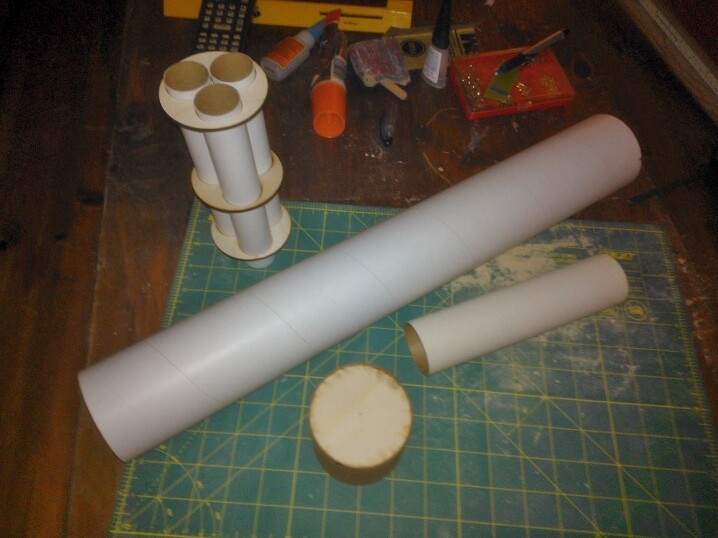
Nothing is glued up yet. The coupler and bulkhead pieces are to make an ejection baffle to fit the 3" tube. The next thing to fall into place is the need for upscales of the BNC-50K cone and the transition piece to fit the tubing being used. I contacted Sandman earlier in the week for those and should see them in a few days. And so it begins!
 
I like it. Large size and light weight plus three F15 motors will make for a fun flight. I would have used C-188 coupler stock from BMS for the scaled up payload section, but the Aerotech tubing is close enough. I'm watching to see what you do for the fins.
 
OK,due to the nature of having three motor mount tubes but four fins, I can't tab the fins through the wall in the conventional way. So I decided to tab the fins into the centering rings. Granted, I can't go in too far, at least on two them, but it ought to at least help. To mark the rings for notching, I used the Apogee marking guide for a 3" tube, together with a short scrap segment of said tube. The centering ring fit the tube snuggly, as did the tube to the guide, so it made a reasonable tool for marking the centering rings.

22663369123_879aa10b75_b.jpg


After laying out the notches, I cut them with an Xacto knife. It was a little bit of a PITA, but it seemed like it would be easier to cut accurate, square notches that way.
23207893131_a1299205be_b.jpg


I've elected to go with 3/16" ply for the fins, so the notches are cut accordingly. Next, I was able to move on to starting to assemble the motor mount. Nothing terribly exciting there, save for making sure that all three tubes were square and parallel. Tubes epoxied to the middle and fore rings:
23264385466_536611a29e_b.jpg


Then I cut out and taped up the fin pattern, which printed from Rocksim onto two pages due to its size. You can see here that its a little more that 7" in semi-span and 10" from front to back length, so its a fairly large fin. That's why I went with 3/16" rather than 1/8" thickness, and 1/4" seems overkill. Now I need to buy the material to make them.
23290525335_f08c0cdbf9_b.jpg
 
I think the number of comments on build threads isn't a true indicator of how many follow. I usually don't subscribe, just lurk and check in. Anyhow, I'd say a project like this is definitely worthy, and I'm glad you've chosen to document it.
 
Good to know, thanks for the input. Well, some progress and a minor snag. As this is to be flown on BP motors, I installed engine blocks in the motor tubes. I knew i saved the ones from the PSII kits I've built for a reason, because i certainly didn't use them on those...
23282372456_659a650f5b_b.jpg


I also marked out the lower body tube for slotting:
23012676260_18d6a209c7_b.jpg


The snag - I went to Hobby Lobby for fin material and was disappointed to find that the only ply they was 1/4". I thought about using that, but I've already notched for 3/16", and I'd prefer not to make the fins too heavy. I'll have to pop into Dan's Crafts & Things to see what they have. I'm sure I've seen it somewhere. I'm now also toying with the idea of laminating thin balsa and basswood sheets together to create a very light plywood, maybe 1/64" basswood core with a layer of 1/64" balsa on either side, possibly papered on the outside. That might actually be a worthy experiment regardless of what I use now...
 
Are you going to make cut outs in the core like the on the MDRM?
 
I don't think so, at least not at this stage. I'm not sure at this point how strong a basswood & balsa ply actually would be, so I'm not going to be cutting holes inside it at this time. Keep in mind that MDRM laminates balsa onto a hardwood ply. I'm considering making plywood out of soft wood and soft hardwood. It isn't really apples/apples.

On another note, I received a box from Sandman today:
22940512029_70be444f82_b.jpg


Of course, that means I have to test fit:
23225827311_07ed56b5c4_b.jpg


This starts to bring home a sense of size now, making for a pretty big rocket...
 
A little more progress. I decided thwt the next step was to make the baffle. Basically, I'd bought a 3" coupler and a pair of bulkhead plates. The bulkheads marked out for drilling:
23221793172_f88aa01376_b.jpg


And then actually drilled:
23034272790_ddebc00fc6_b.jpg


The side notch is for shock cord clearance. I tied a loop in the end of the kevlar and epoxied that into the side of coupler.
23330067975_687847e332_b.jpg


And then, top plate epoxied into the coupler:
22962146759_4d1606d88a_b.jpg


I also smeared a layer of epoxy onto the under surface of the baffle plate to help protect the wood from ejection blast. The final thing was to cut the slots in the body tube:
23330114005_83a4887d2c_b.jpg
 
I made a stop at Dan's Crafts & Things today and picked up a sheet of 3/16" aircraft plywood. Only it isn't really 3/16" thick, it measures .205" thick, making it almost .020" thicker. So, I had to widen my notches and slots. That kind of worked in my favor, since after cutting everything and then marrying the parts together, I had to do a little trimming to bring everything in line. This afforded me the leeway to do it without adding slop. The slots and notches now all line up properly and I have a good fit to the fin material.
23017216809_87600ecca9_b.jpg


Here is the completed motor mount, BTW:
22709957894_654428e7be_b.jpg


So, with that taken care of, I marked out the fins on the ply:
23089404700_f4ddf11f7b_b.jpg

I've elected to extend the fin tabs below the notches between the centering rings, so that they can be glued to the motor tubes. They'll still lock into the notches as well, but that didn't really leave the fins with a lot of purchase to root them in place. That means that while two of the fins will contact a tube just below the notches, the other two will have to reach in another 5/8" or so to do the same job, and they'll all intersect the motor tubes off centerline. So, I'll have to bevel the root edges to suit.

Before I get that far, I decided that the baffle should be installed first. I want to able to fillet epoxy both ends of it, since it is critical for keeping the recovery harness attached. So, the lower baffle plate was epoxied in, and a glazing of epoxy applied to the bottom surface:
23230000552_89a1437c4c_b.jpg


Once cured, the whole thing was installed in the main tube, after a little sanding to get a good fit (it was too snug to readily slide into place before):
23017212519_403f077a94_b.jpg


With the baffle in place, the next step is to install the motor mount.
 
EXP,
this looks like both an exciting build and a well-illustrated and narrated thread. I've learned much already, and look forward to subsequent posts!
 
I love the idea of upscaling rockets we built as kids :cool:
I never built the Astron Cobra, but I remember lusting for it back in the day.
Great build thread, thanks.
 
I love the idea of upscaling rockets we built as kids :cool:
I never built the Astron Cobra, but I remember lusting for it back in the day.
Great build thread, thanks.

Your comment got me thinking about the rocket that I built as a kid - which until now, I had completely forgotten about. As in, that whole segment had been deleted, because after building it, it was 5 or 6 years before got into the hobby more actively. It didn't stick immediately. Now, for me that rocket wasn't an Astron kit, but something out of the early '80s - the Estes Spartan, apparently #0864 from a quick googling. But I'm surprised by how much that had been blanked out from my memory, and by how it'd been triggered.

Anyway, I love the idea of building rockets from the early days of the hobby. Either as clones or upscales - I've already done a clone Cobra (and have a bunch of successful flights on it). I just wanted to push it bigger enough to fly on the largest BP motors that are made. To that end, last night, I epoxied the motor mount into place. I also glued up the forward airframe, and did some filler work on the transition piece. The balsa transition that Gord made is a very nice piece, but it gained a couple of small dings in package handling once it left his hands. Nothing a little wood filler couldn't fix.

I guess really the next big thing is to cut the fins out and get them sanded. I was going to work on that last weekend when I was at my folks' house (and use my father's band saw), but I forgot to bring the marked out plywood sheet with me. So maybe this weekend instead...
 
I managed to find time to cut out the fins over the weekend:
23567374636_d6f90096a2_b.jpg


As you can see, they're largish. Because they will reach past the notches to the motor tubes, there are two with short tabs and two with long tabs. They have to be beveled at an angle to properly contact the tubes, since they won't do so on the tubes' centerlines. So, in the end, each fin is unique and can only be installed in one slot. Next step - fine tune the fitting for each.
 
So, I was finally able to get back to working on this project, now that the holiday craziness is behind us. Last night, I sanded and filed each fin to fit its respective slot; remember that while they're TTW, due to the 3x motor tube cluster, the fin tabs don't intersect the mount tubes squarely. I notched the centering rings so that the fins had a dedicated pocket to sit in, but those notches are necessarily shallow. So, the tabs extend past the notches and meet the motor tubes off center and, consequently, at an angle:
24135747965_e16060e56a_c.jpg


Because of the orientation between the motor tube cluster and the fins, there are two long tabs (shown above) and two short tabs. Of each, there is a right and a left bevel. Once fitted, the angled surface can be bonded to the motor tube, and the fin itself sits in the notches (plus bonded to the tube surface and filleted). I think it ought to be robust. Fins dry-fitted into the lower body tube:
24027683942_db3f29f2e0_c.jpg


First fin glued in:
24027662792_45efdafd0c_c.jpg


For each one, I mixed up just enough epoxy to bond all mating surfaces and put a fillet on each side.

24027651162_f3a82284a4_c.jpg


23767937239_c3f4199d17_c.jpg


23840077520_904781ee19_c.jpg


The epoxy is all set up now, so we can put the front on for a photo:
24109616176_2fde7291fe_b.jpg


Overall height is spot-on at 41.1", and (oddly enough), once I taped in dummy masses to represent a couple choice Jolly Logic products that I don't own yet and stuck the parachute and shock chord inside, the CG was actually right where its supposed to be. Hopefully, that won't change much with paint...
 
Outstanding, can't wait to see the finished vehicle! Like the trains too!
 
OK, this has been on pause during cold weather, but now that its warming up, I've been able to start painting this.

A coat of white:
26105896924_3e2f148d5c_c.jpg


Masking:
26703814701_f9b4e105ef_c.jpg


Sealing the masking:
26498221300_b890e98163_c.jpg


A little black paint:
26770867715_43e83a8efd_c.jpg


And then some final masking (not shown) and some 2X Fire Orange:
26770868395_061ed34e6d_b.jpg


Decals to be worked out yet, but I have some ideas. The paint job was partially inspired by the original Cobra scheme (pre-Damon) and partially by Delta rockets, with some roll pattern mixed in. Next steps are to attach up the harness, install the buttons, and get a final weight on it.
 
Hoe-Lee Cow!

That livery looks fantastic!

Kudos, Rick!

At first blush I'm inclined to think the Astron Cobra is a dog, but no.

There's something so bold and simple in its lines and the wide-splayed fins at the base, it's a rock-solid beauty!

(I'm on the lookout for 2X Fire Orange. Bet it'd work on a Estes Ram Jet.)
 
Thanks! Performance-wise, its heavy enough that on three 29mm BP motors, it'll be a slow lift off and I'll want to use the longer rails to make sure it gets up to a safe speed. If I ever get as far as clustering CTI motors, though, I'd imagine it'll be pretty quick.

The Fire Orange is a little more orange than it looks in the lighting of this photo. I bet it would look good on a Ram Jet, though I'm partial to the metallic yellow-gold I used on both of mine. The Fire Orange is also a good color on an Estes Teros:
21787328735_7890cdf6e4_b.jpg
 
Back
Top