Rail Buttons for Estes PSII Kits

The Rocketry Forum

Help Support The Rocketry Forum:

This site may earn a commission from merchant affiliate links, including eBay, Amazon, and others.

gna

average joe-overbuild member
Joined
Sep 9, 2014
Messages
432
Reaction score
129
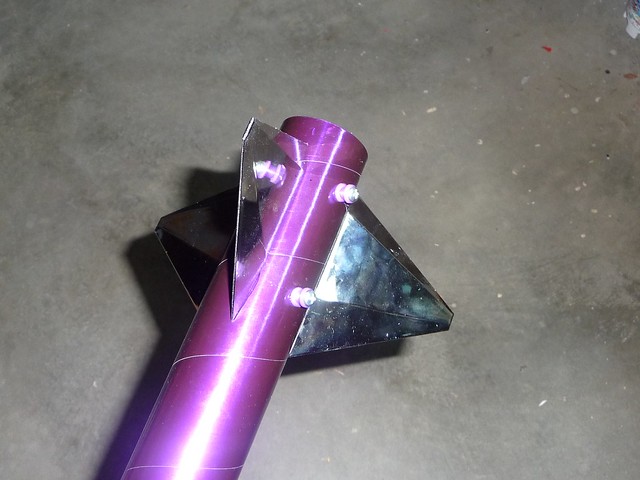
I have a few Estes PSII kits built, and a few more in the build pile. So far I've used launch lugs, but I recently got a piece of 1010 rail. I'd like to try rail buttons on the new builds, and I was wondering if I could add them to the built rockets.

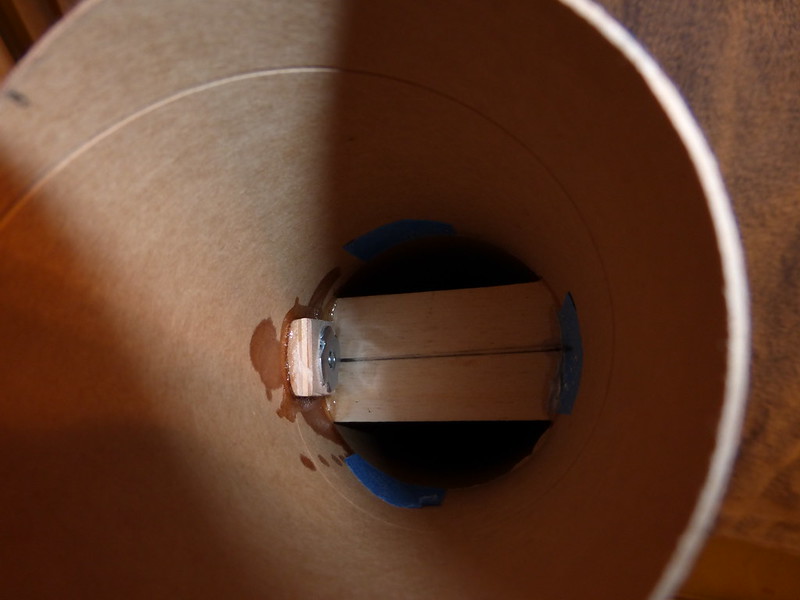
Should they be mounted about where the launch lugs are located? Is CA reinforcement to the body tube enough, or should I aim for a centering ring?
 
For me, I glued on some scrap wood (either basswood, or birch ply) to the rear CR, then drilled into that for the rear button.

Since my builds have baffles, I'll use a scrap of wood to mount a T nut inside the coupler that joins the fin can to the forward body tube. I make sure to do this behind the area were the laundry is packed to prevent it from catching and causing problems. In the image below, the back plate of the baffle has been installed, and the forward plates aren't.

15410032410_663297a854_c.jpg
 
Last edited:
I used t nuts, slightly bent to conform to the body tube, and epoxied them to the inside at the same location as the launch lugs. To get it inside, I put poster putty on a 1 inch dowel, put the t nut on the putty, put a small amount of 5 min epoxy on the flange, and slid the whole thing down the tube and aligned it with the hole I pre drilled and pre fitted. Once it was in place, wiped off any epoxy that gooped through with an alcohol soaked towel, then fastened the rail button in place with the screw. about 5 minutes later, I removed the screw and put some blue locktite on it and reinstalled it just far enough out to allow the button to spin.

For the rear, I just used a dremel to take off a piece of the t nut to get it as close to the aft ring as possible, otherwise the same procedure.
 
Here are the lugs on my Majestic as an example:


I put them near the rear and often immediately next to a ring. Drilling through thin rings is hard. There will be differing views, but on MPR and small HPR I just go thru the tube and add a drop of CA. I have never lost one this way.
 
I used t nuts, slightly bent to conform to the body tube, and epoxied them to the inside at the same location as the launch lugs. To get it inside, I put poster putty on a 1 inch dowel, put the t nut on the putty, put a small amount of 5 min epoxy on the flange, and slid the whole thing down the tube and aligned it with the hole I pre drilled and pre fitted. Once it was in place, wiped off any epoxy that gooped through with an alcohol soaked towel, then fastened the rail button in place with the screw. about 5 minutes later, I removed the screw and put some blue locktite on it and reinstalled it just far enough out to allow the button to spin.

For the rear, I just used a dremel to take off a piece of the t nut to get it as close to the aft ring as possible, otherwise the same procedure.

Neat idea with the poster tack putty!

You can also mount the railbuttons with well nuts, so long as they are not protruding into the airframe where the laundry can snag on the inside. The well nuts make changing the buttons easy, I also use a method like K'Tesh's as well.
 
I use the Madcow buttons with only a dab of epoxy. It works well on Aerotech and LOC tubing, but now that I think of it, the few Estes tubes I have used would benefit from more reinforcement.
 
I was put on to conformal launch guides by another member of my club, and I don't think I'm going back to buttons.

https://www.giantleaprocketry.com/p...nch_systems.aspx#Acme_Conformal_Launch_Guides

Less drag than a button, no parts protruding into the airframe to catch on laundry, no worrying about hitting or not hitting centering rings (etc).

I love my conformal rail guides! For lighter rockets I cut them in half, and to make sure they don't come loose I score the bonding surfaces very heavily with a xacto knife making sure to leave undercuts for the epoxy to squeeze into, haven't had one come off yet.
 
Back
Top