"Flying MooMoo" Scratch Build Thread

The Rocketry Forum

Help Support The Rocketry Forum:

This site may earn a commission from merchant affiliate links, including eBay, Amazon, and others.

Barkley

Well-Known Member
Joined
Jul 1, 2015
Messages
572
Reaction score
15
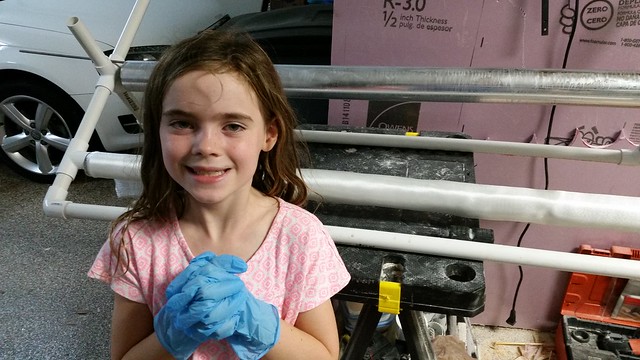
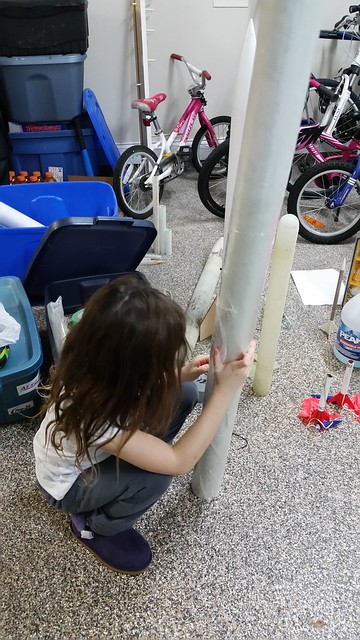
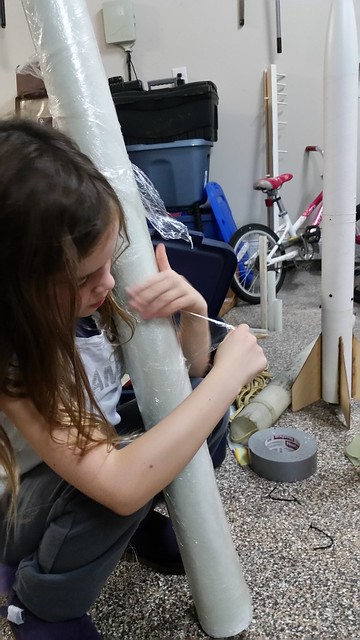
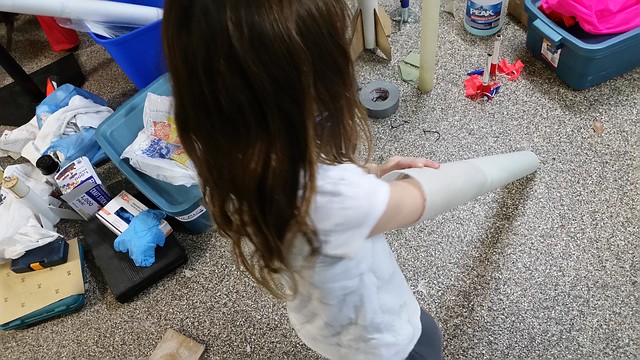
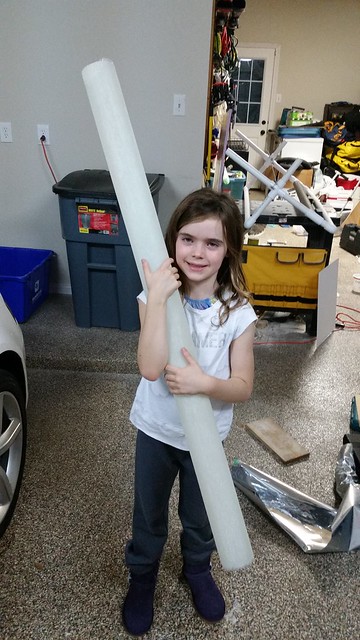
In October of last year I few my first ever rocket, and in August I got my L2. My 7 year old daughter has been with me every step of the way, and knows Newton's 3 laws of physics, can calculate center of gravity/pressure, the whole 9 yards. Her first OpenRocket design is a 29MM minimum diameter with side boosters that is just asking to get lost the moment it leaves the pad, so I asked her to design something a little different. Her design spec was the following:

- needed to be able to be flown off a sub-80 G motor (aka mid powered so she can sign the flight card on it's maiden flight)
- needed to be stable off the rail while still staying under 1500 feet (for when we launch at Johnson Space Center in Houston)
- needed to use our existing mandrels (29mm, 38mm, 54mm, 77mm)

Well... damn if she didn't design the attached OpenRocket file. Does well with G, but sims to 6000 feet and M1.2 with a big J. I mentioned that a 54mm MM would be more versatile, but she insisted it be 38. Who was I to tell her she's wrong...

Anyway, this will be my first TRF build thread, so I'm hoping to both share and learn at the same time.View attachment Flying Moo Moo.ork
 
Last edited:
So, here's the 7 year old rocket designer:

attachment.php


And if someone knows how to rotate a pic on TRF, please let me know.
 
Last edited:
Left to right, peel ply, .4 oz FG cloth, .1 oz mylar film. The shrink wrap is in the garage.
attachment.php
 
Last edited:
So, I had a 36 cm section of 77mm FG tube left over from a previous build, and her NC is supposed to be 35 cm long... perfect. In my previous builds I'd used this method for making a NC:

[video=youtube;z6VvQmoE0cg]https://www.youtube.com/watch?v=z6VvQmoE0cg[/video]

For the record, John Coker has a superb video of how to PROPERLY make a nose cone, and someday I'll do one the right way. You can see his video here:

[video=youtube;Lo_g1VOVAcg]https://www.youtube.com/watch?v=Lo_g1VOVAcg[/video]

Here's a horrible pic of my princess after she helped me mark and cut the tube, and yes she was having fun:
attachment.php
 
Last edited:
I've made 4 nose cones using the crowning method, and all of them have needed a moderate to large amount of "fill and fair" to get them straight and symmetrical. Given that she wants it dual deploy, I'm going to use cable cutters fired from a sled in the nose cone, which means an opportunity to kill two birds with one stone. I have a straight section of threaded rod, and will use that as a center guide. The disk at the moment is intentionally too large, and will be cut down. A metal tip will be ordered and spun onto the all thread down to the disk when the rest of the NC is done. This should limit the fill and fair time, and what there is will have a built in guide for symmetry.

attachment.php
 
Last edited:
FG cloth cut:
attachment.php


EDIT to ADD: at the bottom of the pic is the 4 foot long 38mm mandrel. Yes, I'm making a 3' 9" 38mm tube for 1 foot of MMT, but some left over thin walled 38mm tubing won't go to waste. :)

What's there is enough for 5 wraps around the mandrel.

Weigh the cloth, and mix around 110% of that weight in epoxy:
attachment.php
 
Last edited:
Mandrel on the jig with mylar film applied. One coat of Frekote to get it to release from the inside of the tube when we're done.
attachment.php


And my tried and true. I've heard that RocketPoxy is a great high temperature laminating epoxy, but I've yet to use it, everything I've done so far hasn't needed it (or so I think). West System is just so easy to use... so until it fails on me, I'll keep using it.
attachment.php


Pics fixed.
 
Last edited:
Looks like a fun project. I have some very small children I hope to build rockets with one day.

This design looks very similar to the PML Explorer, which is a great rocket. Her design is slightly larger, so you won't get as much up for a given motor, but it sounds like that is part of the plan.

Any reason for fabricating the air frame components totally from scratch other than just to do it?

On the picture attachments, go read this: Forum FAQ Page on Attachments
To make it so they are oriented correctly, just open them in windows image viewer or Paint first and rotate them and save them. Then upload them per that FAQ post.

The videos you posted also sort of show up weird. I don't have an exact answer for how to fix them, just go back and look at the post and look at all the lines of code you can see, and then delete those in the post editor. Might take a few tries, just keep checking the format in the post preview to see if you got it.

BC
 
Brian, thank you. In both image viewer and paint the pics auto rotate the right way, so on my computer there is no issue. But I'll try it and see if it works.

Re why the fabrication, yes just to do it and learn from it. I hope to make something out of carbon one day that is L3 and stratospheric, so a bit of practice with FG won't hurt. The layup process with carbon is very similar, and the way I see it, practice on the cheap stuff until you're good.
 
I hope I'm not too late, but I highly recommend getting some parchment paper to make it easier to pull the cured laminate off the mandrel. Trust me it makes it that more easy.
 
In both image viewer and paint the pics auto rotate the right way, so on my computer there is no issue. But I'll try it and see if it works.

I rotate the pics with an incredibly easy and simple way in Windows:

1) double click on the file in Windows Explorer, it opens itself in Windows Picture Viewer,
2) hit the rotate button as needed
3) close the viewer, which auto-saves.

If you want to keep the original, make a copy of the file first and open the copy. I've been doing this for decades and it's still the easiest solution when some other program makes it complicated/impossible.
 
I hope I'm not too late, but I highly recommend getting some parchment paper to make it easier to pull the cured laminate off the mandrel. Trust me it makes it that more easy.

With Mylar film and Frekote it's beyond easy. Frekote is a dry release, and a friend doesn't use mylar at all - he puts 10 coats of Frekote directly on the tube, heats the tube while the epoxy cures, then puts ice down the tube when it's time to pop it off. I previously had to cut 2 tubes off mandrels, so now I use the mylar film with mold release.
 
One trick I've learned... I like using West hardener 206 over the longer setting 209, but given that I'm in Texas and the temperature in my garage can easily get over 100F even in October, the pot life can easily be in 10ish minute range for 206. To give myself some breathing room I keep both the resin and hardener inside in the air conditioning, which gives me some additional pot time, but I also make some coolant for my epoxy mix. I take two nesting containers from a local take out spot, then half fill one with water and stick it in the freezer. Then I mix the epoxy in the other one, and nest it into the container with the ice. This gives me the resin and hardener I want, and extends the pot life for as long as I want it.

attachment.php
 
Last edited:
So... MMT build day. Here's the product on the mandrel:
attachment.php


I had my 54mm mandrel on the little section of PVC, holding the FG mat as I spooled it onto the working mandrel. (No pics, sorry.)

Once the epoxy set, here we are pulling off the shrink wrap:
attachment.php


Peel off the peel ply:
attachment.php


Then tap the end of the mandrel on the wooden block on the floor, and slide it out:
attachment.php
 
Last edited:
Next, remove the mylar from the inside of the tube:
attachment.php


Then hit it with some 150 grit sandpaper to get it all smooth. Here is the finished product:

attachment.php


And no, I won't be going into this level of detail for the body tubes, or any other material.
 
Last edited:
Can you say 'thin walled'? I might have to bulk it up so that the motor retainer will fit...

attachment.php
 
For some reason I'm now unable to upload photos. Not sure why. EDIT - evidently the site deleted the ability to upload photos directly. It's now a pain in the ass, and a shame.

MMT done (as per above), 3 centering rings cut, 3 fins cut. Houston is about to get a nasty storm... which means it's a perfect day to make a 77mm glass body tube. The process is the same as the above... just with a bigger mandrel and more cloth.

Pic of fins, centering rings and MMT plus the mandrel for the body. It's now wearing 5 wraps of glass.


22432549492_928d6a1cdf_z.jpg
[/URL][/IMG]
 
Last edited:
Lesson of the day: when mixing a large batch of epoxy, STIR REGULARLY. I got 2/3rds of the way through a tube layup, with the epoxy in my ice bath AND with my garage in the mid 70s F, and it started to kick halfway through the layup. My daughter was there, and my focus was split. If I'd been stirring during the layup like I usually do, it wouldn't have been an issue. Rookie mistake... live and learn. (The smart learn from their mistakes, but the really smart learn from the mistakes of others. Be really smart.)

So, your epoxy starts to kick mid-layup. What to do? JUST STOP. Once the epoxy starts to go, there is almost nothing you can do to stop that chemical reaction, and when it gets to the gel phase if you mess with it you're only going to make things worse. Stop, and literally just walk away. Let it kick, fully harden, then try to save the tube after the fact. Sand the s out of it, get it smooth, mix some more epoxy and finish the layup as you would (with peel ply and shrink wrap if you aren't doing a vac bag setup). You may not be able to save it, in which case you have a lot of tube that you can now use as tube coupler/nose cone shoulder.

Like I said upthread, I'm doing this to learn as much as possible, so when I eventually move to full carbon layup I will have worked through my rookie mistakes and will be able to do it right. If I'd done this with $200 of carbon cloth I'd have been upset. My 'make your early fails as cheaply as possible' mantra has succeeded.
 
You'll find carbon fiber is tons easier than fiberglass. Fiberglass is just a more pain in the neck to saturate than carbon fiber.

Here is a tip, mix separate batches instead of one big batch. This will increase your working time.
 
I'm hoping what you say about CF holds true. I've been told that unlike FG (1) you need a makeshift oven and vac bag setup for CF, and (2) CF doesn't go clear when wet so it's tough to know when you've hit the saturation point (hence the need for the vac bag).

RE separate batches, you get close to 30 minutes of pot time with West 105/206 at 75F and an ice bath if you are not cerebrally challenged and forget to stir the pot. I intentionally put a bit too much epoxy on the early wraps, knowing each subsequent wrap can soak up the excess. If that starts to kick while you're mixing the next batch, the early runs don't spread the epoxy, and you're now heavier than need be. Plus you've defeated the purpose of the peel ply/shrink wrap. I hear what you're saying... but if you can do it with one pot of epoxy you're better for it.
 
View attachment Flying Moo Moo v2.ork

Change to the OR file. I bumped up the nose weight slightly, as the metal tip, allthread and sled make it unlikely to be only 150 gm. (I also suspect 200 gm is unlikely.) We're also now planning on keeping the overall tube length at 110 cm, but breaking it 40 cm down from the nose. There's now a baffled FG bulkhead behind the coupler, and this will hold the parachute cord. (Baffled to allow motor eject.) With a coupler and epoxy both holding it in place, it should be stronger than the proverbial brick s-house. It'll also make replacing the cord easy, and any future zipper will be very easy to deal with.

Edit to Add: the 38mm motor retainer should be in the mailbox, and the cable cutters have been shipped. Excellent...
 
Last edited:
I'm hoping what you say about CF holds true. I've been told that unlike FG (1) you need a makeshift oven and vac bag setup for CF, and (2) CF doesn't go clear when wet so it's tough to know when you've hit the saturation point (hence the need for the vac bag).

RE separate batches, you get close to 30 minutes of pot time with West 105/206 at 75F and an ice bath if you are not cerebrally challenged and forget to stir the pot. I intentionally put a bit too much epoxy on the early wraps, knowing each subsequent wrap can soak up the excess. If that starts to kick while you're mixing the next batch, the early runs don't spread the epoxy, and you're now heavier than need be. Plus you've defeated the purpose of the peel ply/shrink wrap. I hear what you're saying... but if you can do it with one pot of epoxy you're better for it.

You only need an oven if your epoxy is a post cure type. Vac bagging is also not necessary. Despite the carbon not turning transparent, you can still see when it wets out. I've used resins with viscosities of 1,000cps and lower with great success. Trust me you'll love it more than fiberglass.
 
Peeling the shrink wrap. No pics of the removal of the peel ply because we did it in the dark. (When you peel the peel ply from the FG there is a blue glow when you pull it off due to the static electrical charge. Try it - it's very cool.)


Also in the shot is a Leviathan and her younger brother's design (with the hemispheric nose cone, another FG build with motor mount eject).

 
The advantage to having little arms with a 77mm ID tube... mylar removal:


And a happy girl, now that the main components are made:

 
One last pic, with description.


When you're done, if you have anywhere near the minimum amount of epoxy you should clearly see the weave. Again, excess epoxy is weight with no additional stiffness, so you want the minimum. When the ply comes off you should see some little 'hairs' on the tube, which is evidence that the peel ply was wicking the excess epoxy as designed. I didn't do it with this tube, but for maximum stiffness you change the bias of the cloth with some of the wraps on the 0/90 then 45/135. The loads on the tube are then spread down the fibers in all directions, making for a MUCH stronger tube. This is what makes filament wound glass worth a premium, as you get fibers wound in all directions (not just 8).

At 117mm long this tube is 528 grams, which I think is less than stellar. I previously made a similar tube (same diameter, 114 cm length) around 50 grams lighter.
 
Last edited:
Back
Top