Note: There was a big wordy post at the end of page 5 that explains some of the backstory for this part...hate it when a page turns over between related posts.
Paint Scheme:
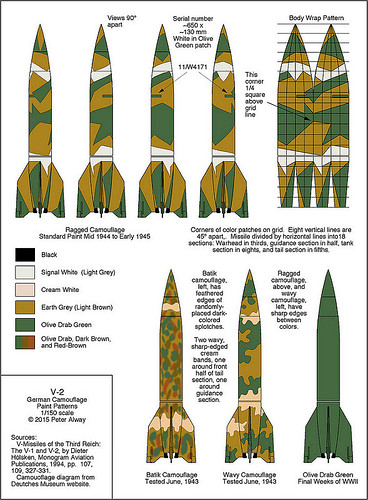
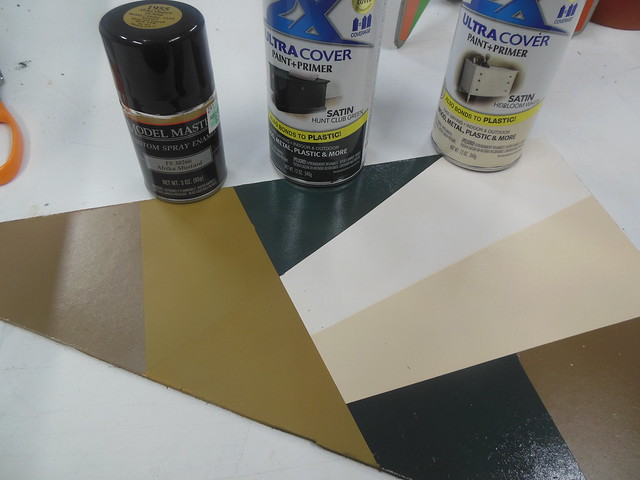
As I said I changed my mind on the paint, and I'm going with the ragged camo using the details provided by Peter Alway in the thread I have repeatedly linked...for ease the pic is below if you are unfamiliar with the design.
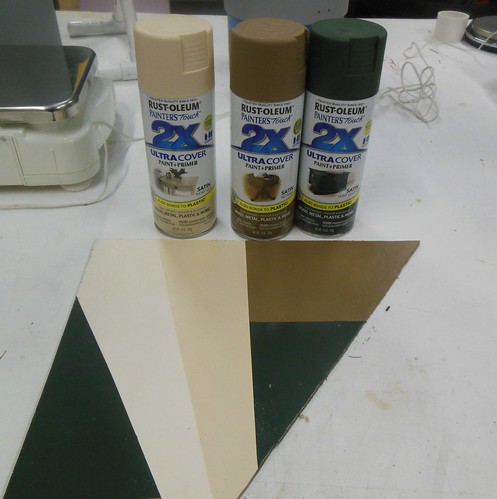
After several rounds of testing I think I have colors I can live with using really friendly to apply paint. The Rusto 2X Satin is really close except for the brown, but I think it will still look pretty good. Valspar has a really close match on all three colors, but the paint was absolute crap, and there is no way I would get a good finish with it.
Nose Weight:
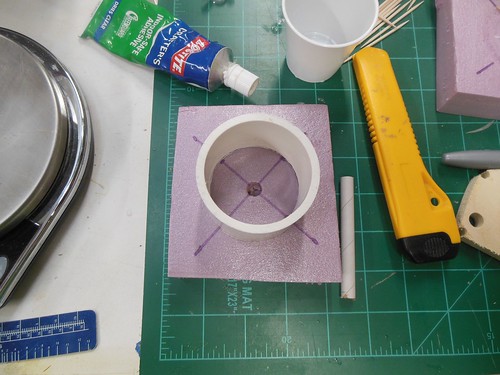
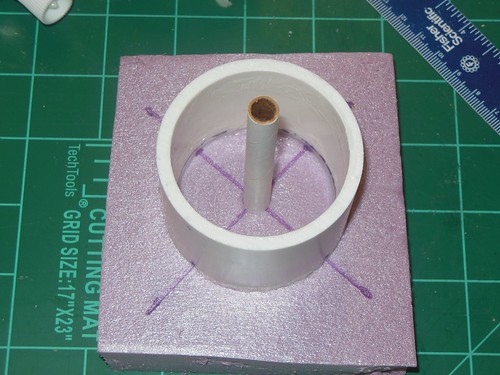
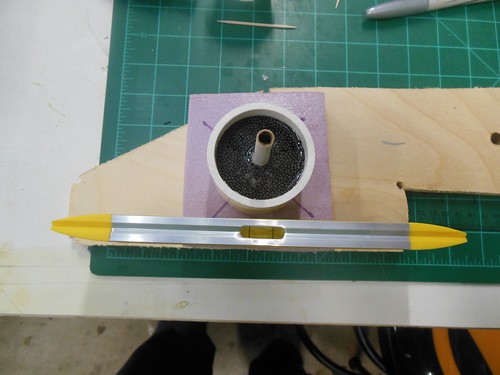
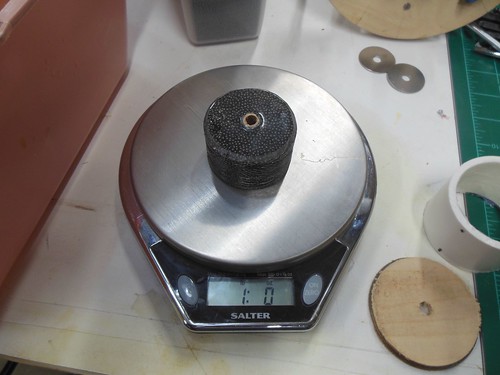
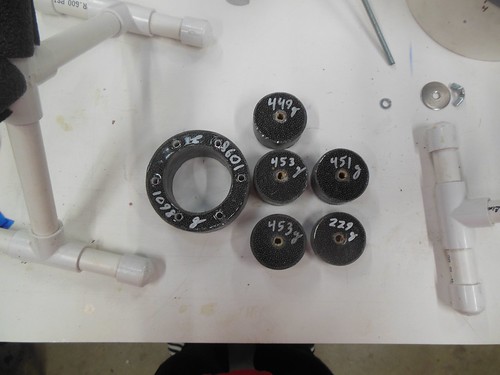
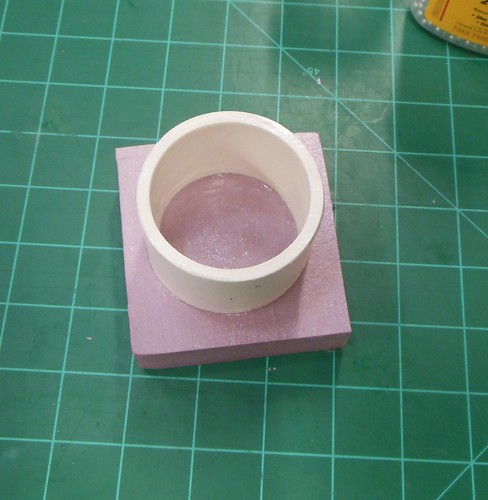
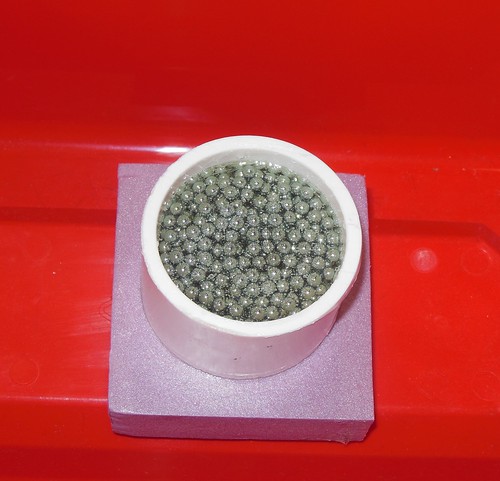
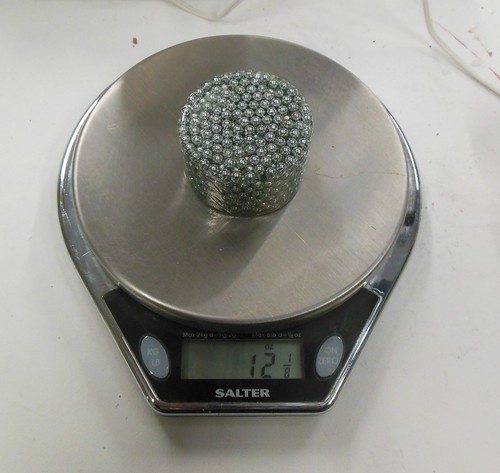
To figure out the removable nose weight I've been practicing with some steel pellets since my lead shot will not arrive until tomorrow. I need disks that will fit through the forward ring of the Nose cone, and the inner diameter of a piece of 2" PVC is just right with enough wiggle to make alignment less frustrating later. As a bottom for my mold I'm using a piece of foam that is glued to the PVC with foam safe craft adhesive... a good bond, but not too good as to be problematic on removal. So the epoxy doesn't stick the inside of the mold was smeared with a thin layer of silicone caulking. The pellets were added and cast in place with US Composites 635 laminating resin. After that hardened overnight it was easy to snap off the foam and press out the weight. This one is 1 1/4" think and weighs a little over 12 oz. The real weights will need a hole in the middle, and I can cast with a tube in the center, but I think it will be easier to just drill the weights on the press after the fact...either way will be fine. I'm estimating these will be a little under 1 lb per linear inch when done in lead and drilled. That will give me 5-6 weights in the space available, which will be plenty for the removable weights.
More on the fixed weight plan later.
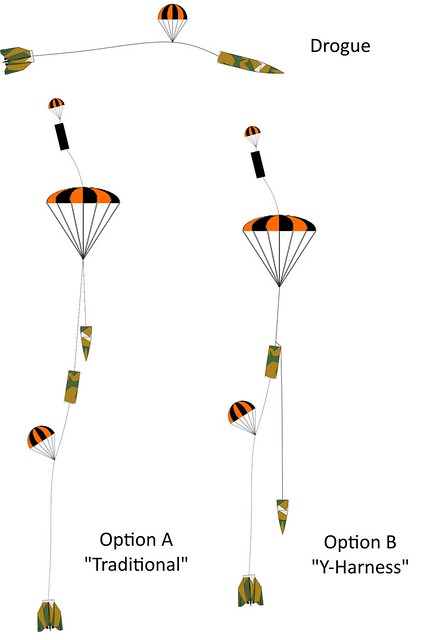
Also, I ordered the chutes...I need a beer.
One more: Also, ordered my first OneBadHawk recovery Harness for the drogue section. Got the kevlar jacketed 3/4" nylon. Normally I use straight kevlar, but with all the nose weight I want some shock absorption to help keep the nose on (keep the shear pins intact). I'll still use straight 1/2" Tubular Kevlar in the main compartment since I have a lot.
Paint Scheme:
As I said I changed my mind on the paint, and I'm going with the ragged camo using the details provided by Peter Alway in the thread I have repeatedly linked...for ease the pic is below if you are unfamiliar with the design.
After several rounds of testing I think I have colors I can live with using really friendly to apply paint. The Rusto 2X Satin is really close except for the brown, but I think it will still look pretty good. Valspar has a really close match on all three colors, but the paint was absolute crap, and there is no way I would get a good finish with it.
Nose Weight:
To figure out the removable nose weight I've been practicing with some steel pellets since my lead shot will not arrive until tomorrow. I need disks that will fit through the forward ring of the Nose cone, and the inner diameter of a piece of 2" PVC is just right with enough wiggle to make alignment less frustrating later. As a bottom for my mold I'm using a piece of foam that is glued to the PVC with foam safe craft adhesive... a good bond, but not too good as to be problematic on removal. So the epoxy doesn't stick the inside of the mold was smeared with a thin layer of silicone caulking. The pellets were added and cast in place with US Composites 635 laminating resin. After that hardened overnight it was easy to snap off the foam and press out the weight. This one is 1 1/4" think and weighs a little over 12 oz. The real weights will need a hole in the middle, and I can cast with a tube in the center, but I think it will be easier to just drill the weights on the press after the fact...either way will be fine. I'm estimating these will be a little under 1 lb per linear inch when done in lead and drilled. That will give me 5-6 weights in the space available, which will be plenty for the removable weights.
More on the fixed weight plan later.
Also, I ordered the chutes...I need a beer.
One more: Also, ordered my first OneBadHawk recovery Harness for the drogue section. Got the kevlar jacketed 3/4" nylon. Normally I use straight kevlar, but with all the nose weight I want some shock absorption to help keep the nose on (keep the shear pins intact). I'll still use straight 1/2" Tubular Kevlar in the main compartment since I have a lot.
Last edited:
.jpg")


")