


I'm not happy with my results trying to fill in the lines on the body tubes,I can still feel them with my finger nails.I've been using this red goop made by Bondo and really not enjoying using that either . I'm going to redo it today and I have 2 questions .Can I use Elmer's wood filler on the lines? I have a tub here ,don't remember why it looks brand new. Also ,should I have primed the tubes first ? and won't this effect how strong the bond is between tube and fins? Oops a 3rd question,how important is it I go out and buy a sanding block. Thanks again
You are using an out of date browser. It may not display this or other websites correctly.
You should upgrade or use an alternative browser.
You should upgrade or use an alternative browser.
Lines on body tubes
- Thread starter sheena
- Start date
Help Support The Rocketry Forum:
This site may earn a commission from merchant affiliate
links, including eBay, Amazon, and others.
- Joined
- Jun 6, 2011
- Messages
- 7,563
- Reaction score
- 1,159
Sheena- there's going to be a million different ways to do this and as many answers. Here's what I do that works for me: Thin a tablespoon or two (depends on the tube size/length) of Elmer's Wood Filler (EWF) to the consistency of your favourite mustard. Spoon into a sandwich/snack/ziplock bag and cut a small corner off. Now you have the equivalent of an icing bag for applying the EWF to the spirals. It takes a little practice, but working on about 6" increments, you can use an old credit card to smear the filler along the line to fill the voids. This limits how much filler you ultimately have to sand off anyway. Also saves filler and time! After it's sanded down then apply the primer. I'll prime the whole thing as many times as I need to get the finish I want but I fly in the desert and really good paint jobs last for the first picture on the rail. I do sand away where the fillets and slots are for adhesive promotion with the idea the fillets will hide the sanding and paint then covers the whole mess anyway. Just my take and certainly not gospelI'm not happy with my results trying to fill in the lines on the body tubes,I can still feel them with my finger nails.I've been using this red goop made by Bondo and really not enjoying using that either . I'm going to redo it today and I have 2 questions .Can I use Elmer's wood filler on the lines? I have a tub here ,don't remember why it looks brand new. Also ,should I have primed the tubes first ? and won't this effect how strong the bond is between tube and fins? Oops a 3rd question,how important is it I go out and buy a sanding block. Thanks again
blackbrandt
That Darn College Student
- Joined
- Mar 18, 2012
- Messages
- 9,281
- Reaction score
- 60
Now, if you want to know how to fill spirals like a god, ask Nathan (that's his username) on here. His rockets he builds are almost godly, with the word "spiral" not in his vocabulary.
Nathan
☢
- Joined
- Apr 19, 2012
- Messages
- 2,230
- Reaction score
- 755
...Also ,should I have primed the tubes first ? and won't this effect how strong the bond is between tube and fins? Oops a 3rd question,how important is it I go out and buy a sanding block...
Glue on the fins first and then fill the spirals before spraying primer. But if you see imperfections after spraying the primer you can still apply more wood filler on top of the primer.
I have never used a sanding block on any part of a rocket.
Now, if you want to know how to fill spirals like a god, ask Nathan (that's his username) on here. His rockets he builds are almost godly, with the word "spiral" not in his vocabulary.
Thanks, but filling spirals is easy. I also use diluted Elmer's Carpenter's Wood Filler (CWF). I used to use Bondo but CWF works just as well and doesn't give off toxic fumes. Like fyrwrxz, I dilute the CWF to the consistancy of mustard which only takes a tiny bit of water but then I just wipe it on the spirals with my finger. After it dries I sand it smooth with 220 grit sandpaper. It usually takes a second application to get it perfect. Then 2 or 3 coats of sanded filler primer and you are ready to paint.
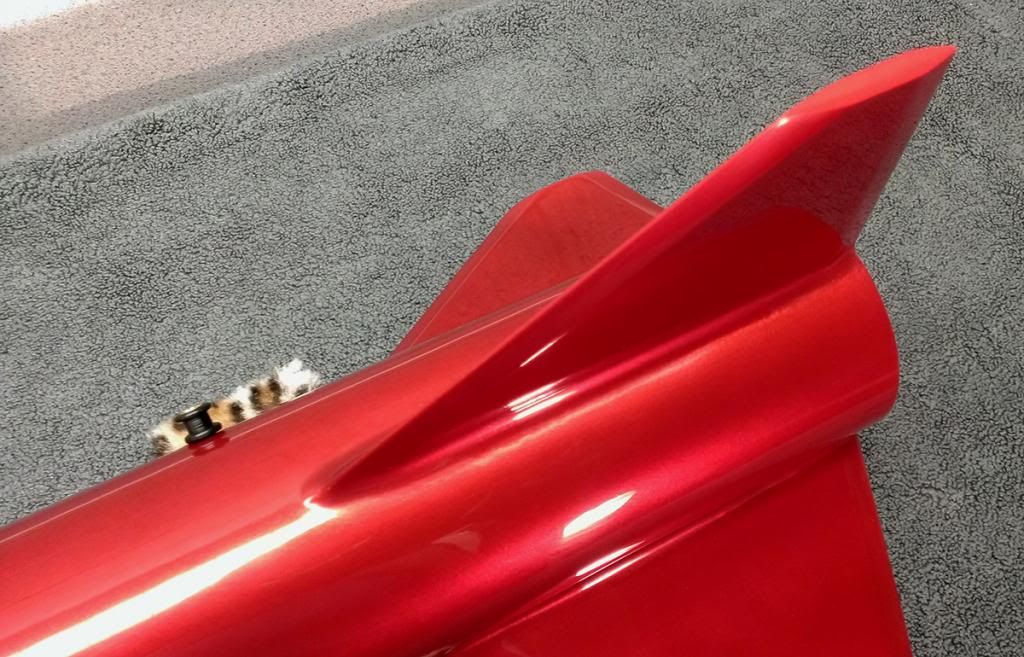
Of course I never miss an opportunity to re-post a picture. Here is my LOC Onyx, with no spirals. . .
Last edited:
codysmith
Well-Known Member
- Joined
- Oct 18, 2013
- Messages
- 1,189
- Reaction score
- 3
It's just so beautiful!!!Glue on the fins first and then fill the spirals before spraying primer. But if you see imperfections after spraying the primer you can still apply more wood filler on top of the primer.
I have never used a sanding block on any part of a rocket.
Thanks, but filling spirals is easy. I also use diluted Elmer's Carpenter's Wood Filler (CWF). I used to use Bondo but CWF works just as well and doesn't give off toxic fumes. Like fyrwrxz, I dilute the CWF to the consistancy of mustard which only takes a tiny bit of water but then I just wipe it on the spirals with my finger. After it dries I sand it smooth with 220 grit sandpaper. It usually takes a second application to get it perfect. Then 2 or 3 coats of sanded filler primer and you are ready to paint.
Of course I never miss an opportunity to re-post a picture. Here is my LOC Onyx, with no spirals. . .
Honestly, I don't put much work into my paint jobs because they never last for me. I can't even load a rocket in the car without destroying the paintjob.

mkadams001
Well-Known Member
- Joined
- Apr 10, 2009
- Messages
- 879
- Reaction score
- 1
Everyone does have their own methods and I think for a beginner it can be very confusing on how to start with a finish. I think when I began building rockets in '69 I had an Estes book that had instruction on how to paint a rocket and that is what I followed. Basically it was to use dope sanding sealer on the balsa and then paint the rocket with spray or brush. To this day I still use sanding sealer on balsa and plywood. Here is how I finish a rocket that is to be a nice looking flier.
1. I do a few coats of sanding sealer on the fins (and nose cone if it is balsa) sand in-between coats until it smooth. Sanding sealer drys fast so it does not take too long.
2. I use Dupli-color gray primer. It is a lacquer primer usually found in auto parts stores. I will spray on about 2 or three coats then sand it almost all off. This dries fast as well but don't think you can dump on one thick coat. The top will skin over and be wet underneath.
3. This is when I use the red spot putty. Again, this is lacquer based and will dry fast if you apply it thin. If you used enough primer your spirals might be filled but there always seems to be places where you need to do some filling. Same applies to the fins grain. When it is dry, spray another coat of primer and sand smooth. Some people use two colors of primer to help see imperfections. Do not apply thick layers of red putty. It will skin over and stay wet underneath. Not a big deal because you can spread it again but it wastes time. The spot putty melts the primer, that's ok applying the spot putty is fast, your not trying to do a drywall joint.
4. If it looks good to you then you can apply a primer sealer if your want. I don't. I just start painting. I use Dupli-Color lacquers. They dry fast and if you mess up a little when they dry you can fix the problem.
This all takes practice.
I use this method because I like to work fast. I don't want to wait a week for paint to dry. I can finish a rocket with masking two colors in an afternoon and fly it the next day and the rocket looks really good. If I want a show rocket it takes longer because I will take the time sort the minor issues. The nice part about the lacquer primer is that I can topcoat it with anything.
If I am building an Estes kit I won't do this much work. I will seal the fins, maybe a coat of primer and then paint.
Sandpaper - I use mostly use 220 for the rough work and 320 for the finish. I never wet sand unless I am doing a repair on the paint. I will use coarser if I am working on plywood. 3M makes nice superfine sanding pads. These are about a 1/4" thick great for sanding the body tube primer.
Try what works best for you and have fun learning how to paint. It really does just take practice.
rharshberger
Well-Known Member
If you are using the Bondo Spot & Glazing putty it is recommended by the manufacturer to prime the surface first. I use both products BSG and diluted CWF depending on what I am doing/have on hand.
watermelonman
Well-Known Member
- Joined
- Sep 22, 2014
- Messages
- 2,597
- Reaction score
- 10
Number one reason to build fiberglass, hah!
Honestly, I don't put much work into my paint jobs because they never last for me. I can't even load a rocket in the car without destroying the paintjob.
I also am often at odds over this dilemma...the more work you put into making it look beautiful, the more it hurts if you lose it. Still, I prefer to give my rockets as nice a finish as I can reasonably afford the time to without making it a shelf queen.
My procedure:
1) Prime with gray Rustoleum Filler Primer (available at Walmart) - it fills as well as primes and helps part way with filling spirals as well as providing a good surface for the filler
2) Use Elmer's CWF straight on the spirals...applied with a piece of cut up junk mail credit card. I may water down a bit if it is too dry to make spreading easier
3) Sand with a sanding sponge...medium, then fine.
4) repeat 2-3 as needed/if wanted
5) finishing paint
I also use self-stick label paper on my wood fins.
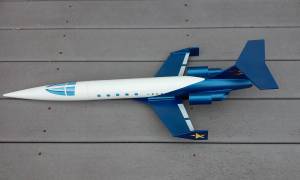
Here's my latest (and yes, it has flown...absolutely beautiful lift-off):
BDB
Absent Minded Professor
- Joined
- Aug 22, 2015
- Messages
- 2,556
- Reaction score
- 938
+1 for sanding sealer. I use AeroGloss. It is pricey and old-school. But it is easy to work with, doesn't warp balsa, dries in minutes and will make your tubes and fins feel silky smooth. Just sand the spirals to remove the gloss, then apply the sealer, sand and repeat if necessary. Usually two coats does the trick. The only issue is the smell. (My wife hates it!)
I haven't used any kind of body filler in the last 15years. I use the cheapest sandable gray primer I can get my hands on. currently Wal-mart @ .89/12oz can.
Spray three wet coats about 5 minutes apart, Let the model sit overnight. Sand with 240 to 360grit DRY sandpaper. if you still see any seams. Give the model another 2 or 3 wet primer coats. Personally I haven't needed more then 4 wet coats on the worst deepest Balsa Grain or body tube seams in years. Once your happy with the smoothness of our primer coat. the model is ready for color coats. Pay attention to the re-coat times on both primer and color cans.

_08-27-15.jpg")

 Decaled & Complete_02-10-08.jpg")
Spray three wet coats about 5 minutes apart, Let the model sit overnight. Sand with 240 to 360grit DRY sandpaper. if you still see any seams. Give the model another 2 or 3 wet primer coats. Personally I haven't needed more then 4 wet coats on the worst deepest Balsa Grain or body tube seams in years. Once your happy with the smoothness of our primer coat. the model is ready for color coats. Pay attention to the re-coat times on both primer and color cans.
mkadams001
Well-Known Member
- Joined
- Apr 10, 2009
- Messages
- 879
- Reaction score
- 1
I haven't used any kind of body filler in the last 15years. I use the cheapest sandable gray primer I can get my hands on. currently Wal-mart @ .89/12oz can.
Spray three wet coats about 5 minutes apart, Let the model sit overnight. Sand with 240 to 360grit DRY sandpaper. if you still see any seams. Give the model another 2 or 3 wet primer coats. Personally I haven't needed more then 4 wet coats on the worst deepest Balsa Grain or body tube seams in years. Once your happy with the smoothness of our primer coat. the model is ready for color coats. Pay attention to the re-coat times on both primer and color cans.
I agree that you can pretty much eliminate the need for filler by using the sanding primers.
Solomoriah
Well-Known Member
- Joined
- Feb 12, 2009
- Messages
- 820
- Reaction score
- 16
Rustoleum Filler Primer. I get it at Menards, as their prices always seem a bit lower than anywhere else. I do use Elmer's filler sometimes, but only for dings in the fins and such like, never for spirals.
I like to use both red oxide and gray. I spray on a coat of red oxide, then a coat of gray, then begin sanding. When I see the red oxide revealed, I know I've sanded an area enough. This avoids sanding through to the body tube and raising fuzzies that I have to sand off again.
I like to use both red oxide and gray. I spray on a coat of red oxide, then a coat of gray, then begin sanding. When I see the red oxide revealed, I know I've sanded an area enough. This avoids sanding through to the body tube and raising fuzzies that I have to sand off again.
lcorinth
Well-Known Member
- Joined
- Aug 5, 2014
- Messages
- 1,022
- Reaction score
- 46
First of all, let me say that Nathan's rocket is freaking beautiful. I don't know how the guy does it. I want to take a class from this guy.
My method of filling spirals with CWF is pretty painless, and requires little to no sanding. In fact, I have occasionally completely forgotten to sand off the CWF, and have only noticed in a couple spots. You can find it here.
My finishes are not anywhere as good as Nathan's, but my spirals are well-filled.