Eggfinder and LCD Receiver Build Thread

The Rocketry Forum

Help Support The Rocketry Forum:

This site may earn a commission from merchant affiliate links, including eBay, Amazon, and others.

HHaase

Well-Known Member
Joined
Aug 3, 2014
Messages
880
Reaction score
338
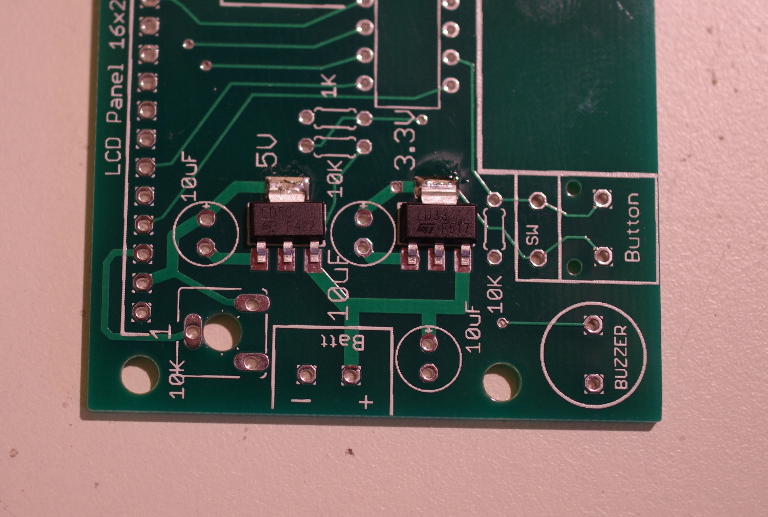
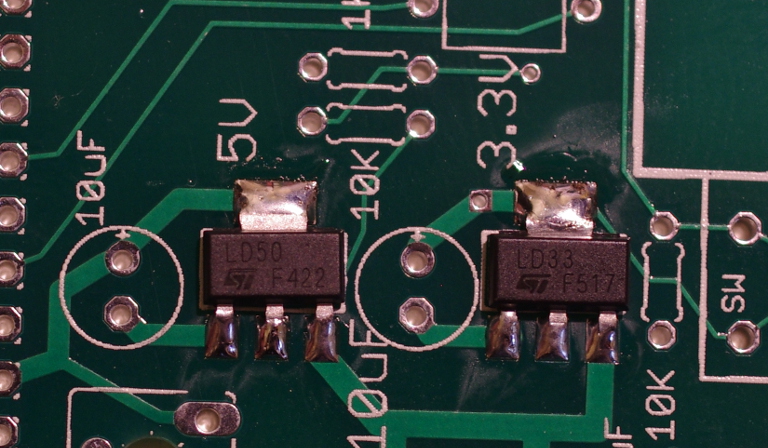
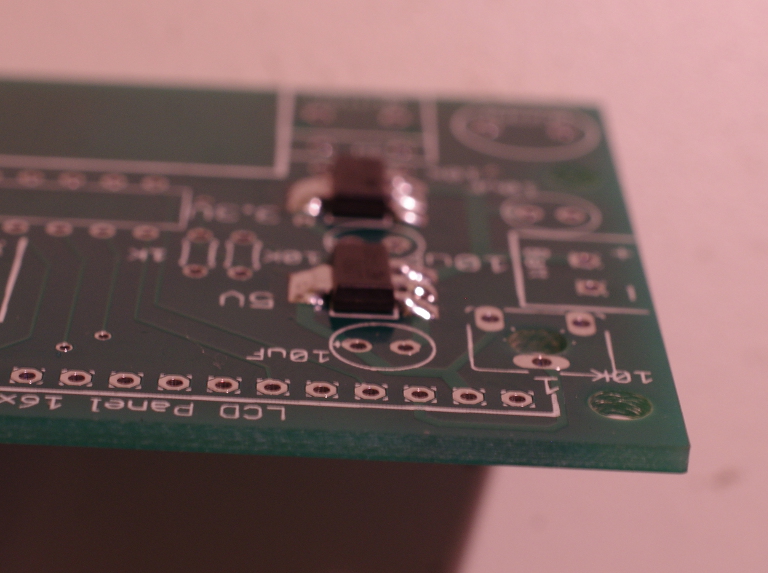
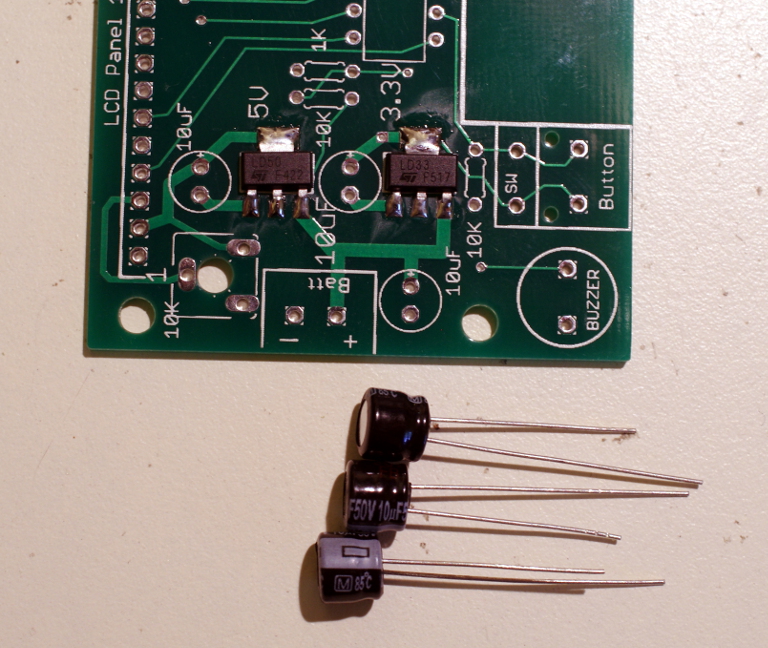
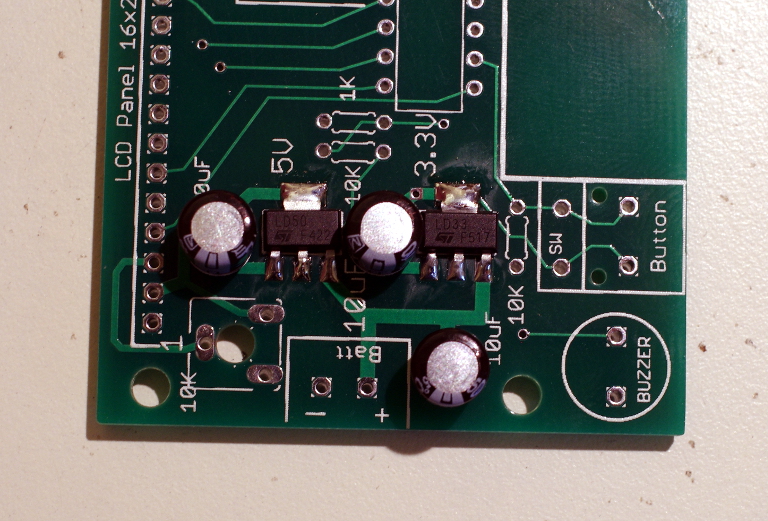
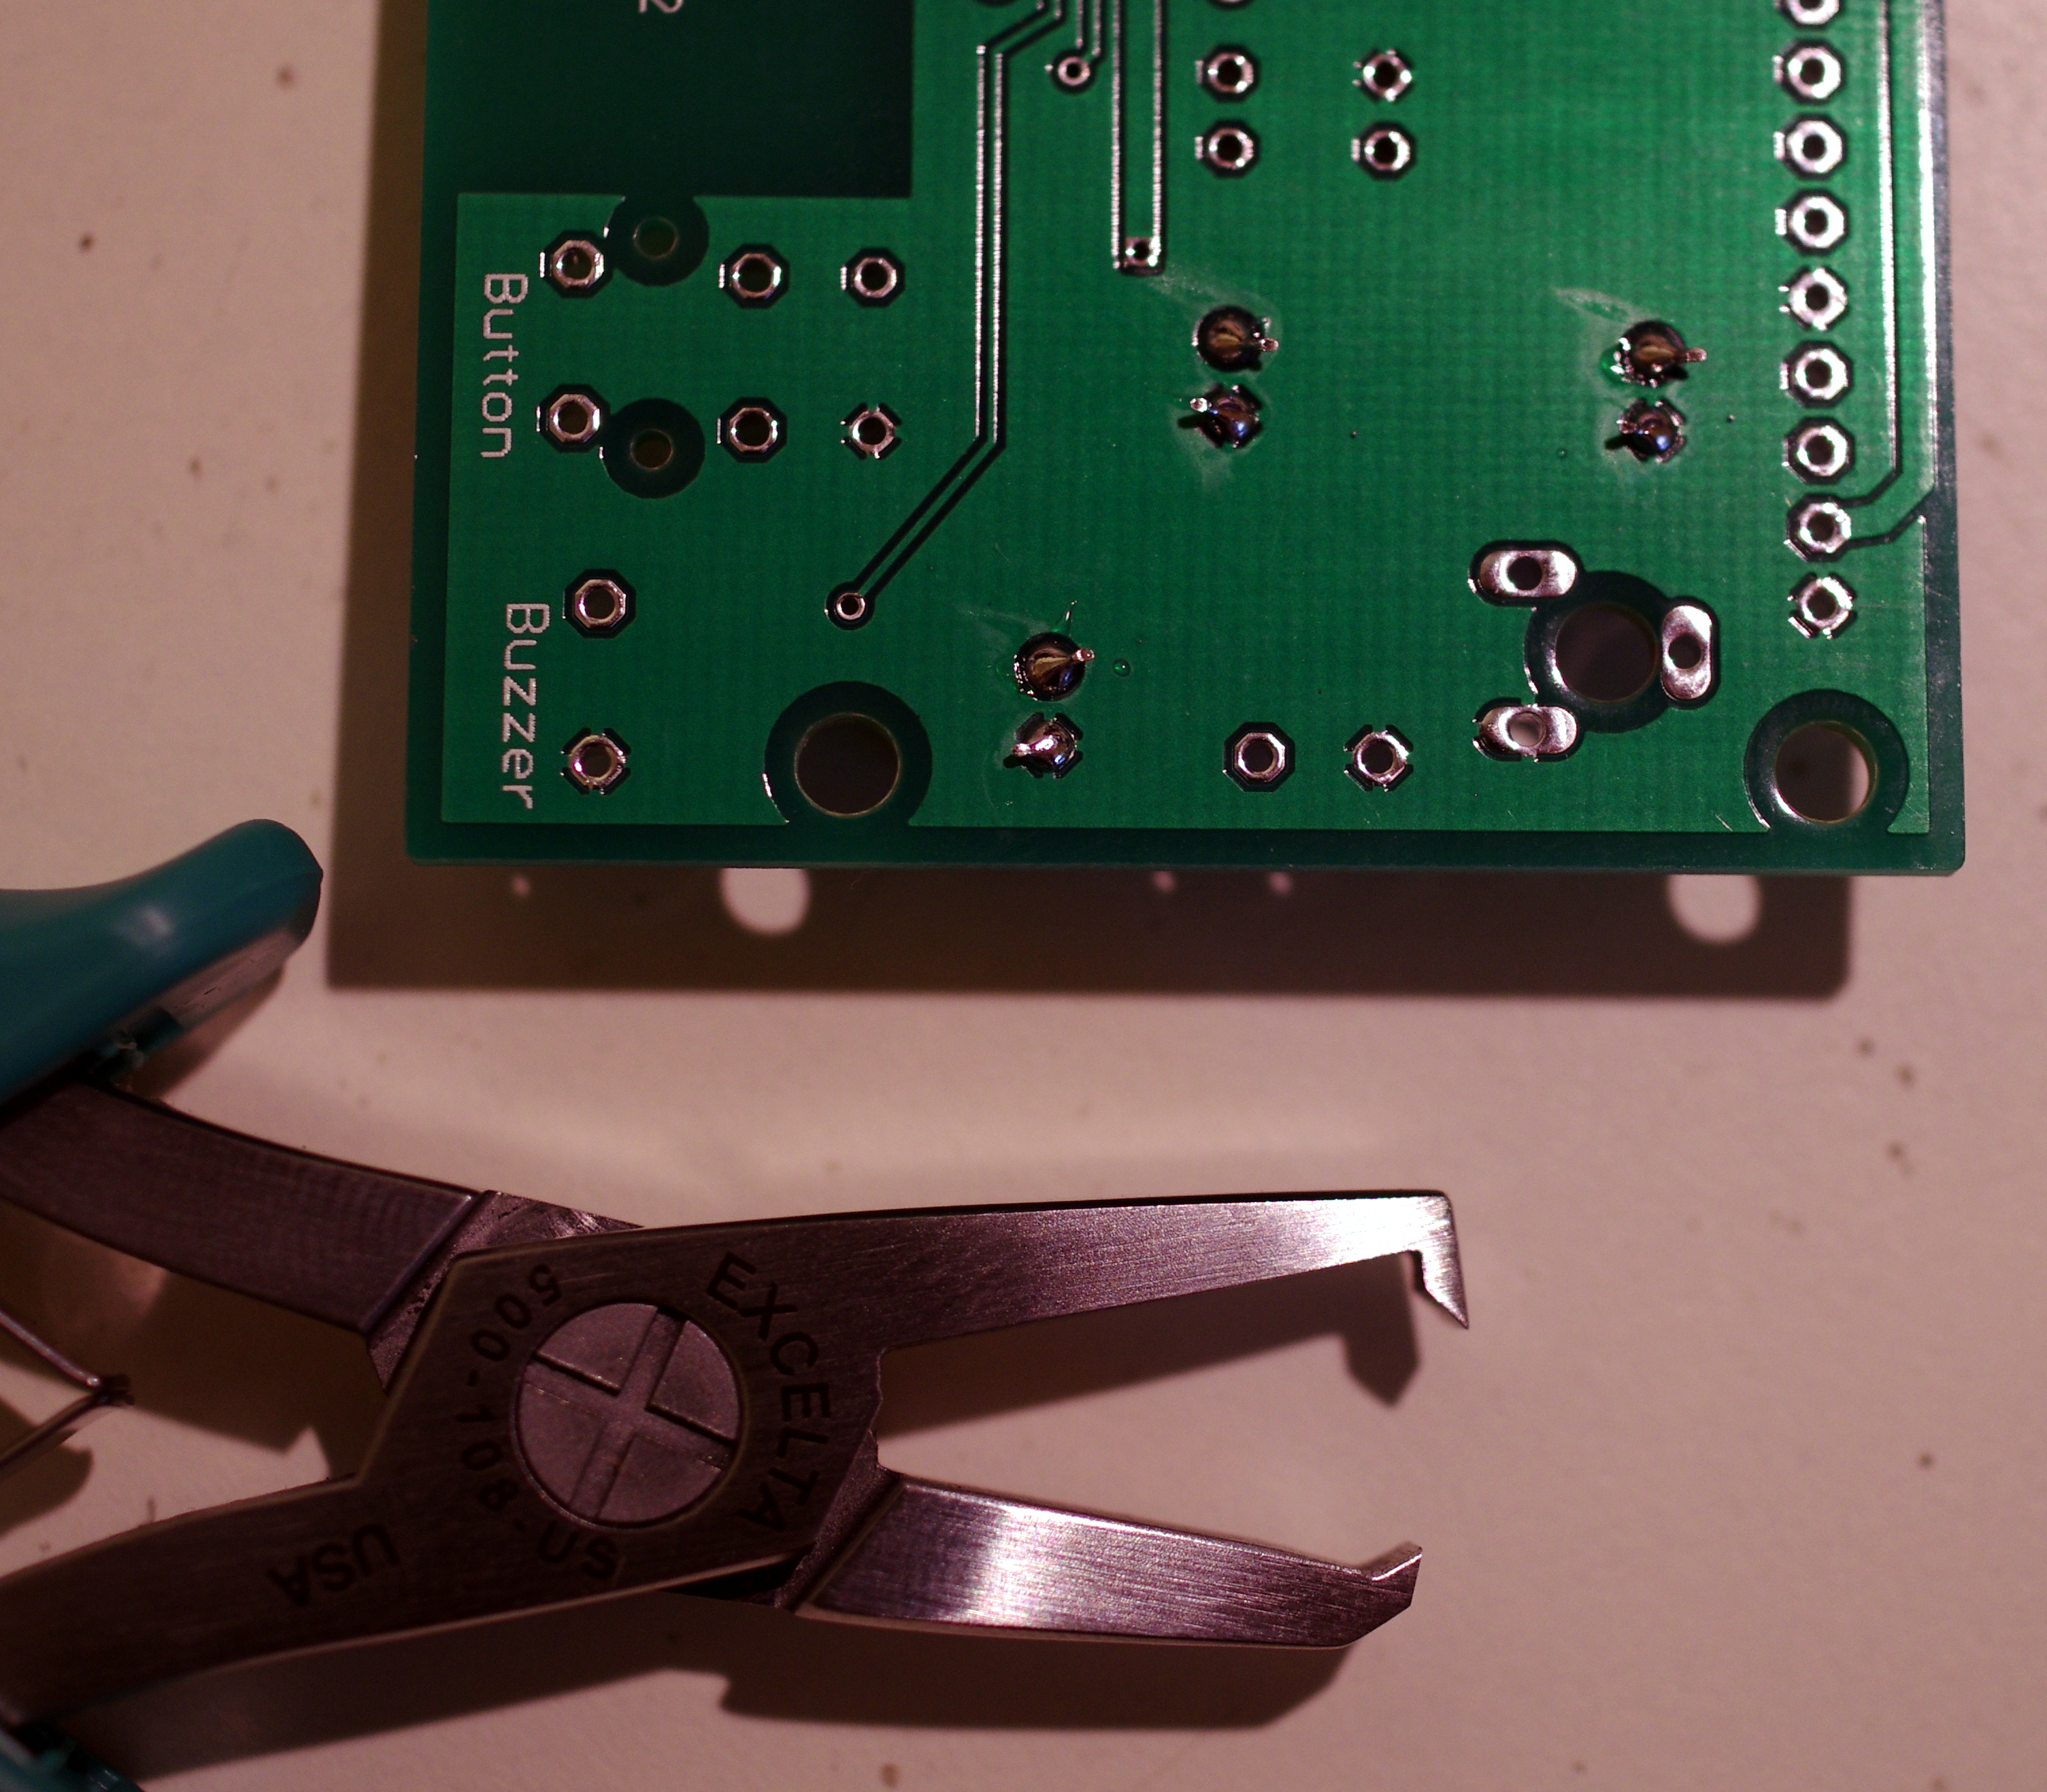
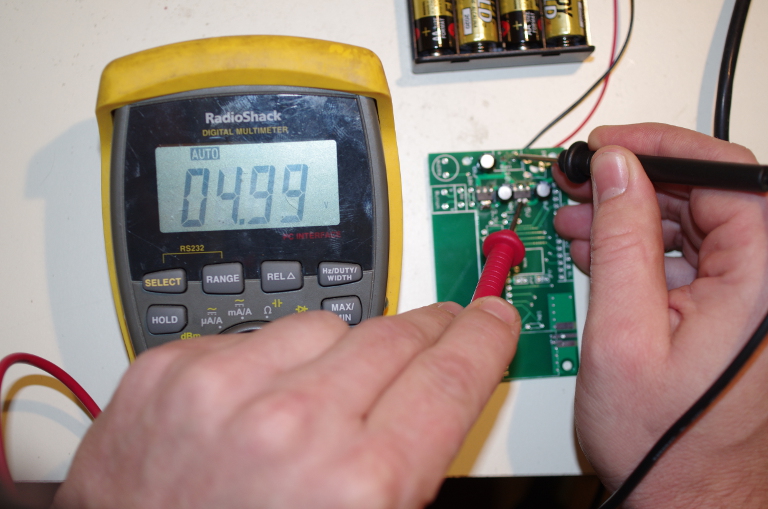
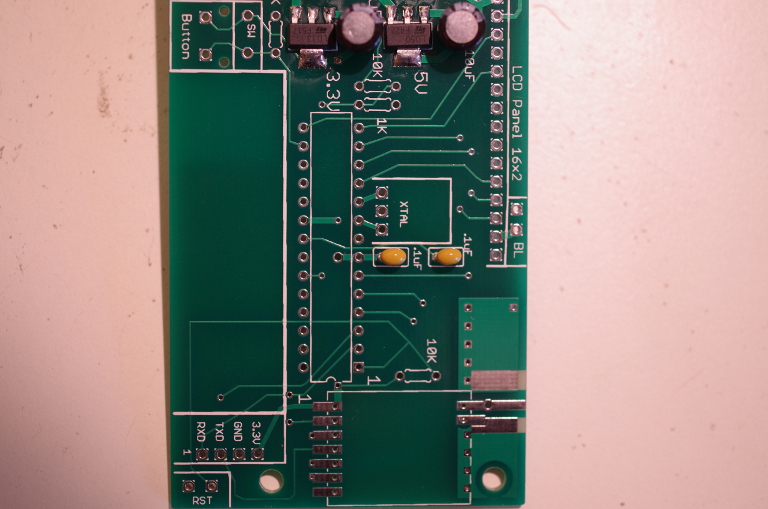
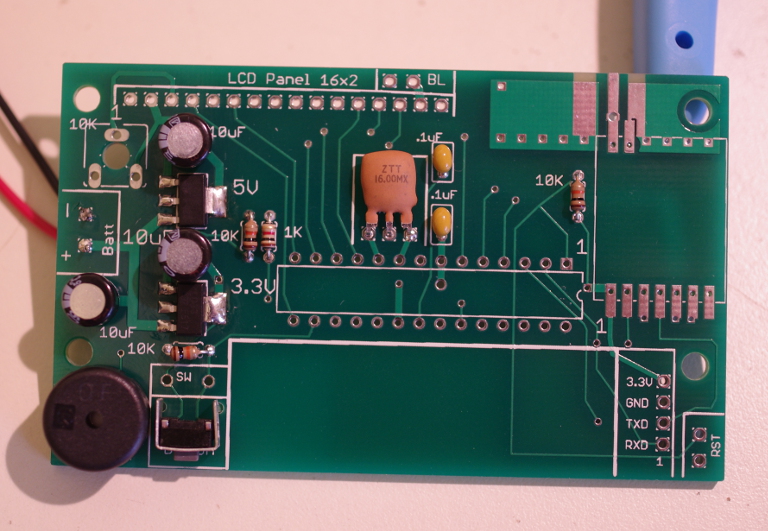
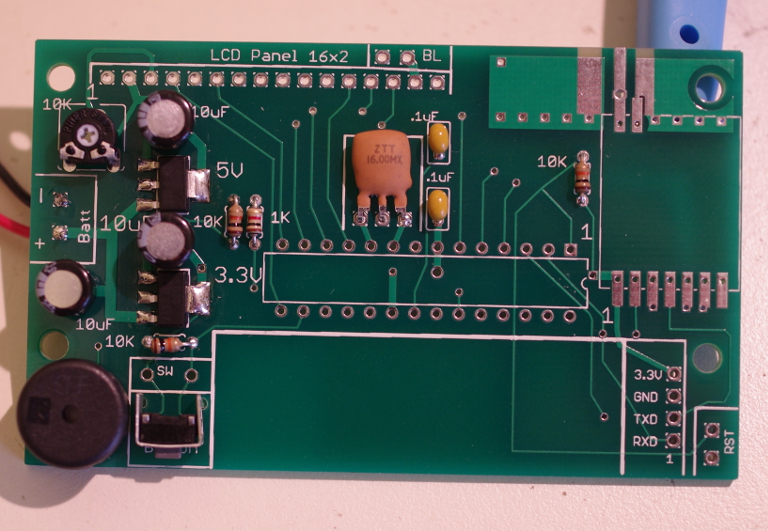
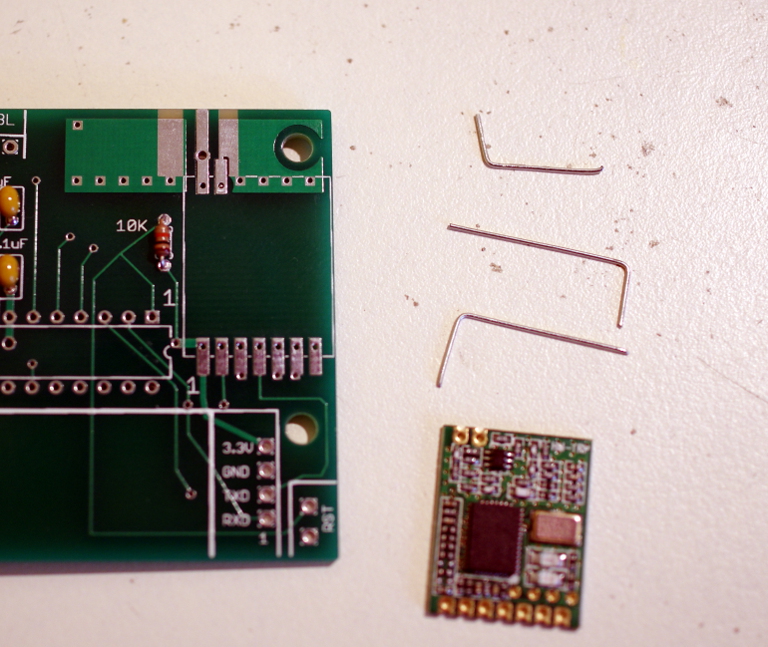
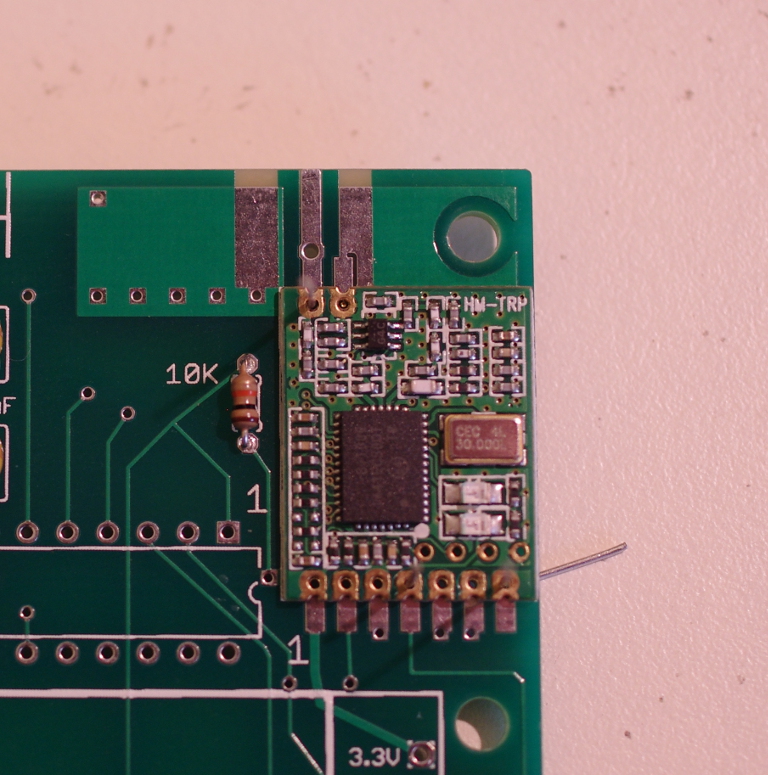
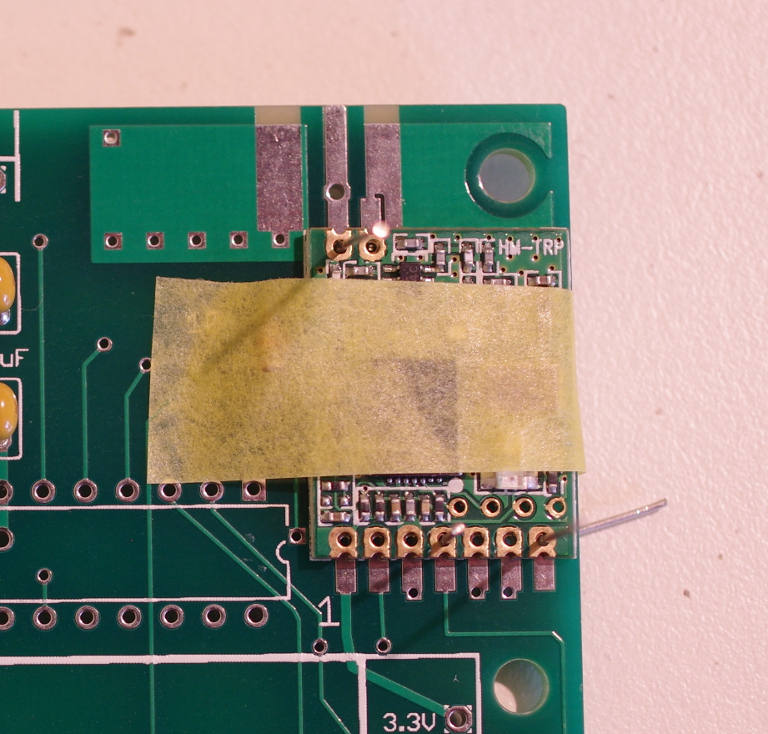
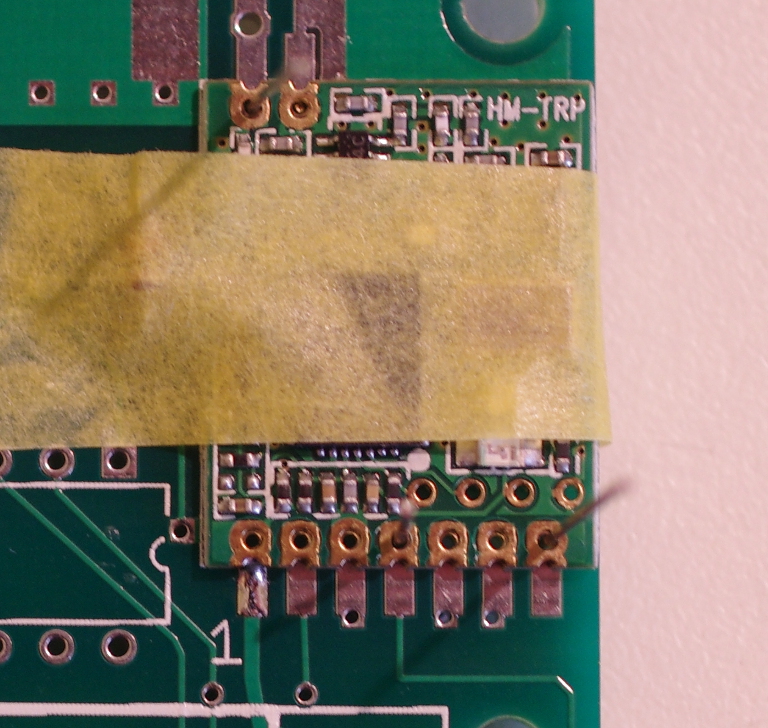
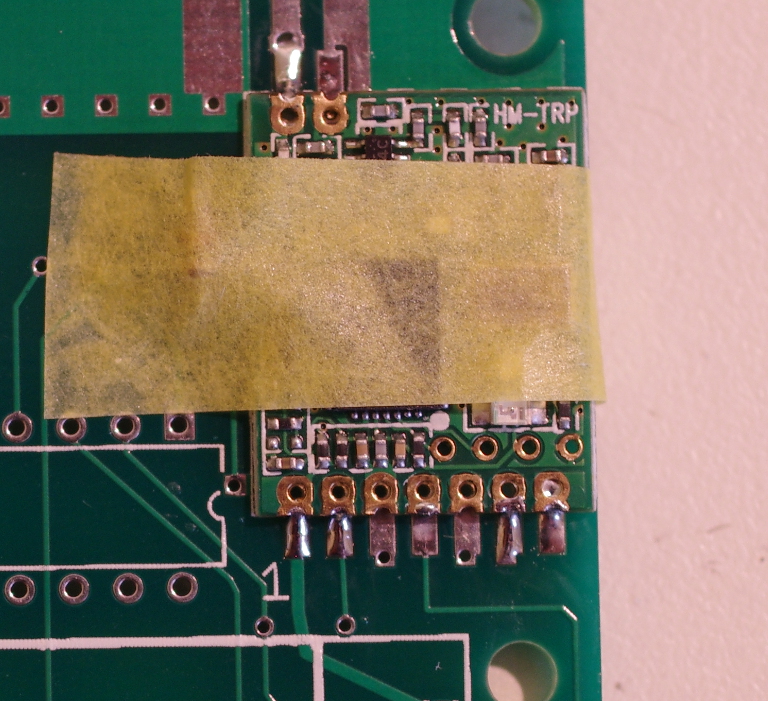
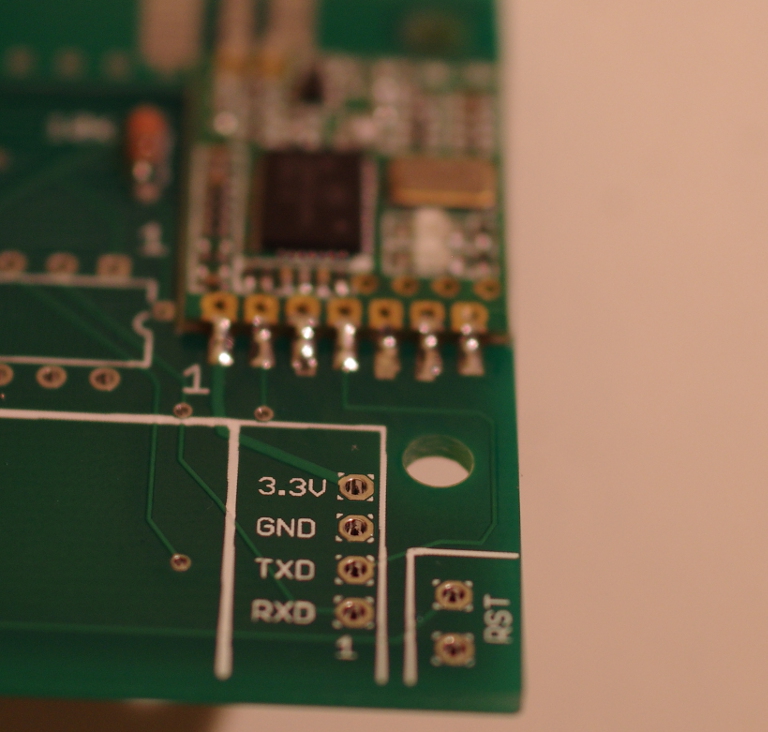
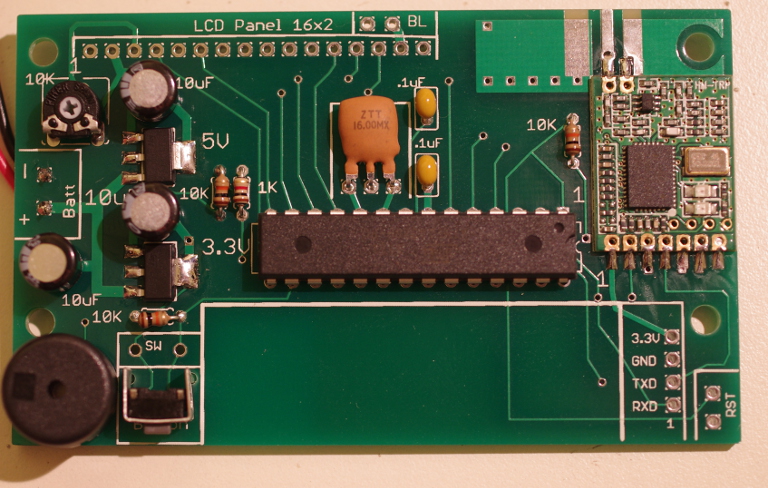
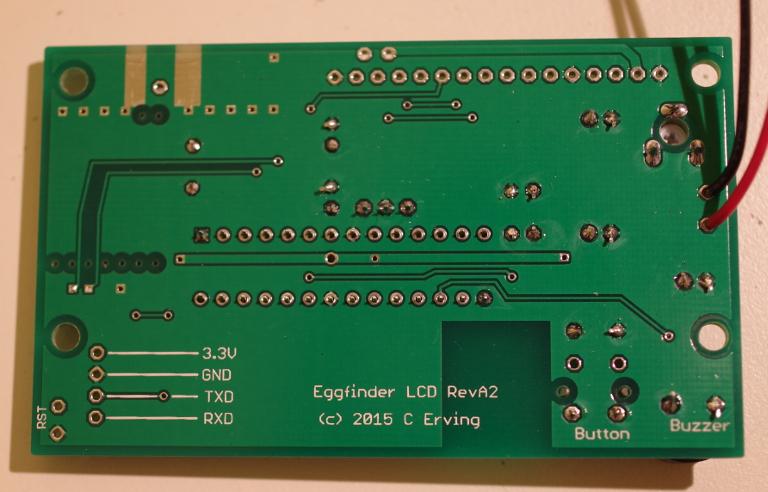
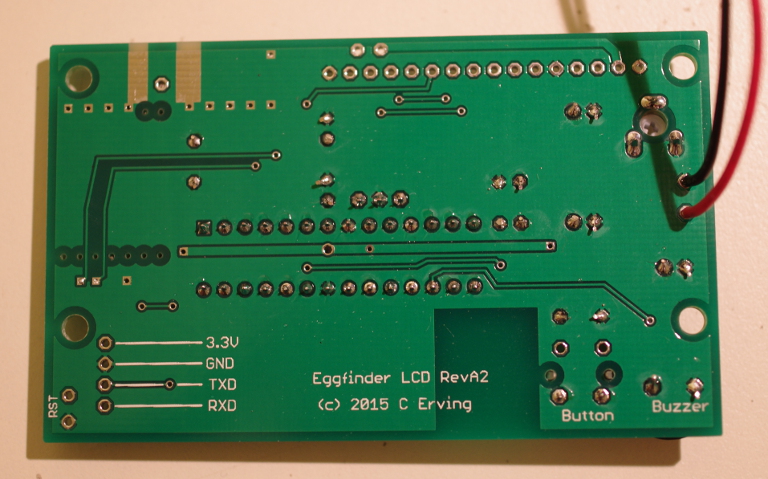
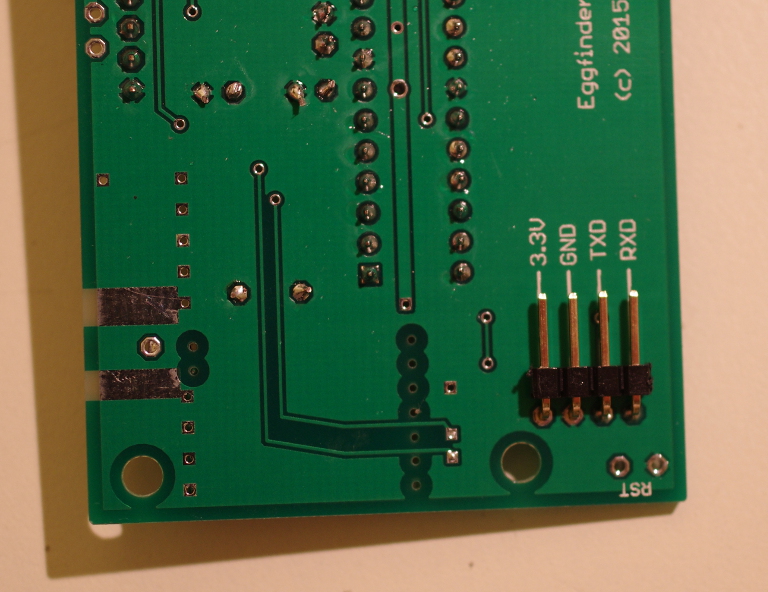
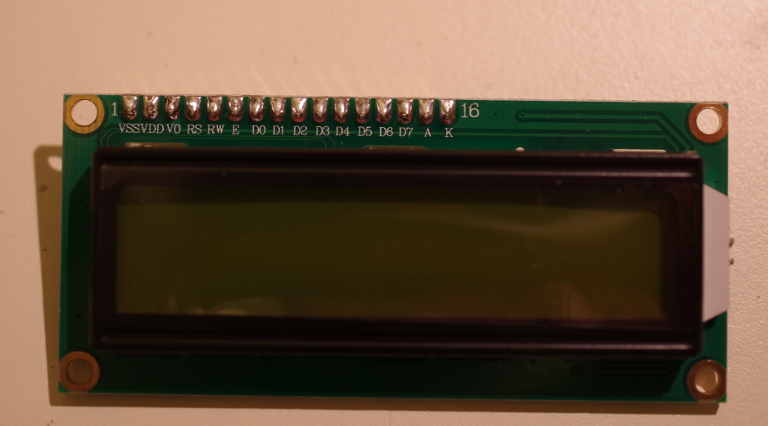
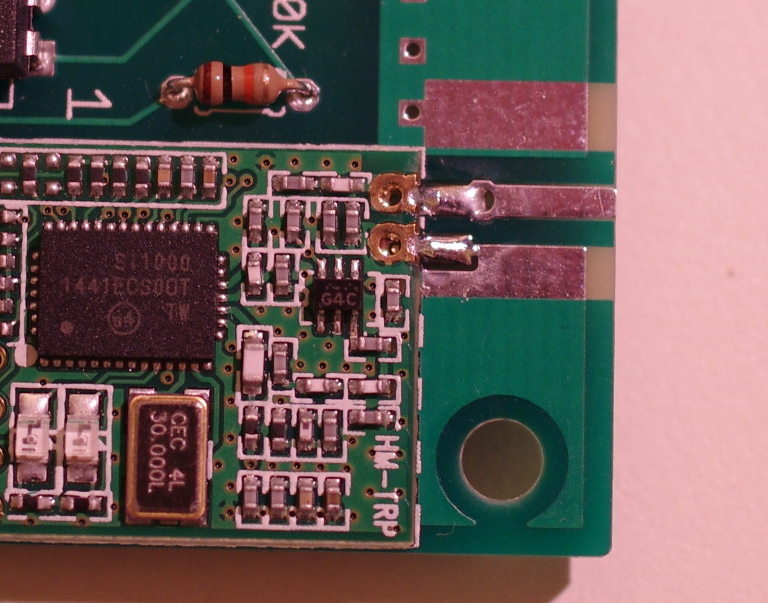
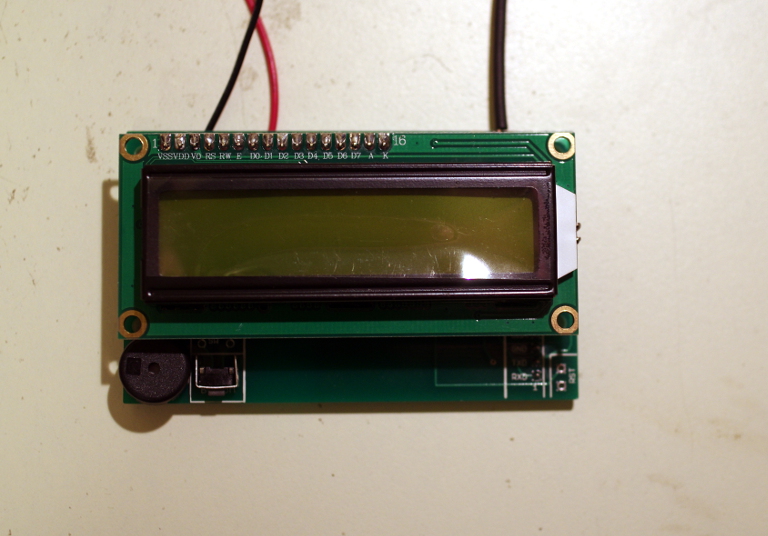
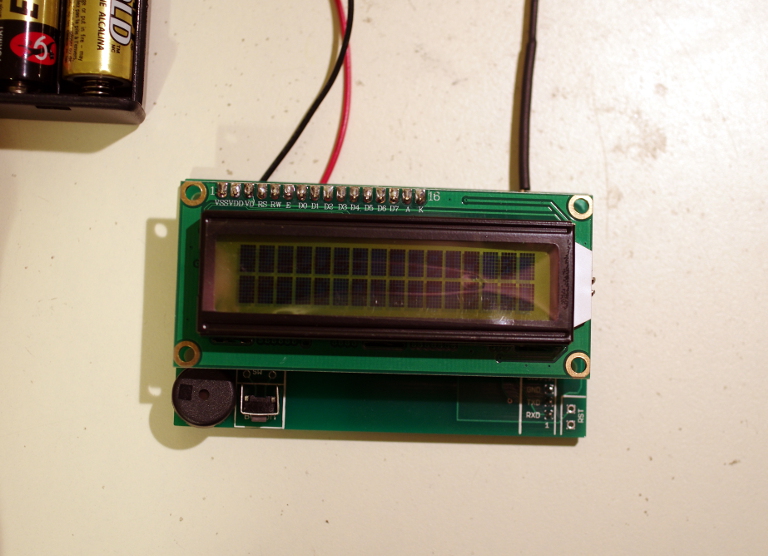
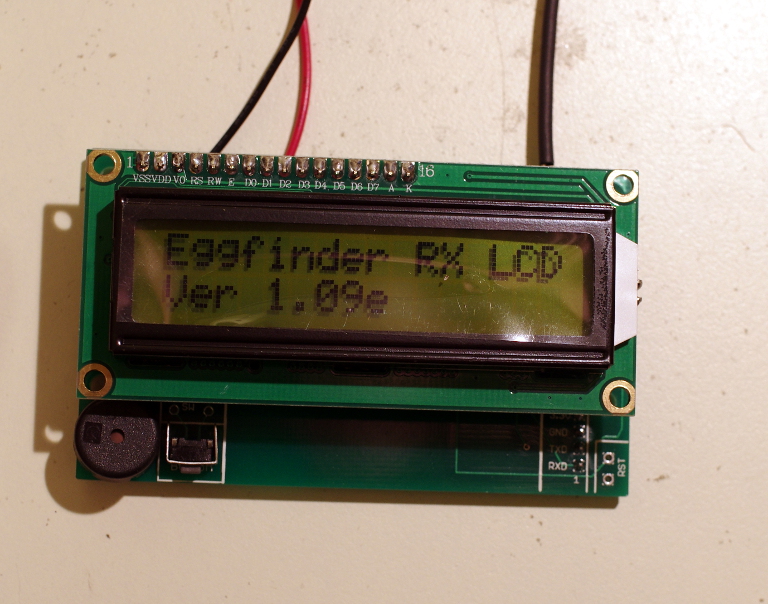
Been seeing this requested a few times, and I do a fair amount of electronics assembly, so figured I'd be the sucker that actually starts a build thread on assembling an eggfinder. For this build I'll be doing the basic eggfinder with LCD, not the TRS. In all honesty, the TRS is a tricky assembly due to the higher count of surface mount parts. Even more tricky is the smaller size of the included parts. If you guys want to see other electronic builds, just let me know. My budget isn't too strong for buying electronics I don't necessarily need, but I'll do what I can.

I'll start though with a few resources I always recommend when it comes to soldering. Pace Worldwide makes very good industrial soldering stations, and has done so for decades. They also have put up an older series of instructional videos on YouTube that I very highly recommend. Yes, it's that 70's style industrial video look..... but it's still accurate information and worth watching through. You're soldering up $150 worth of electronics, you can take the time to watch an hour or so of videos.

https://www.youtube.com/playlist?list=PL926EC0F1F93C1837

More recently, a guy named Marc Siegel did another great series of soldering, with a greater focus on surface mount parts. I believe he works for Pace. More advanced stuff, but again fantastic info if you want to get serious about soldering

https://www.youtube.com/playlist?list=PLtC8xXD7xz1hArt-i33vyaiLby3VJcMe6

I don't know yet how picture heavy this thread is going to be, but probably going to be a killer for 56k if anybody is still on it. Not too many electronics build threads here. So a lot of new info to cover that most of you probably have never seen before.
 
Ok. Now that we've watched some videos, and you've read the instructions on the Eggtimer website (You DID read them first, right?), we can get things ready to start building.

First things first, let's clean up all this mess! We're doing decently small parts here. Easy to lose on a messy bench. All the things you're not working on get put away, and the tools you need come out. You also really don't want any loose paper near the electronics. Paper sliding against paper is a big static generator.

eggfinder-001.JPG


Much better. Now, I know I'm better stocked than usual for this sort of thing, I do a lot of thru-hole assembly at this bench. So my bench is already ESD grounded, and I have a wrist strap available. I have a fume hood too. These aren't necessary, but you do want good ventilation, and don't want to be wearing socks on carpet. Touch yourself to something metal before grabbing parts and working on them. This will help to dissipate any ESD charge you've built up. This is particularly important when working with the MPU and RF modules. The resistors and capacitors are pretty robust. voltage regulators, still a good idea to ground any charge. You can't see it here, but I tucked my RF module and processor into a silver static shielding bag. The pink bags are great in that they don't generate static, and do dissipate, but they aren't shielding bags in any form. A heavy static charge will go right through pink bags.

Also, only have out the stuff you're actually working on. Notice I only have the PCB and the two voltage regulators in the work area. The other parts for the LCD are behind the fume hood, the actual eggfinder is still in the package, set aside elsewhere.

eggfinder-002.JPG


For a soldering iron, I have a Xytronic rework station, which is straddling the high end hobby / low end industrial price point. (The soldering side is fine, the desoldering side is crap). So I have temp control, which I always recommend if you'll be doing any real soldering. For leaded solder I prefer around 650 degrees. I also have a fine point wedge tip to use. Notice that it's dirty. Put your tips away dirty, it protects them from oxidation. Clean before use, put away dirty. If you put your tips away clean, they'll go bad and need to be cleaned and re-tinned. It's a pain in the ass to do that properly without a solder pot.

eggfinder-004.JPG
 
Last edited:
Next step, inventory! Go over the packing list, I won't post it here as who knows when/if revisions will change. So keep up with most recent documentation. All the parts are here, so we're all good.

eggfinder-003.JPG


Let's get the first two parts ready, the voltage regulators. One is a 3.3v the other a 5v. Markings show which is which. LD50 is the 5v, LD33 is the 3.3v. (F422 and F517 are date of manufacture codes). I've also applied some solder already to the two large tabs to get things ready for attaching the parts.

eggfinder-005.JPG


Then we lay each part down on top of its location, hasn't been soldered in place here. You want to make sure all the tabs and leads are as close to centered as possible.

eggfinder-006.JPG


Once it's in place, we'll hit it with the iron real quick, and just a dab more solder to get better thermal transfer and some fresh flux. Only that first tab though, to lock it in place.
Not looking for perfection here, just to hold it down.

eggfinder-007.JPG


Now that it isn't going to move, and with all the leads and tabs within the pads still, we can go back and get the smaller leads. After those are in place, you can go back and clean up the big tab if needed. Since you're using an iron and wire solder, they aren't going to look the same as volume produced parts that are done with paste and in an oven. So if you're like me and don't do SMT parts too often, you're probably going to have a bit excess of solder like this. A little bit too much is ok, big blobs aren't, you don't want to bridge between joints. You'll also see some residue too from the flux. Since this is no-clean flux, you don't need to clean it. If you decide to, use 90% or higher isopropyl alcohol, but it's completely optional and not necessary. Oh, and since it's a common question, the solder included is really good stuff. I've been using Kester 245 for years. Can't ask for better in an electronics solder.

eggfinder-008.JPG


Don't forget to look at the sides of your solder joints too, make sure you don't have any gaps

eggfinder-009.JPG
 
I'm going to deviate from the instructions a bit here, and install the electrolytic capacitors first. Good thing is they're all the same, but they are polarized, so you need to get them in the right direction. The light colored stripe down the side points to the negative lead, which is shorter. So the long lead goes near the + marks on the board.

eggfinder-010.JPG


Three of them get soldered into place, and like any good board designer, the polarities are consistent.

eggfinder-011.JPG


Something to watch out for is the back side solder joints. A board of this design has a ground plane that is, basically, any spot that doesn't do something else. So there's very little room around the solder pads to the ground plane. Gotta be careful not to burn through the solder mask and create a short to ground. I kept this photo larger to show it. Notice on some of the holes, there's some lines radiating out like crosshairs? Those connect those thru-holes to ground. It shows how close that ground plane is.

I also cheated here, I have some fancy expensive pliers that cut leads to length, and give them a 45 degree bend. Makes life easy when you do as much thru-hole work as I do.

eggfinder-012.JPG


So why did I install the capacitors now? To finish the voltage regulator circuits. I also opted to connect the battery box now too. This way I can test in stages as I build, and do diagnostics easier if needed. Both voltage regulators check within spec. No shorts on the capacitors.

eggfinder-013.JPG
 
Nice setup! I haven't soldered any SMT components until Cris came out with the Quark. Watched a few Youtube vids and then tackled a few Quarks and then moved on to the Eggfinder. Easier than I thought it would be. The TRS is still a little too intimidating.
 
Nice build thread. Im curious what your using for magnification?
 
Nice work Hhaase..
I'd like to see your technique on the TRS's small surface mount components...
I did 2 of them.. I had a bit of a difficult time with the first one
then the second was a bit easier...

Teddy
 
Nice build thread. Im curious what your using for magnification?

So far I haven't needed any yet. When I go into the actual eggfinder, or if I do a TRS, I'll talk about magnification more in detail. In the past I've used one of those magnifier lamps, but can't fit it on my bench right now, so I'm looking into an optiloupe. At work I either use a magnifier lamp or an industrial microscope.
 
OK, let's move on to some more thru-hole components. I'll do a single post just for the two .1uf ceramic capacitors. These guys aren't polarized, the way electrolytic's are, so no worries about putting them in backwards.

eggfinder-014.JPG


Time for a quick word on hole fill, since you can see it on these parts. The electrolytic's covered up the top side of the pad so I couldn't get a photo. For a good solder joint, as per IPC standards, you normally want 50% to 75% hole fill depending on the classification. Hard to tell 50% fill visually, so I usually shoot for 100% fill when possible. It's just easier to spot solder coming up out of the top of the thru-hole. Usually a good solder joint will automatically do this on a smaller sized part with a properly sized barrel. So if you aren't seeing this happen, you're going to want to hold your heat a second or two longer.

While I have plenty of fill, I also have the yellow encapsulation material slightly pressed into the thru-holes. As long as it's not excessive, it's ok. On these parts it's fine as I have good fill on the thru-holes. Just something to keep an eye out for as it can compromise solder joints on parts that have the encapsulation or enamel going further down the leads.

eggfinder-015.JPG
 
Adding more thru-hole parts.

10k and 1k resistors. Be careful not to mix these up, as they look extremely similar. 10k has an orange band, 1k has a red band, and looking at them next to each other you can see how similar they look. Test with an ohmmeter before soldering if you've potentially mixed them up. Not polarized, so no worries about getting them backwards.

eggfinder-016.JPG


Then the resonator, bend over 90 degrees before soldering. Again, not polarized, but good practice is to have the markings visible.

eggfinder-017.JPG


push button on the bottom left. Polarized, but only fits one way. Only the two holes closest to the board edge get solder.

eggfinder-018.JPG


Piezo buzzer. Not polarized, so either way 'round is fine

eggfinder-019.JPG


10k trimmer on the top left. Polarized, but will only fit one way. May take a bit more heat for a good thru-hole fill. Last one for now, I'll update more after work later tonight.

eggfinder-020.JPG
 
Last edited:
I lied. Time for one more post before work..... the dreaded RF module. Hardest component on the LCD receiver. Let's play game to see who can first spot the mistake I made installing this one. I opted to install the RF unit before the processor chip, as they do get kinda close together and I wanted more room to work on the RF.

I started by bending 3 of the thin resistor leads to use as thru-hole locators. Since both the RF module and the PCB have identical hole patterns, it does help to use these to keep it centered.

eggfinder-021.JPG


I ran these up from the bottom side of the board, and then ran the RF module down on top of them. This got me really close to lined up already. The pads on the RF module are a bit wider than those on the PCB, but that's not a problem. Just center the castellations and you'll be fine.


eggfinder-022.JPG


The some paper tape wrapped around to hold it down to the PCB. It's critical, and I mean very critical, not to use any kind of scotch tape here. You wouldn't believe the amount of static that scotch tape generates. It is more than enough to kill your RF module in the right situation

eggfinder-023.JPG


Then tack down one connection. This solder joint is fine, but if it's not perfect on the first try don't worry about it. You're more worried about the alignment of the RF module at this point. A finer point helps here, my straight / angle tip didn't work too well here. I don't have a fine conical tip at the moment though, so I had to kinda bludgeon through here.

eggfinder-024.JPG


Then you can start soldering other connectors now too. A bit excess solder here, these are always tricky joints to hand solder. I recommend bouncing around a bit, not going after joints next to each other, as you don't want to get too much heat into the RF module. Take your time, take breaks between soldering joints on this one. I'm not actually done here yet. You'll also see that I've pulled out my wire supports at this point too. Don't solder the wires in place.

Now I'm really out for the day, see you all tonight.

eggfinder-025.JPG
 
I recommend that you cover the module with masking tape all the way up to the outside of the holes... this prevents any solder splatter from getting on the RF module's components.
 
I recommend that you cover the module with masking tape all the way up to the outside of the holes... this prevents any solder splatter from getting on the RF module's components.

Definitely a good suggestion. Particularly for people new to soldering, who tend to apply too much, which will result in a lot of flux splattering around.

Need to do some photo edits, I'll be back at it here shortly.
 
Last episode, we left our not hero with a half soldered RF module.
So let's continue the same way, skipping around on the pins a bit, taking time in between solder joints, until we get them all.
This photo is a bit deceiving, as it almost looks like the solder joints aren't complete. But with castelated pads like this things are a bit different.

eggfinder-026.JPG


You more importantly need to lift it up and check along the sides. You want the solder to reach 50-75% of the way to the top of the castelation, anything more than that is gravy.
What you DO want to see is a good fillet between the castelation and the pad. Sorry about the photo quality issues here. Lighting isn't great, so I have to leave the iris open a bit more than I'd like and I lose some depth of focus.

eggfinder-027.JPG


Since no data will be sent, and thus the transmitter will not be active at any point, you can do a quickie test to see if you have good power to the RF module. If you put the batteries in and power it up, you'll see both LED's quickly flash at the same time. This is the visual indication that the RF module has initialized properly. But it's ONLY testing the power connectors and the RF module internals. It doesn't tell you if your data connections are any good between the RF module and the main PCB.

I don't know how sensitive the RF is to SWR reflection, so be careful about powering it up with the CPU attached but no antenna.

-Hans
 
I found that dragging/flicking the tip of the iron upward was the best technique for producing really clean joints on those pads. Helps in making sure the module side is wetted and leaves a nice fillet.
 
Next in line will be the main processor CPU. This is were all the real work is getting done. The nice thing is that the pins are already spaced for a hand insertion. Normally IC's come with the legs splayed out a bit for automated assembly, which also holds it in place prior to soldering. May take a bit of wiggling, but it'll fit. Match the notch on the IC with the matching drawing on the board. You also have a dot on the IC which corresponds to the '1' on the PCB.

eggfinder-028.JPG


Then flip 'er over and solder a pin. I usually hit both corners.

eggfinder-029.JPG


Check that you're still inserted all the way, polarity is good, and you can start soldering for real. My normal method is to do the alternating corners. Top / Bottom, Left / Right. This distributes the heat to protect from frying the chip. Check on the top side that you have good hole fill. The holes on this design are a bit smaller than usual for a stamped leg IC. Be careful not to get too much heat in there trying to get 100% fill. Remember that 50% is the IPC requirement for class 2, so you don't have to go nuts here.

eggfinder-030.JPG


Keep at it, take your time. Stay focused. This part technically can be replaced, but only if you're damned good at desoldering and have the right equipment.
To do it with the best chance of not damaging the board would involve destroying the IC to get it off. Don't rush.

eggfinder-031.JPG


Aaaaand, we're done. All 28 pins soldered.

eggfinder-032.JPG
 
I found that dragging/flicking the tip of the iron upward was the best technique for producing really clean joints on those pads. Helps in making sure the module side is wetted and leaves a nice fillet.

I found the same thing. I would apply solder to the pad on the PCB, and then gently push the tip into the castelation. With the shape of the notches you're not going to get the tip into there enough, so you need to use liquid solder to transfer the heat. I wouldn't say 'flick' though, as you don't want to move it that quickly. More of a push/drag.... along the lines of mig welding.

-Hans
 
Now a couple easy ones for a change. Let's solder in the female connector strip. No polarity here, and you'll find this one a breeze by this point hopefully.

eggfinder-035.JPG


On the back side, you can also solder in the 4 pin right angle header. This is for an optional bluetooth module. Even if you don't attach one, the connector is quick and easy to install for later use.

eggfinder-034.JPG


Then we'll put the pin header into the LCD display board. You want the long side extending out, the short side goes into LCD display. Just watch out on this one, as a couple pads are attached to thicker ground and power traces. So you may need to heat it up a lot to have it flow. I ended up bumping my temp to around 725f for the Vss and Vdd pins. Also watch out, as the pads on LCD modules like this tend to like bridging.

eggfinder-036.JPG
 
Last edited:
Almost done, I promise.

Remember I asked if anybody could spot my mistake earlier? Here's a closeup. I filled the hole needed for the wire antenna. Do your best not to fill this hole. Without the right equipment to clear it, you risk goofing up the connections to the RF board.

eggfinder-037.JPG


Thankfully I do have a desoldering rig, so it was about 5 seconds to clear it for me. But if you're using solder wick, or other methods, it may be a lot harder. I do still have a good fillet in there, just tricky to evaluate these solder joints from a top down photo.

eggfinder-038.JPG
 
Almost There!

Now that I have my antenna hole cleaned out, I can go ahead and prep the wire antenna. (I'll do a separate addendum for the external antenna connector later. I need to order one more. Also don't have an external antenna yet.) As per the Eggfinder instructions, I bent a short angle on the back end and placed it in the board. Mark and trim at 80mm from the board. Then grab a file, or some good sandpaper, and round off that sharp edge at the point. Also take some sandpaper and give a good cleaning to anything which will be in contact with a solder pad. Things do get oxidized, and that will make your soldering difficult.

eggfinder-039.JPG


Prep for surgery! Masking tape goes back on, to cover the ground connections.

eggfinder-040.JPG


Time to solder it up. If you've done your surface prep right it should actually solder up pretty easy. Get it all the way to the edge of the PCB, as you're looking at both electrical plus mechanical connections here.

eggfinder-041.JPG


Then some shrink wrap to keep it clean and also to keep it electrically insulated. Instructions say to mask off areas of the board for protection. I just left the bottom third un-shrunk. Easier for me, as I'll eventually be removing the antenna to switch over to an external.

eggfinder-042.JPG
 
Now the grand finale, for the LCD receiver. The LCD display just press-fits into place.

eggfinder-043.JPG


Then power it up! Ummmm.... what's with the dark boxes here?

eggfinder-044.JPG


LCD screens are adjustable for darkness, which is why you have that trimmer on the board. Easy to access through the back side, good engineering gets you things like this.
Adjust with a fine point phillips screwdriver to your desired darkness.

eggfinder-045.JPG


And there we have it, a functioning LCD receiver!

eggfinder-046.JPG


I haven't decided yet on my mounting plans, but to be honest I think you guys likely have this side of things well covered in the meantime.
I'll probably go ahead later and build as per the instructions, for the sake of this thread, and do any modifications or custom mount in a separate thread.
I will be changing to the external connector soon though, and that will be in this thread.

-Hans
 
Hey great thread Haase. Just wanted to throw this in from something In learned from building mine.
The contrast on the LCD screen is adjustable so if your unit is hard to read in the bright sunlight,
you can adjust it with a small phillips screw driver on the back of the board. Look for this....

eggfinder-045.jpg
 
Hey great thread Haase. Just wanted to throw this in from something In learned from building mine.
The contrast on the LCD screen is adjustable so if your unit is hard to read in the bright sunlight,
you can adjust it with a small phillips screw driver on the back of the board. Look for this....

Contrast..... that's the word I was looking for when I did that post. I knew what I wanted to say, just couldn't find the exact word.


I recommend a rubber duck whip over the wire antenna.

So do I, which is why I'll be swapping it later. I wanted to cover both methods. But the quarter wave wire should actually be a decent performer as well. Most antennas are basically just wire, rod, or tube stock cut to length. Even fancy rubber ducks, they're often just a rubber sheath over a wire antenna. I'm actually considering a yagi for the receiver to be honest, or a full wave whip.

-Hans
 
A full-wave antenna is a bit long to carry around... the Linx Technologies ANT-916-CW-HW half-wave antenna works very well, and I've heard tales of 20K+ flights with that antenna and a 1/4W rubber duckie (Linx ANT-916-CW-QW) on the TX. The ROC waiver (and my motor budget...) isn't big enough to fly that high. :)
 
A full-wave antenna is a bit long to carry around... the Linx Technologies ANT-916-CW-HW half-wave antenna works very well, and I've heard tales of 20K+ flights with that antenna and a 1/4W rubber duckie (Linx ANT-916-CW-QW) on the TX. The ROC waiver (and my motor budget...) isn't big enough to fly that high. :)

Oh, you've never seen the antennas I've had to lug around in the past. A full wave in 900mhz is less than a foot and a half. Tiny thing.
Much easier than a solo-lift on an OE-254! I'm not so worried about free-air reception, more about keeping hold of weak signal after landing.
The Linx are only advertising under 2dbi reception. I'd like 5dbi or higher, without going directional if I can avoid it.

I'll probably grab the Linx for convenience, as I need to get a build finished soon and need to watch the budget. I also have to place an order with Mouser this weekend too.
But this is more along the lines of what I'll be grabbing for next season.
https://www.l-com.com/wireless-antenna-900-mhz-5dbi-rubber-duck-antenna-rigid-rp-sma-plug-connector#

I did finish up the Eggfinder itself last night, but I have a blazing headache right now. So I want to get away from the computer for now. Is there a setting to turn off the beeping on the receiver?

-Hans
 
Nope, in fact I've had people complain that the little PC mount buzzer isn't not loud enough. You can put an external pizo buzzer on it with a switch inline if you want more volume and the ability to shut it off.
 
Back
Top