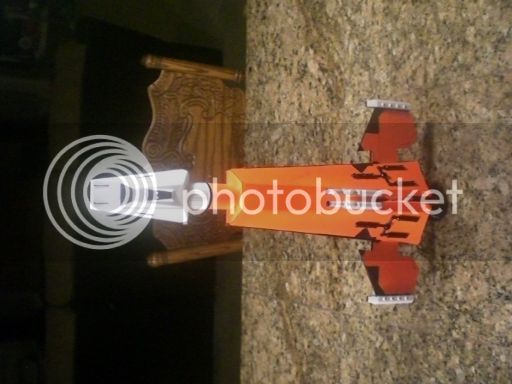
Estes Asteroid Hunter build thread

The Rocketry Forum

Help Support The Rocketry Forum:

This site may earn a commission from merchant affiliate links, including eBay, Amazon, and others.

les

Well-Known Member
TRF Supporter
Joined
Jan 19, 2009
Messages
3,443
Reaction score
1,322
It seems a shame that it appears Estes is discontinuing the Asteroid Hunter.

I bought one when they came out, but only started building it (my build queue is just WAY too big....)

Let's start with a picture of parts. You get 4 sheets of laser cut parts, motor mount stuff, parachute, shock cord, and miscellaneous other plastic pieces.

parts.jpg

The motor mount is a typical build. One part I found interesting/different is one ring comes pre-cut to fit around the motor hook. When gluing it on I used tape to hold it to get a tight fit to the motor tube. The completed mount

motor mount.jpg

You then build the front bulkhead. I had some difficulty with this. You first sand a bevel and glue the two pieces together, and you have two other pieces to hold to get the angle correct. Here is the piece waiting for the glue to dry

bulkhead front.jpg

When I did the rear bulkhead I had the thought to use some tape to help hold the pieces together (you can see one of the guide pieces in the upper left corner). It came out better. I just had the thought that I also could have used some straight pins to help hold the guide pieces as well

bulkhead rear1.jpg bulkhead rear2.jpg
 
The next few steps I got a bit skimpy with the pictures, so I will try to describe it

You measure and glue a ring onto the body tube. This ring acts as the cornerstone for all of the rest of the build. The first flat bulkhead is glued to the tube against the ring. The ring places this bulkhead and helps keep the bulkhead perpendicular to the tube.

The guides from the front angled bulkhead are glued to the flat bulkhead, and then the angled bulkhead is glued to this.

Then the part that seems complex, but is really simple. You slide 3 other bulkheads onto the body tube (but don't glue them yet). Then you install the stringers. I installed all 4 "dry", and then removed one, added some glue at the joints, and re-installed. Then removed another one, added some glue, and re-installed. Two more times and all 4 main sets of stringers are now glued on.

I did notice that one set of stingers did not appear to be level with the bulkhead, but I verified with a straight edge that the stringer was straight (which is the important part). After letting that dry for a bit, I glued in the guides and the rear angled bulkhead.

stringer 1.jpg

So in the picture from the top you see the angled bulkhead, its guide, the first flat bulkhead, the black "cornerstone" ring, the next 3 flat bulkheads, the rear guides, and rear angled bulkhead.

There are 2 side members that add on. These lined up and fit like a charm - really amazing! I used an angle iron to make sure the side member is straight.
You then add 2 cross members. These will provide support for the launch lugs.
At this point the tape is holding the side members while the glue dries and I added the cross members

stringer 2.jpg

By the way - I can have nothing but praise for the precision of the laser cut parts. Everything basically fell together. I only had to do one bit of sanding, at that was due to my troubles I had with the front angled bracket. Really superb design and fabrication :clap:
 
Last edited:
Looking forward to this one. I got a couple from Tower's big sale prices (not quite as low as Estes but still a steal!) and will hopefully get to building one soon. I'll be sure to follow your progress for ideas and tips to use on my own.
 
So the skeleton is done, time to add some skin to this beast

Cut out the card stock skins. They have you run a pen along the fold line 3 times to get a good fold (combined with a straight edge it worked great)

I used white glue to attach the first skin and some tape and weights to hold it while drying

skin 1.jpg

After drying I discovered it some how ended off center! :y:

skin 2.jpg

The skin did not attach properly to the rear bulkhead. So a touch more white glue and I used some rulers to hold it flat against the bulkhead

skin 3.jpg

After it was dry I used an exacto to trim the skin to size (it is purposely slightly oversize to allow for placement errors)

And then the other side. Make sure to mark which side is the bottom for the launch lug supports (cross braces)

and the other side is trimmed and done

skin 4.jpg
 
While all that is drying I worked the fins

The two small fins have balsa add-on pieces. I used clothes pins to hold them while drying. I also forgot to mention I had papered the fins ....

fin 1.jpg

The other two larger fins have plastic pieces. I first used the Tenax to glue the pieces together. The fell apart right away. I then used some tube plastic glue and it held

fin 3.jpg

The glue dried on the smaller fins so I used some F&F to make the edges all even. I wanted to sand before they were installed.

fin 2.jpg
 
Interesting. I'll be watching.

Me too. I thought I'd missed the sale, but the Estes website is calling it "Back To School Specials" now. I'll get one of these based on what I've seen of the construction on your build thread.
 
Glued in the fins and the side trim that hides the tabs for where the side member glued on. Again, I am really impressed with the thought that went into this design. There are slots in the bulkheads to guide the fins - no alignment issues.
One fin I had to sand slightly, and I'm not sure if that wasn't due to my skin being slightly off
The rubber bands are holding the side trim while the glue dries

fin 4.jpg
 
You cut, mark and fold a trim piece for the rear and glue it on. I did need to trim it a bit to fit over the body tube.

You cut apart the nose cone so you end up with the cone plus an engine bell. I did this with multiple passes with an exacto knife. I did find the plastic was thicker on one side than the other, but it really only appeared at the cut point. I sanded the bell opening to make it smooth. You also have to ram 3 blocks of clay into the nose cone.

Then remember the motor mount built back in post 1? It is finally time to install it. I found the mount was a bit loose for the tube. Normally I need to sand a bit to get a fit. I used a little extra glue due to the looseness. I didn't have to worry about any tube "pucker" as it is all under the skins. You use the engine bell to determine the depth for the engine mount.

Once the engine mount set a bit I used the plastic cement to glue the bell on

tail.jpg

Then using the plastic glue I glued the "launch lugs" on. Two points. The instructions use different symbols for wood glue and plastic glue. The lug diagram showed wood glue. That would never grab the plastic so I used the plastic glue. Second, I really like how they incorporated the lug into the model design... :clap:

lug.jpg
 
One last bit before the finishing, although I am trying something a bit different.

There are some trim pieces that glue onto the skins. I am concerned about getting a clean paint job with these. So I am painting them first. After the paint dries for a day (or 2) I plan to "paint" them with liquid mask. I'll then glue them on, do my normal spray painting, and then pull the liquid mask off. I've never tried this so we'll see how well it goes. I am open to comments on this point.

Here are the painted pieces

trim.jpg

While these are drying I'm going to do a bit of grain filling on the side trim pieces.

With the papered fins and the skins there is not that much exposed wood! YEA! :grin:
 
My Asteroid Hunter arrived the other day. Service from Estes was fast. Of course, I live in Colorado so it did not have to ship very far. I also ordered two Sizzlers for my grand kids, and a few other really cheap items that were too good of a deal to pass up.

I think the Asteroid Hunter will go into storage with about 150 other kits, I have so many other rocket projects in process. The one kit I struggled with was the Cosmic Interceptor, priced at only $16.99. But I have one Interceptor-E ready to finish, 5 more in storage, along with 8 of the Interceptor 1250 kits. I decided not to hit the "Add to Cart" button ...

I am interested to know how the liquid mask test goes. I have masked a few canopies with finely cut masking tape, to color the canopy different than the nose cone. Works well, but a little tedious. It would be nice to paint a nose cone the color of the canopy, apply liquid mask, and then apply the topcoat color. Please post your results when you have them, and also what liquid mask you used.
 
My Asteroid Hunter arrived the other day. Service from Estes was fast. Of course, I live in Colorado so it did not have to ship very far. I also ordered two Sizzlers for my grand kids, and a few other really cheap items that were too good of a deal to pass up.

I think the Asteroid Hunter will go into storage with about 150 other kits, I have so many other rocket projects in process. The one kit I struggled with was the Cosmic Interceptor, priced at only $16.99. But I have one Interceptor-E ready to finish, 5 more in storage, along with 8 of the Interceptor 1250 kits. I decided not to hit the "Add to Cart" button ...


am interested to know how the liquid mask test goes. I have masked a few canopies with finely cut masking tape, to color the canopy different than the nose cone. Works well, but a little tedious. It would be nice to paint a nose cone the color of the canopy, apply liquid mask, and then apply the topcoat color. Please post your results when you have them, and also what liquid mask you used.


I flew mine three days ago on the recommended C6-3. It goes up REALLY slow and tops out at 250' or so. I built mine with the wings a little further out to help with stability. D21's I think are the way to go with this one. It was a fun build! Challenging and with awesome results.
CIMG4336.jpg
 
Waited several days to make sure silver paint was dry, then covered with liquid mask
I made copies of the placement guides and cutout and taped on.

I found that the guide was a bit tight to remove around the plastic trim, so I taped both sides and slit them in two. After applying glue and placing the piece in place, I could then slide the guide(s) out.

guide1.jpg

And the part installed

guide2.jpg
 
It's been a while since I designed this kit but I thought the guides were there to mark the outline with a pencil, but I could be wrong.


John Boren
 
It's been a while since I designed this kit but I thought the guides were there to mark the outline with a pencil, but I could be wrong.


John Boren

Well, perhaps it would have been easier, but the directions make no mention (picture) of a pencil and sort of shows installing the part with the guide attached.
One nice thing about my approach is when I applied the part excess glue came out. This excess glue went onto the template that I slid out so I had less mess to clean up.

Here it is in primer stage (actually second coat of primer - already cleaned up some problem areas that the first coat showed)

prime.jpg

For the first coat I left off the small nozzles and rolled a strip of paper to place in the holes. This was to make sanding the rear bulkhead after priming easier. I installed them with plastic cement before the second coat so they would be primed before painting
 
Last edited:
image.jpgFinally opened this one up and started building. Looking nice after a base coat of Almond with the nozzles in place. Still have some trim work to do.
 
Turned out pretty nice with the decals. The dark red color is called Merlot, the off-white is Almond. Really a fun build, nice kit, can't wait to fly it.

DSC_6732.jpg
DSC_6733.jpg
DSC_6734.jpg
DSC_6736.jpg
 
Back
Top