Another 3" Minimum Diameter Build. Rockets name: "BoomStick"

The Rocketry Forum

Help Support The Rocketry Forum:

This site may earn a commission from merchant affiliate links, including eBay, Amazon, and others.

BayouRat

Well-Known Member
Joined
Feb 16, 2009
Messages
962
Reaction score
66
Location
Luling, LA
I'm building this for AirFest. It is designed specifically for the 75/6000 research motor I have. Here is some of the specifications and materials.
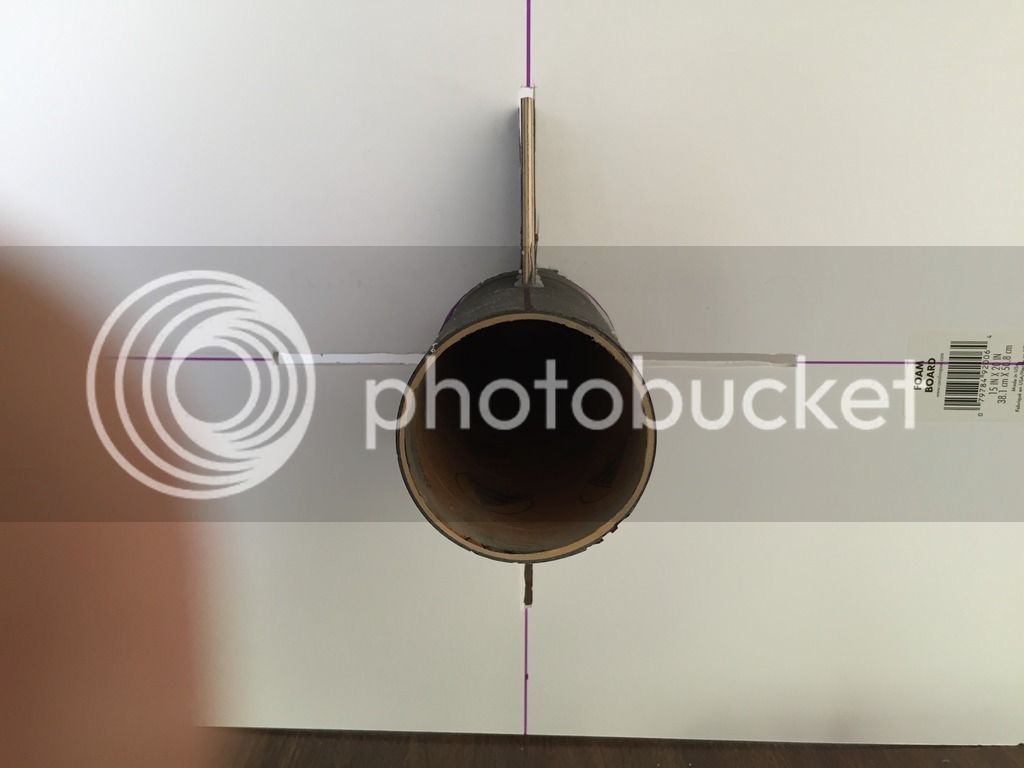
Airframe is a 48" Carbon Fiber reinforced PML 3" tube (3 layers of 5.7oz 2x2 twill)
Nose Cone is a PR 3" VonKarman
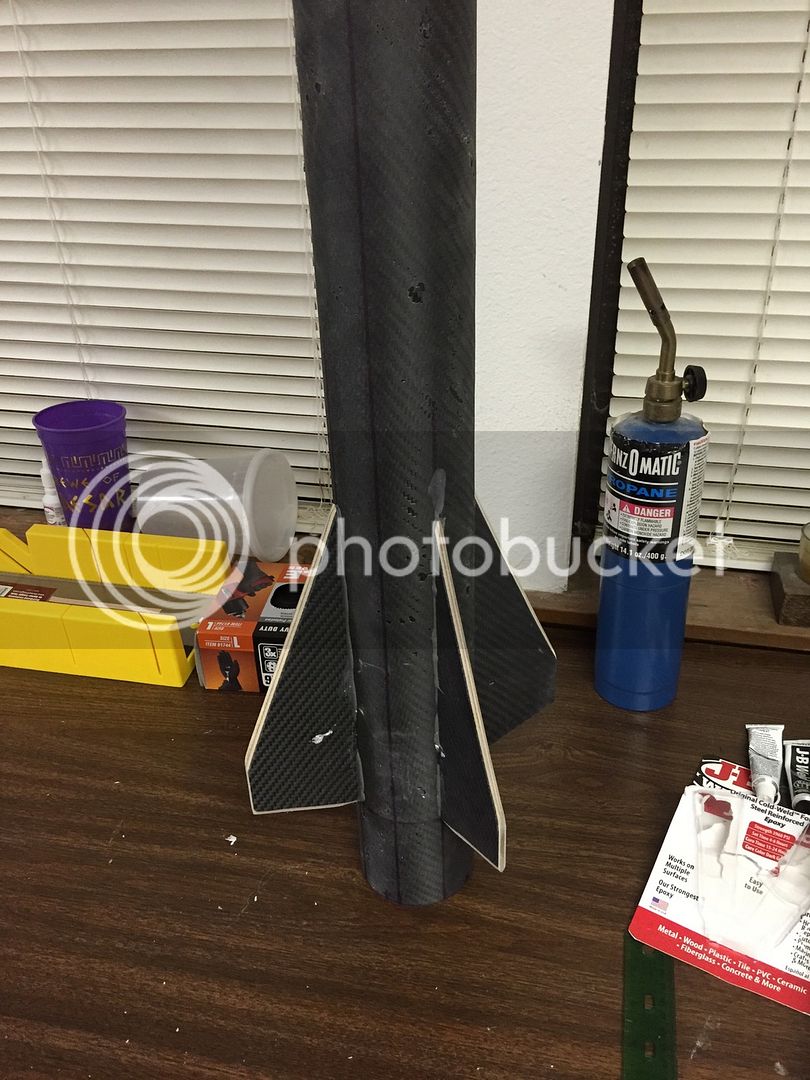
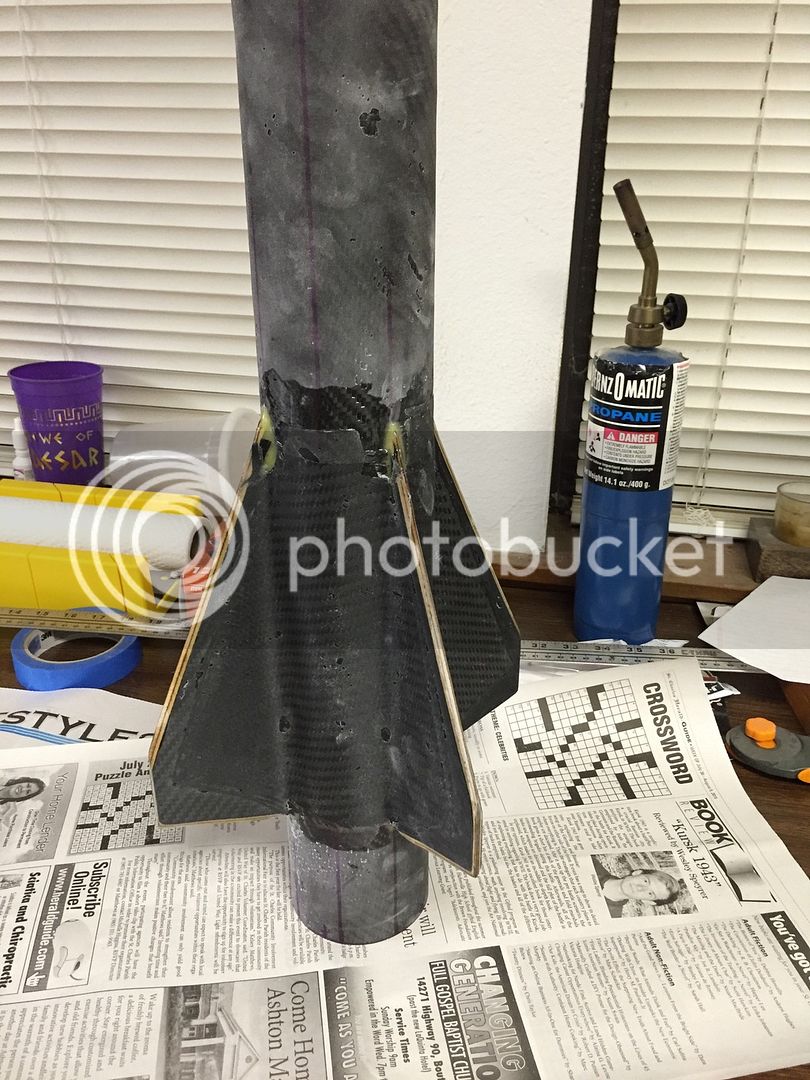
Fins are 3/16" Aircraft Plywood sandwiched between 2 layers of the carbon cloth. Then 2 more layers tip to tip.
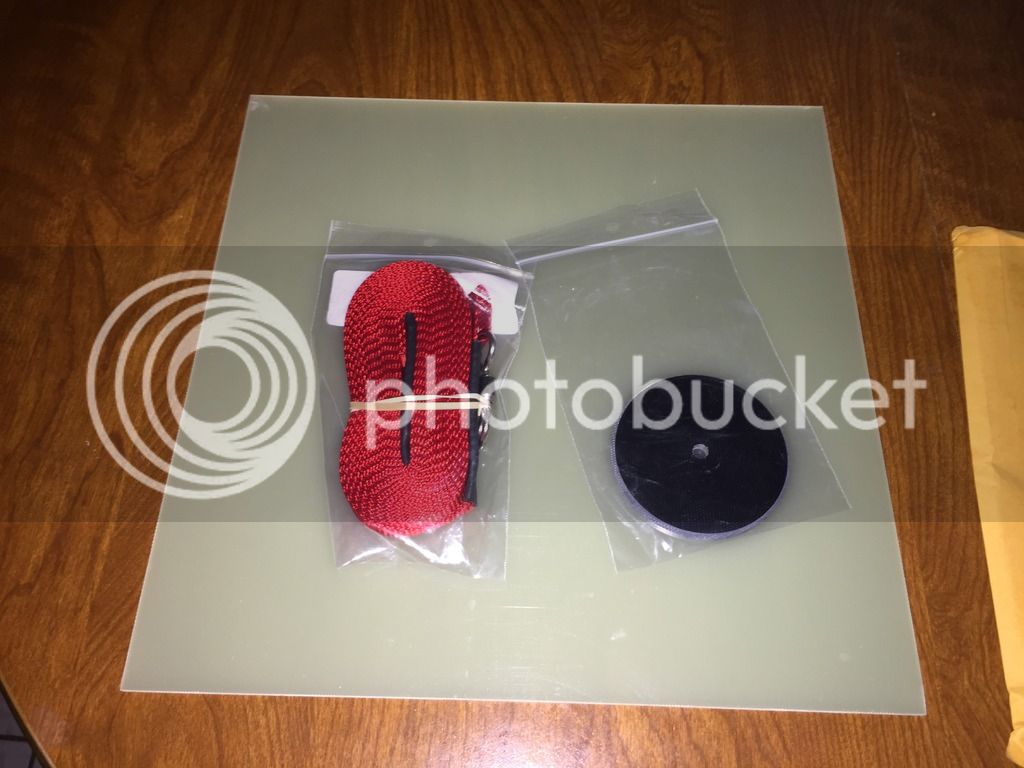
Rocket will be dual deployment out the front end with a cable cutter.
Electronics will be a Raven Flight Controller and a Beeline 70cm GPS transmitter.
BoomStick.jpg
 
Last edited:
This is the fin sandwich being made.
2 layers each side of 5.7oz 2x2 twill carbon fiber with a 3/16 plywood core
Carbon weight 48 grams. I mixed a 100 gram batch of epoxy. Added milled glass and Cabosil to harden it up some.
Oops I forgot to weight the core? Oh well! It'll interesting to see the finished weight.

BoomStick1.jpg
 
Love the rocket design, and build... what flavor do you have in mind for the 6000 case?

[video=youtube;pFriRcIwqNU]https://www.youtube.com/watch?t=110&v=pFriRcIwqNU[/video]
 
Last edited:
Are you going to go tip to tip with a final layer of CF after the fins are mounted?
 
Love the rocket design, and build... what flavor do you have in mind for the 6000 case?

[video=youtube;pFriRcIwqNU]https://www.youtube.com/watch?t=110&v=pFriRcIwqNU[/video]

I have a white and a blue. I also have a white moon burner. Should be fun!
 
I pulled my laminated fin material out of the press. Now I have to trim it and cut the fins out.

E0AFC788-9D1A-4A5B-BAC4-8F29E3A154D0.jpg
 
I have a white and a blue. I also have a white moon burner. Should be fun!

Looks good! You are going to have a very lightweight rocket indeed. Use whatever motor you want but the others will be using a white propellant. On second thought, use the moonie so our rockets will be gone well before your motor comes up to pressure and Boom Stick comes apart Lol!
 
Looks good! You are going to have a very lightweight rocket indeed. Use whatever motor you want but the others will be using a white propellant. On second thought, use the moonie so our rockets will be gone well before your motor comes up to pressure and Boom Stick comes apart Lol!

For the drag race it is getting the Blue. Be very afraid! LOL!
 
After 2 hours trying to get a carbon fiber splinter removed from my right index finger. The Boom Stick's fins are born.

2A0753EA-4695-417E-929D-09100BA9CC90.jpg
 
Postman came bearing gifts! A piece of G10 for my nose cone ebay, a base for my nose cone ebay, and a shock cord for a different project.

7EAF18D7-6F32-457E-9CCF-BF5EB8454AB9.jpg
 
Just finished the last of the filets. U.S. Composites thick epoxy with milled glass and cobosil added.

69573387-849B-4428-88EA-1D4ACB0E2224.jpg
 
Last edited:
Looking good... Cabosil, how do you like working with it? I have used micro-ballons as a filler, but I am about out now. I was wondering if the Cabosil would be a good replacement.
 
Microballoons reduce strength and makes the epoxy easier to sand. You should use those when you are making a filler or sanding layer. Cabosil is very light weight and makes the epoxy rock hard and very hard to sand. It very cheap and a little goes a long way. I would recommend buying some and trying it out before you commit to using it on a rocket project. I have all different kinds of fillers from microballons to milled Kevlar. I've tried them all. I don't use the microballons any more. I just use automotive body filler for filling. It's much cheaper then epoxy and sands easier for paint prepping.

But to each his own. What works for me. May not work for you. I always test different methods before using them on a rocket project.
 
Second fin segment is getting two layers of tip to tip carbon fiber.
Before
F673A361-75AE-4809-94E3-69C85B5AB11C.jpg

After with peel ply.
7E0FAF76-F276-4BCE-9904-022269BE8917.jpg
 
Last edited:
That's one lean, mean, rocket machine...looking good
 
First I make a template.
Then I cut the carbon fiber with a cloth wheel cutter.
Then I cut the peel ply much larger so I have something to hold when I go to peel it off.

2A54E7E9-CD46-4F59-B297-76243BBB7EA3.jpg


44E63BFB-4CA0-4A91-9562-245ACC7CD50A.jpg


E6B56CA7-93E4-4DE0-A30B-3E7FFD193454.jpg
 
The tip to tip reinforcement has been completed. Now I am going to add two small pads for rail button attachment points. Then it will be a week of sanding and filling before its off to the paint shop.

E474AFEE-BCB8-4D16-A5F0-7F8A3A4F2BBF.jpg
 
Back
Top