Resurrecting The Excalibur

The Rocketry Forum

Help Support The Rocketry Forum:

This site may earn a commission from merchant affiliate links, including eBay, Amazon, and others.

DRAGON64

Well-Known Member
TRF Supporter
Joined
Jan 17, 2009
Messages
5,209
Reaction score
2,752
Location
Toney, AL
This rocket probably has not flown in 15+ years... I know the last time I posted about this rocket was 8-years ago, here is the thread:

https://www.rocketryforum.com/showt...r-3-0-Restoration-Project&highlight=excalibur

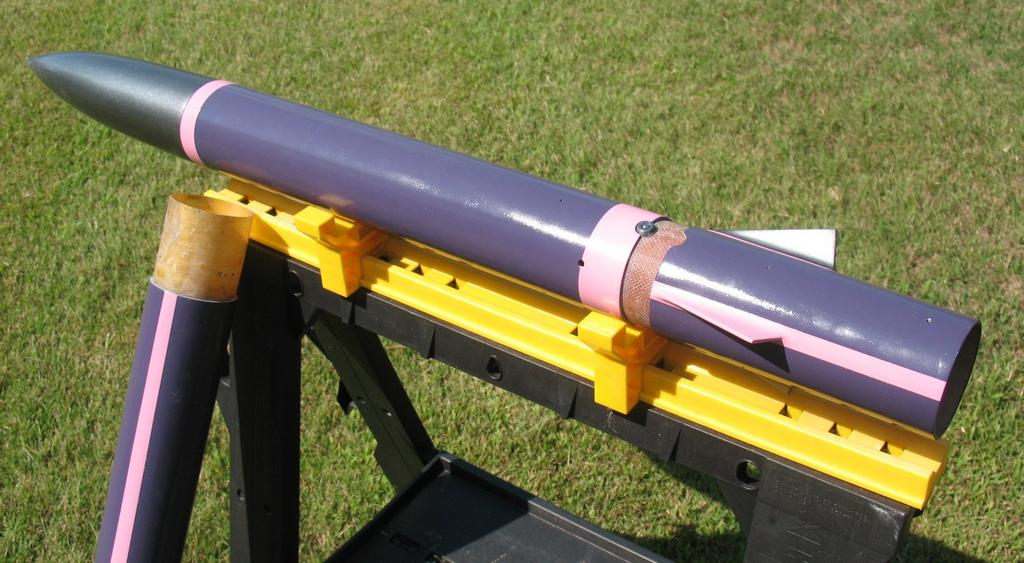
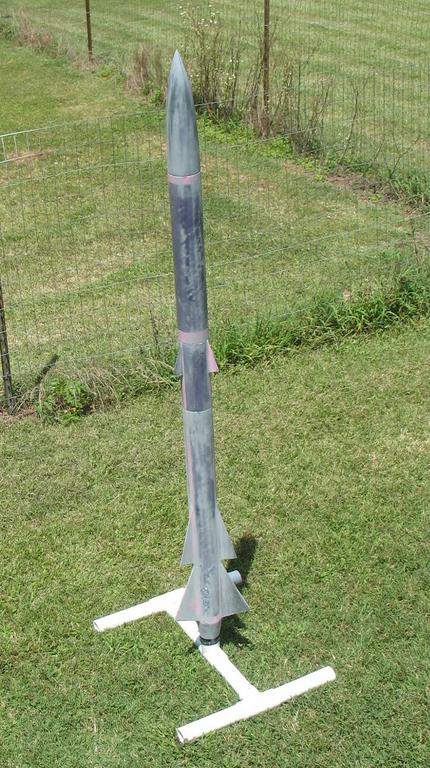
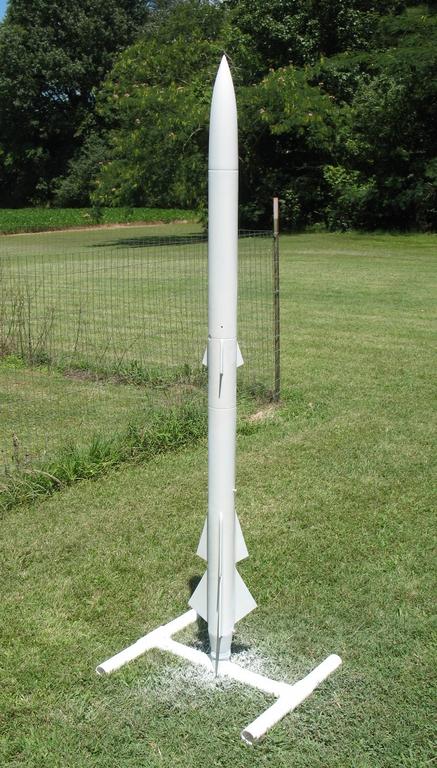
She had 8-years worth of dust on her when I dug her out, otherwise the rocket remains in limbo, until I decided to finish the resurrection. In that linked thread, my old username was Johnnie, which coincidentally is my real name...go figure. I have an action item list made, and will finish the rocket off on this thread. I have ordered a few parts from Apogee Components, and once they arrive, I will be well over the 80% completion mark.

I will post some new updated images as they get uploaded etc.
 
Here is the current configuration of the Excalibur:

3.0" Dia
69" long
9-Triangualr Fins in 3-sets
Set-up for dual deploy.

The rocket is scratch built from:
Airframe - 3" "glassed" mailing tube
Avionics coupler - Giant Leap phenolic
Booster Coupler - Filament wound fiberglass
Motor mount - filament wound fiberglass
Nose cone - Scott Glass epoxy resin cast
Fins - 3/16" G10

tNTDp3N.jpg


The paint job was terrible 8-years ago, and is even worse to me now...

ybWl0oh.jpg


Due to the odd inner diameter of the mailing tube. I had to use 6oz glass on the Giant Leap coupler to snug the fit...

Ig9rczW.jpg


NMylf7U.jpg


So I will have to re-adjust the claims to finished end product... the paint has to go, so I'll say 65% to completion...

89cEfGh.jpg
 
Last edited:
I actually really dig the styling and paint job on that rocket. Those fins are wicked!
 
I appreciate that... a fellow rocketeer, who left the hobby long ago, was cutting fins for a rocket one day, and he gave me the drop-offs. The drop-offs became the fins as they are mounted on Excalibur, no further cutting or trimming was done.

The paint scheme is Pink, Purple and Gun Metal Gray... The combo works, but I really hate the pink... Anything EXCALIBUR by name should never have been painted pink...

49457658.jpg
 
Last edited:
This week I was able to work on the avionics for Excalibur. I ordered some 4-40 PEM inserts; screws; washers and a #19 drill bit.

sWyimFc.jpg


Install for this Giant Leap phenolic coupler went very smooth. I wicked a little thin CA into the holes before I inserted, and then wicked a little more after the install.


tEUO7j4.jpg


JE3fjbs.jpg


Also ordered and received some bulkheads from Apogee Components. The coupler internal bulkheads fit really loose, but should work okay. I used Gorilla glue to mount them to the outer coupler bulkheads. Later this evening I will drill the bulkheads for the sled mounts.

k9Fq7uu.jpg


The sled will be a Landru 3D printed sled.

HKSR1fh.jpg
 
Last edited:
I managed a little more work on the airframe; I trimmed the boat tail back 1/2" to expose the filament wound motor mount...

qraiwG4.jpg


That way I can mount the Aeropac motor retainer in place...

HJW8DWR.jpg


It is amazing to me that I never lost a motor in the only three flights this rocket has been on... thank goodness for Duct tape! No More!

5UBFTSM.jpg


My daughter went with me to (s)Lowes this past weekend to pick out some paint for Excalibur. Looks like "Hammered" Copper it is...

hdLKqAO.jpg


A few more orders to get a chute and an altimeter, and this rocket will be ready for paint!
 
Last edited:
Moving ahead rather quickly with this project, and then hit my first set back. I prepped Excalibur for a new paint job by rough sanding the old paint to get rid of witness lines from the 3-color mess that it currently has.

gCkIu5y.jpg


A minute or so after starting to add the primer coat, I run into this...

8spkf8Y.jpg


And it got worse...

DnCt7Ly.jpg


The damage was not central to any one color, as the Duplicolor, Krylon and Engine enamel all cracked the Rustoleum primer after it was applied. This is a deviation from what I normally use, as I prefer KILZ for my builds, but instead, I went with what I had on hand...live~n~learn crack~n~burn!
 
Last edited:
I'm not sure what kind of Rustoleum primer you used, I always use the Filler Primer. The way I use the primer is to sand the first and usually the second coats almost all off the rocket, leaving just the filled areas. The third coat is sanded almost off and that is the layer that the base coat of paint goes on unless I find more areas that need filling.

I've had the same cracking thing happen to the first coat on occasion when repainting. I wait a day or so and put a second heavy coat over the cracks and then wait two days or so to sand both of those layers down like I normally do for the first coat. After sanding down that coat and repeating the coat and sand processes with another layer, I've never had the cracking on the final layers of primer.

All that sanding can be a PIA and is another reason I'm leaning more and more to 15 ft paint jobs. Good luck.
 
The "ugly" has been rectified; I got up early and sanded the cracked primer areas (primer sanding boogers-b-damned). Got my daughter out of bed, so she could be my chauffeur, and off to Lowes we went. She has been invaluable for me and very instrumental in my return to rocketry... she helped me choose hardware, paint, PVC (for the new paint stand) and tools... Excalibur is back on track once again, as I went with the KILZ primer like I should have done. I will let this coat dry for a week before I apply the base coat.

voyKZHl.jpg


KILZ coats and soothes the sorest of surfaces, I love it!

8LBxn1G.jpg


We have selected the second color for Excalibur, and have laid out a plan for the graphics... hopefully the rocket will be as awesome as I have it pictured in my head.
 
Last edited:
Here are the major components of Excalibur's avionics. The 3D printed sled from Additive Aerospace has really helped the process of design for this resurrection.

U5W0FgS.jpg


8W9E4KK.jpg


LXGelZq.jpg


It has been very rewarding to take a rocket that I built nearly 15+ years ago, and have been able to update certain aspects of it with the new advances the hobby has made. The best is yet to come.
 
Last edited:
I'm not sure what kind of Rustoleum primer you used, I always use the Filler Primer. The way I use the primer is to sand the first and usually the second coats almost all off the rocket, leaving just the filled areas. The third coat is sanded almost off and that is the layer that the base coat of paint goes on unless I find more areas that need filling.

I've had the same cracking thing happen to the first coat on occasion when repainting. I wait a day or so and put a second heavy coat over the cracks and then wait two days or so to sand both of those layers down like I normally do for the first coat. After sanding down that coat and repeating the coat and sand processes with another layer, I've never had the cracking on the final layers of primer.

All that sanding can be a PIA and is another reason I'm leaning more and more to 15 ft paint jobs. Good luck.

Thanks Handeman, I went and looked, and I was using Rustoleum Automobile Primer (Fast Drying & Wet Sandable...). I will save it for the Black Dahlia which already has Rustoleum primer coats on it.
 
Hmmmmm, I got in this late. You should have flown it with the original paint job. When it was worn and chipped, strip and do something brightly colored. Sanding is a pain. I had to get some metallic paint off of a smaller main chute bay
and simply stuck it in a tray of lacquer thinner and used chemical warfare. Was easy. Restarted from scratch and used a non-metallic paint for Rf purposes. Not practical for a larger rocket though and I just had to do it with a tube and not a fincan. Kurt

The original color was Black... When Oscar Valent was the original owner of Star Rocketry he was able to get demo motors from HypertEK... He let me fly one of the (Then) beta EFX grains that HyperTEK was coming out with. Oscar's son captured the only image ever taken of Exaclibur in flight, and she was sporting the original color...

cSx9ioi.jpg


I could not go back black, and I hated the tri-color she was sporting until today...
 
Last edited:
The original color was Black... When Oscar Valent was the original owner of Star Rocketry he was able to get demo motors from HypertEK... He let me fly one of the (Then) beta EFX grains that HyperTEK was coming out with. Oscar's son captured the only image ever taken of Exaclibur in flight, and she was sporting the original color...

Oscar Valent. That's a name I have not heard in a long while. He was instrumental in mentoring me with hybrid technology back in the day. I wonder how he is? Have you heard from him lately?
 
Oscar Valent. That's a name I have not heard in a long while. He was instrumental in mentoring me with hybrid technology back in the day. I wonder how he is? Have you heard from him lately?

It has been 10-years since I last talked to him. He took a job in DC and then packed his stuff and moved. In 2005 he made it to Southern Thunder where he delivered a fuel grain to me for my Level attempt. He told me then he was selling Star Rocketry, and that was that.
 
Wow! A job in D.C. He is probably driving around in a Maserati drinking $1,000 bottles of wine! :)
 
Yeah, the stuff is pretty cool, but it ran on me. I thought it was just me, until my buddy used two different kinds on some of his rockets, they ran too. And he's much better with a rattle can than I am. The way the paint works, it makes the hammered pattern by staying extra "flow-ey" longer than other paints. Very thin coats are your friend. And watch the nozzle, they'll gum and spatter pretty quick...
 
Wow that's strange. I've used it on 7-8 rockets, never a problem and love the stuff.

That being said, it does work a bit differently than standard paint, but then so do Fluorescent..metallics & special effects. Highly advisable to do a test on scrap tube or box.
 
Yeah, the stuff is pretty cool, but it ran on me. I thought it was just me, until my buddy used two different kinds on some of his rockets, they ran too. And he's much better with a rattle can than I am. The way the paint works, it makes the hammered pattern by staying extra "flow-ey" longer than other paints. Very thin coats are your friend. And watch the nozzle, they'll gum and spatter pretty quick...

Thanks for the tips... what colors did you use? My daughter chose a Hammered silver to go with the Hammered copper, and I am worried that the silver will be like any other silver paint, where the silver keeps coming off in your hands like pixie dust.
 
I've used the hammered copper and hammered silver-ish. Was a darker silver, like pewter. Works fine once I figured out how to use it. The paint is durable enough. Just had application issues.
 
Wow that's strange. I've used it on 7-8 rockets, never a problem and love the stuff.

That being said, it does work a bit differently than standard paint, but then so do Fluorescent..metallics & special effects. Highly advisable to do a test on scrap tube or box.

Good idea on the test object, as I am getting close to paint. I have multiple testing tube subjects that I can donate for the small side project.

I've used the hammered copper and hammered silver-ish. Was a darker silver, like pewter. Works fine once I figured out how to use it. The paint is durable enough. Just had application issues.

The silver being darker like pewter will be perfect for what I am trying (hope) to achieve. I'll give it a test run (pun) this weekend.
 
Thanks for the tips... what colors did you use?

Black....gold....copper....silver. On rockets as well as metal toolboxes [both carry type and truck mounted], weathervanes, roof vents, concrete yard animals, metal boot wipes, un-anodized motor cases.

Lighter coats = smaller dimples.
Heavy coats = larger dimples.

You will see what I mean after shooting some of it.
Instead of wasting your test shots, if you have any old toolboxes that could use freshening up....shoot them. This stuff is really durable & scratch resistant.

I getting anxious to try the paint now. I have pleanty of metal test subjects to try it on as well. I was looking at images on line of objects painted with this stuff, and they all look pretty good. I am hopeful the "good" will transfer well to my rocket.
 
So far, no drips runs or errors... and no "Hammered" look just yet...

YelPa6W.jpg


The 1st coat of silver touches the last fin-set, but stops just short of the base of the rocket. Here we change colors. I expect this paint process to take a couple weeks to complete, as I want to work with truly 'cured' paint... the smell must be gone before I proceed etc.

X5c2p8i.jpg
 
Last edited:
Looks like you have a nice field out back to fly some rockets!
 
So the weather is looking RIGHT! for this weekend so I can finally get back to painting this rocket. With the rain and high humidity I decided it best to not push the completion of the paint job on this rocket. I have lots of rocket 'stuffs' planned for this weekend (building, painting, sanding... repeat), with the low humidity, temps mid 80's and the lows in high 50's to low 60's the times are right...
 
Back
Top