Scarab 54

The Rocketry Forum

Help Support The Rocketry Forum:

This site may earn a commission from merchant affiliate links, including eBay, Amazon, and others.

RKeller

Well-Known Member
Joined
Jul 31, 2014
Messages
1,055
Reaction score
24
I picked up a scarab 54 with a 38mm motor tube during the Rocketry Warehouse black friday sale. I got a 38mm Aeropack motor retainer and some 5/16th kevlar for the Y harness. This kevlar is massive, defiantly overkill for this rocket but it's that or the 1/4" stuff that just seems a little wimpy, even though it would probably be fine.

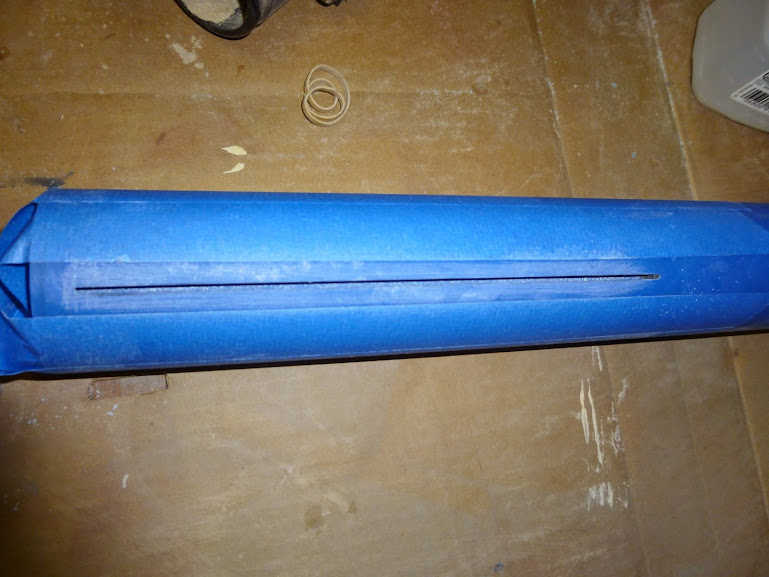
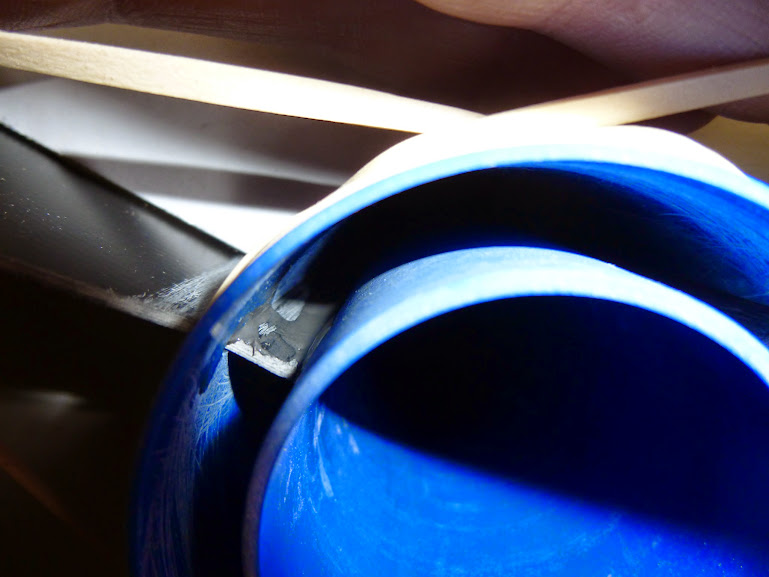
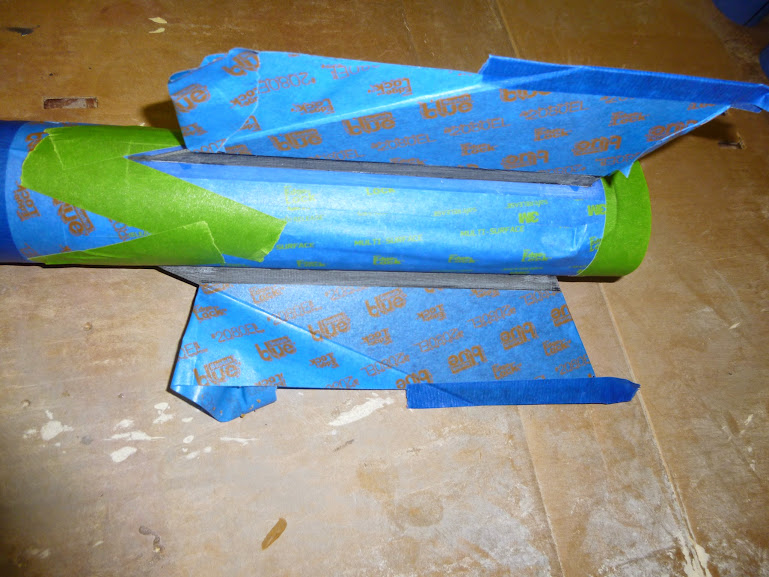
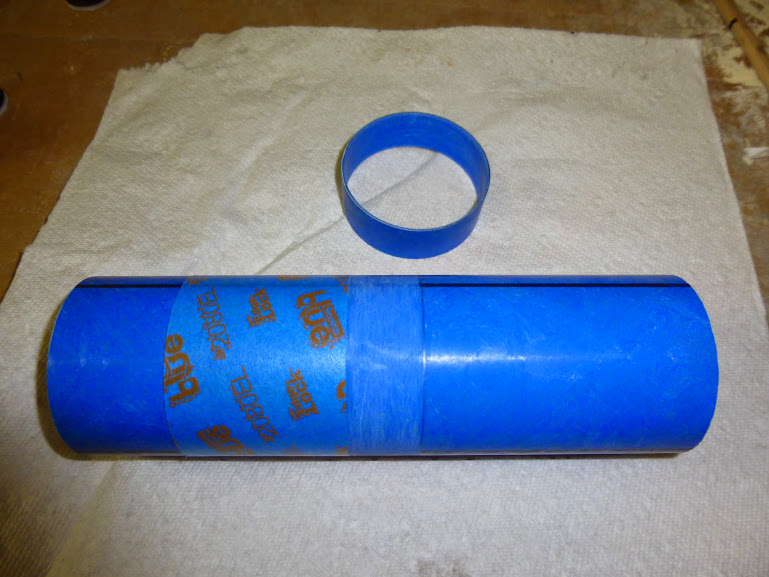
The kevlar is tubular and relaxes to about 1/2". I pulled it taught, taped it, cut it, then put a drop of CA on the ends so they don't fray apart. I tacked down the ends of the kevlar with CA so I could pull it tight and glue it down.
001.JPG

002.JPG


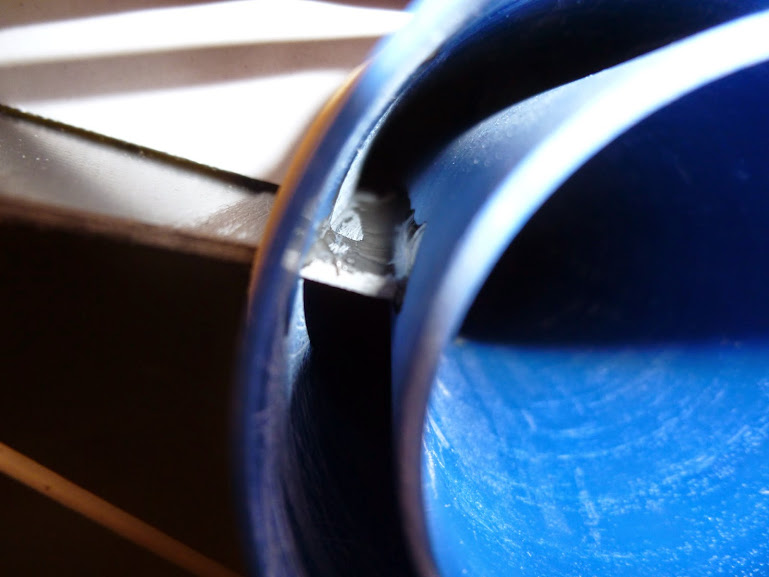
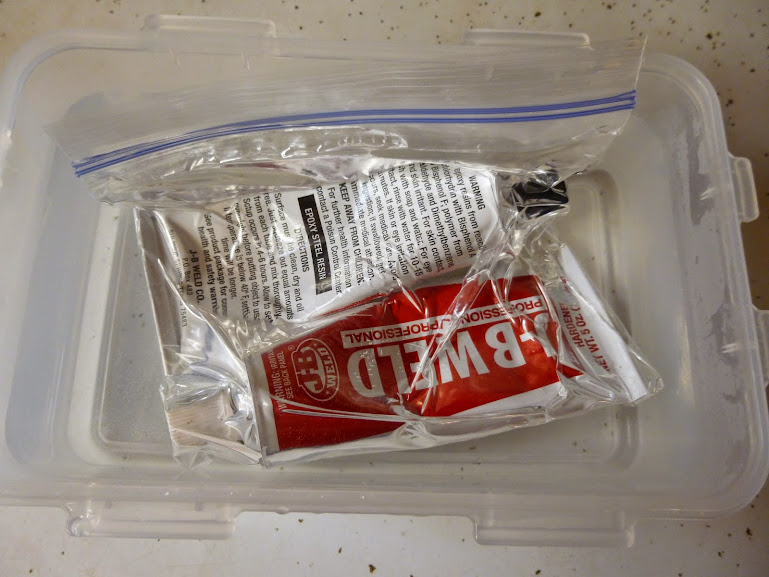
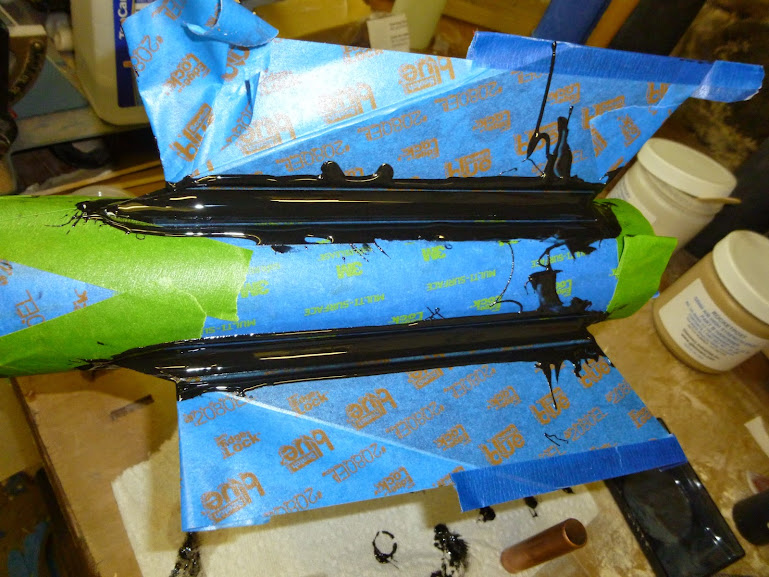
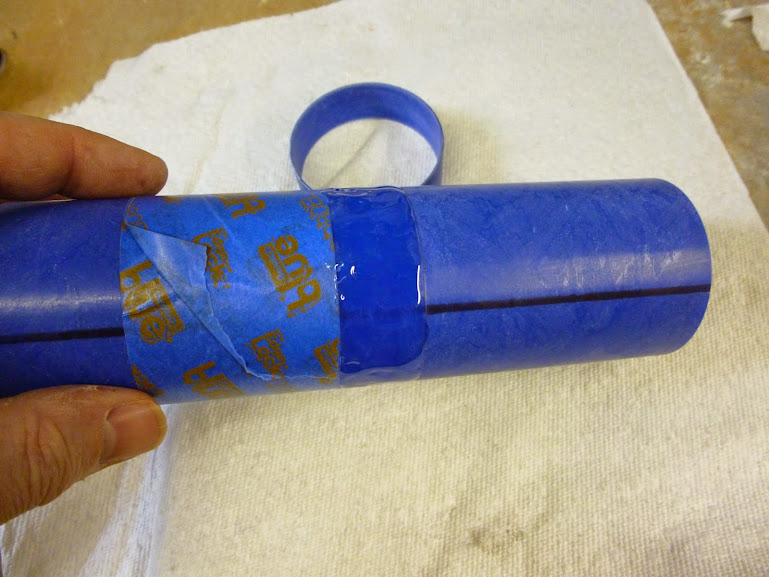
I applied JB weld under the kevlar, pulled it tight and taped the ends to the motor tube to keep them nice and tight against the tube then covered the kevlar with JB weld. I made sure to mark the centering ring where the fins will be so I didn't get any JB weld in the way.
006.JPG

004.JPG

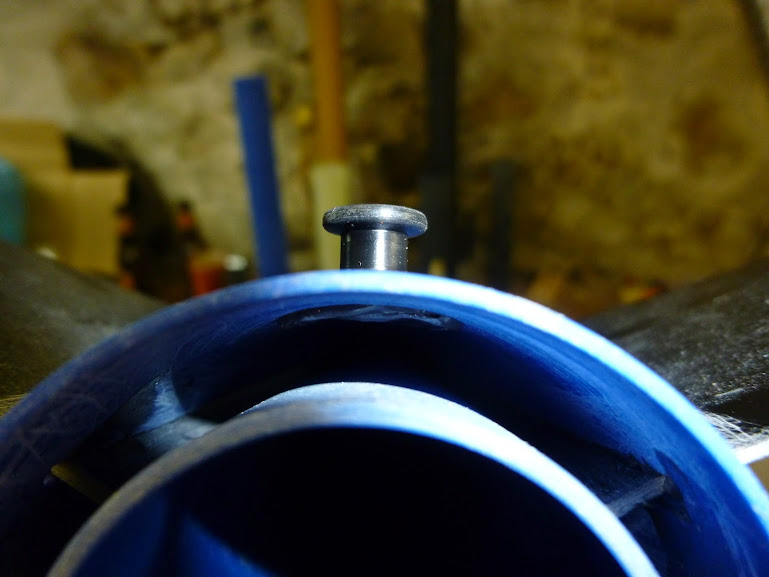
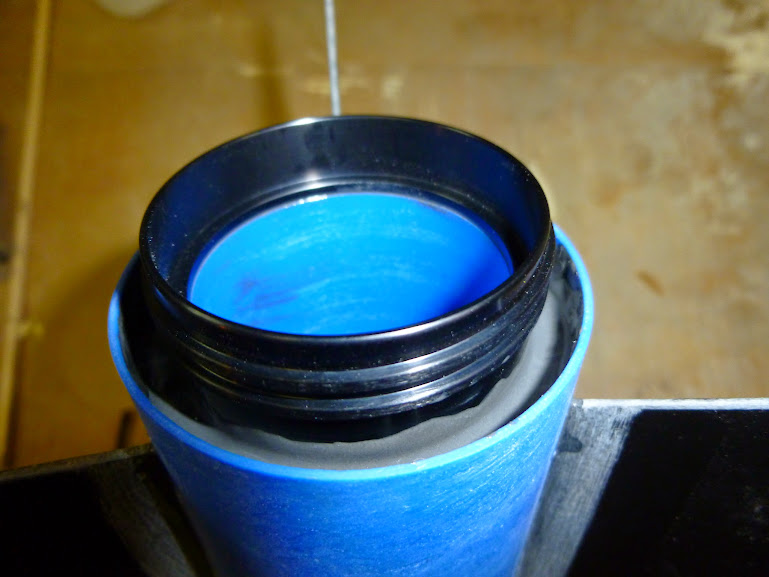
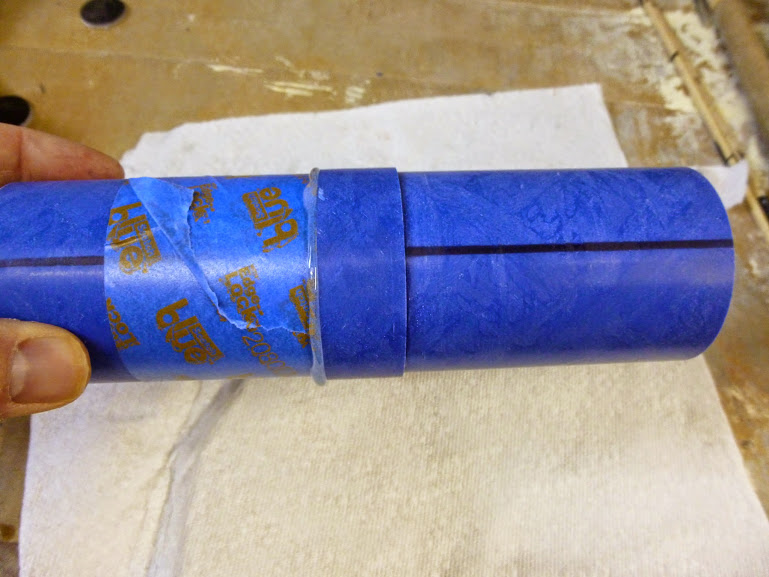
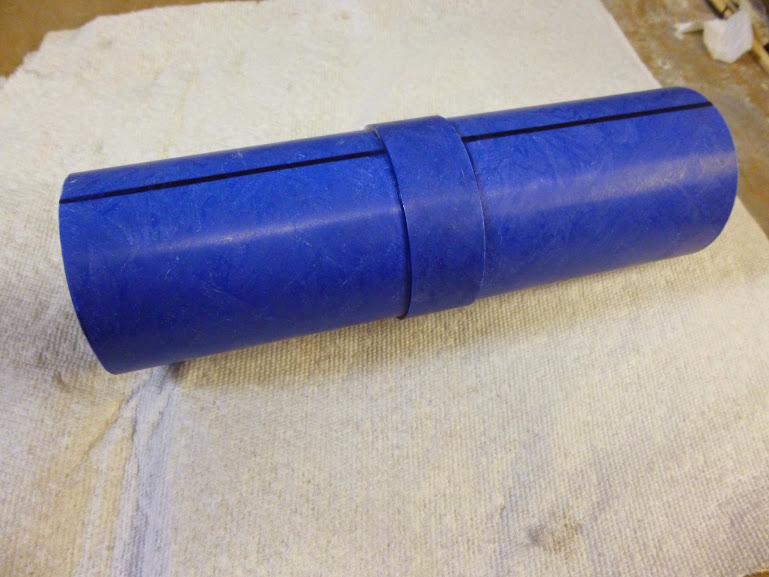
The rear centering ring and motor retainer are not glued on, just a tight fit so I can properly position the front centering ring. once the JB weld sets up I'll pull off the tape and put a nice fillet on the front of the centering ring.
 
I forgot to mention that I washed all the tubes with dish soap and hot water before I started, then I washed them with alcohol, then wet sanded all surfaces being glued with 40 - 60 grit, then washed with hot water again and then washed with alcohol again. I also wet sanded the entire external surface with 320 and then 400 grit since I will not be painting this rocket.
using my trusty internal sanding drum (40 grit) I roughed up all internal surfaces that will be glued, washed with hot water, and alcohol again.
001.JPG

004.JPG


sanded the leading edge of the motor tube so there was no sharp edge to cut into the kevlar.
006.JPG


used scotch tape so I could pull out the rear centering ring once the front is cured
008.JPG
 
Inspired by Dan's "curing oven" I found a warm place to help the JB set up a little faster...
uKfABD83kxT0GikDJNkvkRzNUfEr6BLotePZyaWT-Qg=w769-h577-no


I decided to bevel the leading edge of the fins, with the swept back point on the rear beveling the other edges would make the tip brittle.
015.JPG


printed a fin alignment sheet from payloadbay.com and glued it to a piece of cardboard then dry fit the fins and marked them for the external fillets, then taped and sanded. I've noticed I have to be much more careful with the finish knowing I'm not going to have the option to hide things with paint.
016.JPG

017.JPG

019.JPG
 
it's cold in my basement so I put the JB weld in sandwich bags and put them in a bowl of hot tap water while I prepped the surfaces to glue in the fins. this worked really well and I was able to slop the JB weld into a microjet syringe and inject through each fin slot onto the motor tube. I then slipped each fin in and wiggled it around to make sure there was good coverage on the root edge. I tacked each fin in with 4 drops of superglue while using the cardboard alignment jig to keep them straight.
030.JPG

033.JPG

028.JPG

029.JPG
 
I had grand plans of taking lots of pictures while doing internal fillets. then my ADD kicked in, I got epoxy all over my gloves, 3 hours went by, my family ate a meal without me wondering what happened to me... oh well ;D

I decided to use weld nuts for the rail buttons. mostly because the centering rings are thin and so is the body tube, only .040" the rear one had to be filed down a bit so it would slip in between the MMT and the BT. I put some tape over the thread on the inside to keep it clean and tacked it in with a dab of JB weld.
003.JPG


I'm not drilling holes to inject fillets, instead I'm injecting from the rear before putting on the centering ring and motor retainer. I'm using JB weld again so the first step is to get everything warm so it will flow. epoxy went into hot tap water, and the fiberglass was warmed with a hair dryer while I got everything ready to make a mess. I put masking tape on the fin joints to prevent any leakage on the outside.
004.JPG

005.JPG


I used a monoject syringe with the tip cut back to inject JB weld on both sides of all three fins. using the hair dryer to keep everything warm it ran all the way down to the front centering ring making nice fillets. I then put more JB weld around the motor tube and body tube and pushed in the rear centering ring up against the fins. then flipped it back over to let everything run back down to the rear centering ring. next I put in the rear fillets and glued on the Aeropack retainer, after roughing it up and cleaning it of course. I ended up using about a 1 oz of JB weld. here is the end result
007.JPG

glad I taped the fins, there was JB weld in the gaps that would have made a mess.
 
now it's time for some fillets! I bought some rocketpoxy from wildman to try out on this rocket. first impressions... it's thick. really thick.

fins all cleaned and taped up
015.JPG

goopy goopy goo
018.JPG

ta-da!
019.JPG

021.JPG

022.JPG

026.JPG


so far I'm really happy with this epoxy. you do have to keep an eye on it because it slowly flows for about an hour or two. I just keep changing the position of the rocket. I prefer to do all the fillets at once and this epoxy seems to be good for that.
 
haven't had a lot of time to work on rockets lately, but I started the ebay today. I picked up some stainless steel #10-24 and some other hardware. all I have to show is gluing the vent band on. I still have to drill the aluminum stepped bulkplates and build the sled. I'm either going to use 1/16 or 3/32 G10 for the sled.
007.JPG

I used bob smith 30 min epoxy.
008.JPG

009.JPG

010.JPG


gotta get these done soon! started the ebay today, I used #10 stainless steel threaded rod. I may change to aluminum later, we'll see. I cut the sled from 1/16" G10 from mcmaster and used aluminum tubing from a hobby shop, it's a nice fit on the rods.
006.JPG

007.JPG

might put them on the other side so there is more room for batteries and stuff
010.JPG
 
Ebay is all done! I used two missileworks screw switches with button head hex screws. I can reach them both through one hole with a 1/16" ball end hex key.
014.JPG

015.JPG

Just like the wildman sport I'm using 20ft of 1/4" kevlar for the drogue and main shock cords. main chute will be a 36" military surplus deal that I dyed and put new lines on.
the one on the left
0420151756.jpg

no drogue chute.
 
had an awesome first flight on a CTI I285 classic. 5195ft and 459mph. I had more angle on it than I realized and it cocked a little off the rail. still a great flight
17722926678_fb84e7c7b3_b.jpg

17884390626_f129b472bd_b.jpg

Scarab_I285a.JPG

Scarab54_I285.JPG
 
Thanks for posting this, it looks great. What did you use for the charge tubes? I am in the middle of building my e-bay and I'm not sure how to fit everything on the end plates.
 
I machined those out of some scraps of high temp plastic. they are 9/16" OD and 7/16" ID
 
Too cool Riley..
Great build..
Lemme see a pic of the bulkheads..
I'd like to see how you jived out 2 charge wells on each bulkhead..
I found a completely redundant set up a bit tight in a 3" airframe,,
though my choice of altimeters took up more room,, they're physically larger then the 2 you chose..
Super cool,, super nice / meticulous work....

Dude,,
You made 5200 ft on an I.....
Very cool build....

Teddy
 
What's your opinion on rocketpoxy? You like it? I use Proline 4500. Its thick stuff, but I actually like that consistency.
 
I have used rocketpoxy on a good number of builds and really like it. I found out after mixing batch for fillets its works well to let the epoxy set about 10 minutes before staring to use it. I have no problem with it wanting to run. Plus they have about 4 dyes you can choose the color you want.
 
What's your opinion on rocketpoxy? You like it? I use Proline 4500. Its thick stuff, but I actually like that consistency.

I really like rocketpoxy. This build was my first with it but I have done 3 or 4 now with great results every time. I mix it, then mix in the dye, then let it sit for 15-20 minutes before laying it down. I do all the fillets at once too. it's awesomesauce.
 
I really like rocketpoxy. This build was my first with it but I have done 3 or 4 now with great results every time. I mix it, then mix in the dye, then let it sit for 15-20 minutes before laying it down. I do all the fillets at once too. it's awesomesauce.
Thanks for the input. When I was deciding on which epoxy to buy, it was between Rocketpoxy and Proline. The
 
Had a really nice flight on my first Loki motor. H160 Blue to 2170ft. That little 240 had some good punch! Thanks David McCann for the great photos!
21008680855_e5482e2ca8_h.jpg

20387610593_5081a8a897_b.jpg
 
Smokin cool flight Riley...
Great shots as always Dave...
I sure do wish I could have been at the launch last weekend...
But I'm still getting ready for Airfest...
I just finished building 2 Eggtimer remote switches...
Tomorrow I'm going to get them in SteamPunk's av bay...

Great launch you guy's...

Teddy
 
Thanks for posting this, it looks great. What did you use for the charge tubes? I am in the middle of building my e-bay and I'm not sure how to fit everything on the end plates.

Ditto, OP!

I have a Scarab that I started on this evening.

Do you remember how much powder you used per charge? How many pins?

Would you ever consider launching this on an J?
 
I'm putting about 2g on each end.. although I tend to overdo it. 3 shear pins on the nose cone. none for the booster.

I would definitely consider launching it on a J. Not sure which one yet, but it's on my short list of things to stick in it.
 
For mine, 1 shear pin in booster, 2 in the nose cone. 0.8g for the booster (drogue), 1.0g for the main. +0.5g in each for the backup charges.

Don

Scarab 54 Takeoff.jpg
 
So you let it tumble until 500' or so and then a 36" chute?

I've (still) never flown dual deploy yet but I expect to do so with this model. Maybe get my L2 with it (if I don't have to walk to Phoenix to recover it!)
 
So you let it tumble until 500' or so and then a 36" chute?

I don't know about other people, but I fly mine drogueless, as it's too small to have any kind of drogue other than maybe 6". The main is at 700 feet, and the chute is a 20" recon recovery.

Note- when you say "tumble", the rocket still is split in two with a shock cord attached, so it's not like it's coming in in one piece. It just doesn't have a chute.
 
Ditto, OP!

I have a Scarab that I started on this evening.

Do you remember how much powder you used per charge? How many pins?

Would you ever consider launching this on an J?

I have three 2-56 screws in the nose and friction fit the booster.
I think I use 1.2g main and 0.8g booster with 50% more for the backups.
Yes, I would fly a J motor. kinda sad I haven't yet. I need to do that soon....
 
I have three 2-56 screws in the nose and friction fit the booster.
I think I use 1.2g main and 0.8g booster with 50% more for the backups.
Yes, I would fly a J motor. kinda sad I haven't yet. I need to do that soon....

*cough*J510W*cough*
 
*cough*J510W*cough*

For me, it's the J500G.. mostly because my scarab is black with a green sticker on the side. Green sticker- green motor. Yeah, I'm superficial.

While we're speaking of nice looking things- this is one of my favorite rocket pictures. It's my scarab going up on an I327DM.

scarab2.png
 
For me, it's the J500G.. mostly because my scarab is black with a green sticker on the side. Green sticker- green motor. Yeah, I'm superficial.

Close call. This is in a 4" rocket..... in a 54mm.... zoooooooom annnnnd an I600r for giggles

14041097201_d7180ed17c_z.jpg
10010200234_677904a18a_z.jpg
17084470570_f1bc62b643_z.jpg
 
Last edited:
I have three 2-56 screws in the nose and friction fit the booster.
I think I use 1.2g main and 0.8g booster with 50% more for the backups.
Yes, I would fly a J motor. kinda sad I haven't yet. I need to do that soon....

Nice build Riley. What size lipos did you use in the av-bay?
 
Back
Top