


Squawsach
Well-Known Member
- Joined
- Sep 28, 2013
- Messages
- 109
- Reaction score
- 0
My new scratch built project will be my level 3 cert rocket and is named Whole Lotta Rosie. It will get a rose color pinkish paint job. I know it's not very manly but it seems correct on this rocket.
I started out with some 6" x 60" Uline mailing tubes that were left over from a Piedmont Area Rocketry Club group project. The 6" Uline tubes have a 1/8" thick wall. There are several 6" nose cones available from various suppliers but I only found one that had a 1/8" shoulder. Scot Glas makes one at a reasonable price so I opted for it instead of making my own. There was a 1/4 sheet of 1/2" oak plywood in the garage so that became centering ring and bulkhead material. A trip to Regal Plastics in Oklahoma City yielded a sheet of 3/16" G10 for the fins.
My level 3 scratch build.
I have all the basic pieces except for the coupler. This rocket will be the typical dual deploy. Payload with main chute up front, coupler/electronics bay in the middle, booster section with drogue in back.
Coupler, no problem, cut 18" off a tube, figure the circumference of the tube, figure the circumference needed for the coupler leaving a little room for fiberglass, subtract the small from the big, cut the proper size strip of material out of the would be coupler, and glue it together. Easy.
It don't work that way or it didn't for me. The 1/8" mailing tube is pretty sturdy and it doesn't like to change shape which is good most of the time. When making the coupler, just removing the strip of material and gluing the tube back together created a football or teardrop type shape. I cut another section of tubing, removed the strip of material, wrapped the coupler section in several wraps of mylar and put it inside of another tube. This helped the coupler stay round as epoxy and fiberglass were used to glue the coupler tube back together.
Once the coupler seam cured, the coupler was wrapped with 2 layers of 6oz fiberglass, again wrapped in mylar and shoved back into one of the unaltered body tubes while the epoxy is still wet. The mylar kept things separate but it was still very difficult to pull the cured coupler out of the tube. Good news is the coupler is now round.
The payload section was covered in 2 layers of 6oz e glass. The booster was covered in a polyester sock. It was my first time using a polyester sock on an airframe and I must say that I am unimpressed. The polyester sock will provide some protection from dent and dings but it is not as ridged as fiberglass. I used a homemade rotisserie to glass the tubes. I knew I would find a use for that washing machine motor I picked up at a garage sale.
The booster and payload were sanded and primed on the rotisserie. I can change speeds for sanding. They were cut to length on a table saw. I made a simple jig to hold them while the blade is raised into the material. The tube is then rotated and the blade is dropped when the cut makes it all the way around. I was a little surprised at how well this worked. It cut the tubes true and square.

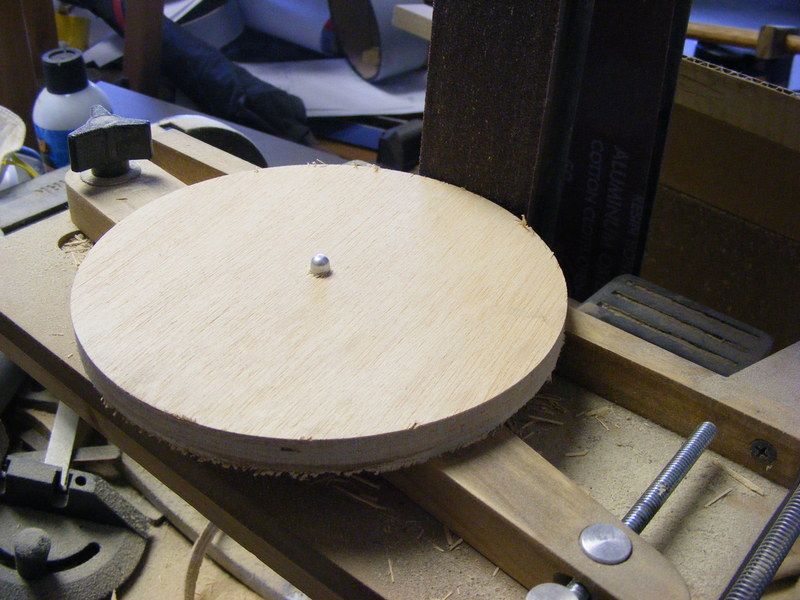
The motor tube also started life as a mailing tube. The heavy 3" mailing tube was wrapped with 2 layers of 6 oz fiberglass and cut to length on a miter saw. The centering rings for Rosie were rough cut with a band saw and trued on a sanding jig.
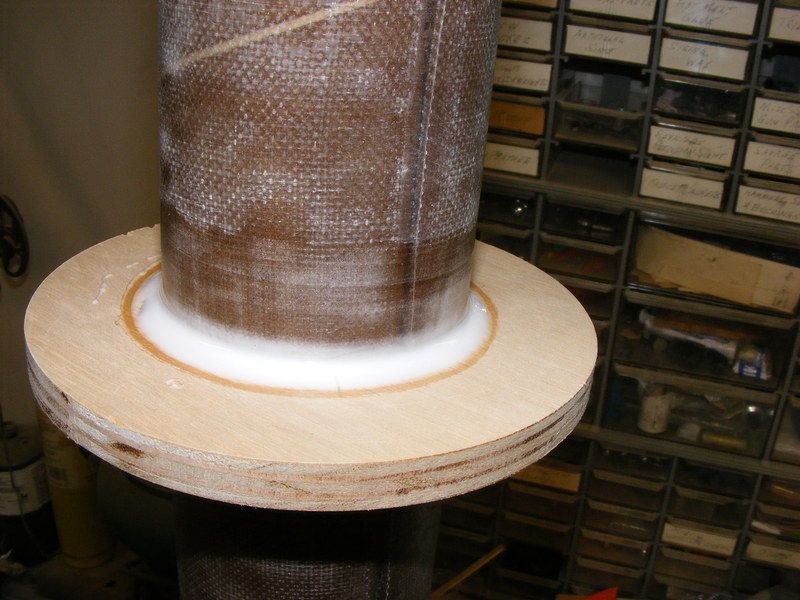
Once the OD was correct, the rings were taken to the drill press to have the ID cut.

The centering rings were glued to the motor tube using Extreme Power 30 minute epoxy and glass microspheres to thicken the epoxy. The thicker epoxy allows me to make larger fillets. I gain confidence from large fillets. They may not make much difference but they make me feel better about the strength of the build.
I started out with some 6" x 60" Uline mailing tubes that were left over from a Piedmont Area Rocketry Club group project. The 6" Uline tubes have a 1/8" thick wall. There are several 6" nose cones available from various suppliers but I only found one that had a 1/8" shoulder. Scot Glas makes one at a reasonable price so I opted for it instead of making my own. There was a 1/4 sheet of 1/2" oak plywood in the garage so that became centering ring and bulkhead material. A trip to Regal Plastics in Oklahoma City yielded a sheet of 3/16" G10 for the fins.
My level 3 scratch build.

I have all the basic pieces except for the coupler. This rocket will be the typical dual deploy. Payload with main chute up front, coupler/electronics bay in the middle, booster section with drogue in back.
Coupler, no problem, cut 18" off a tube, figure the circumference of the tube, figure the circumference needed for the coupler leaving a little room for fiberglass, subtract the small from the big, cut the proper size strip of material out of the would be coupler, and glue it together. Easy.
It don't work that way or it didn't for me. The 1/8" mailing tube is pretty sturdy and it doesn't like to change shape which is good most of the time. When making the coupler, just removing the strip of material and gluing the tube back together created a football or teardrop type shape. I cut another section of tubing, removed the strip of material, wrapped the coupler section in several wraps of mylar and put it inside of another tube. This helped the coupler stay round as epoxy and fiberglass were used to glue the coupler tube back together.

Once the coupler seam cured, the coupler was wrapped with 2 layers of 6oz fiberglass, again wrapped in mylar and shoved back into one of the unaltered body tubes while the epoxy is still wet. The mylar kept things separate but it was still very difficult to pull the cured coupler out of the tube. Good news is the coupler is now round.
The payload section was covered in 2 layers of 6oz e glass. The booster was covered in a polyester sock. It was my first time using a polyester sock on an airframe and I must say that I am unimpressed. The polyester sock will provide some protection from dent and dings but it is not as ridged as fiberglass. I used a homemade rotisserie to glass the tubes. I knew I would find a use for that washing machine motor I picked up at a garage sale.


The booster and payload were sanded and primed on the rotisserie. I can change speeds for sanding. They were cut to length on a table saw. I made a simple jig to hold them while the blade is raised into the material. The tube is then rotated and the blade is dropped when the cut makes it all the way around. I was a little surprised at how well this worked. It cut the tubes true and square.

The motor tube also started life as a mailing tube. The heavy 3" mailing tube was wrapped with 2 layers of 6 oz fiberglass and cut to length on a miter saw. The centering rings for Rosie were rough cut with a band saw and trued on a sanding jig.

Once the OD was correct, the rings were taken to the drill press to have the ID cut.

The centering rings were glued to the motor tube using Extreme Power 30 minute epoxy and glass microspheres to thicken the epoxy. The thicker epoxy allows me to make larger fillets. I gain confidence from large fillets. They may not make much difference but they make me feel better about the strength of the build.

Last edited:


 :wave: :cool2: