Starting an Estes Partizon Build

The Rocketry Forum

Help Support The Rocketry Forum:

This site may earn a commission from merchant affiliate links, including eBay, Amazon, and others.

Agatheron

Well-Known Member
Joined
Jun 2, 2014
Messages
153
Reaction score
0
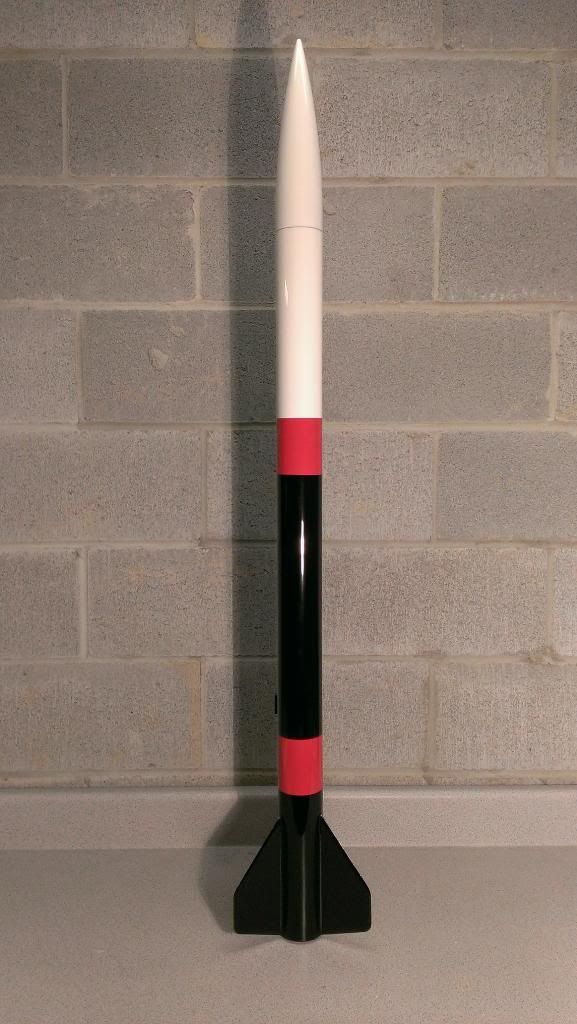
Well, spring is here, and it's time for another round of rocket builds. I have a Photon Probe, a Mega Mosquito, and a freshly acquired Partizon that will be the focus of my build here. There's a mid power launch coming a week from Saturday that my Maxi Alpha 3 and my Prowler will see some action at, assuming the weather cooperates. I thought it might be fun to try to get the Partizon ready for that launch, but I'm not going to knock myself out to get it done. Still, this is a good place to track progress and get some feedback.

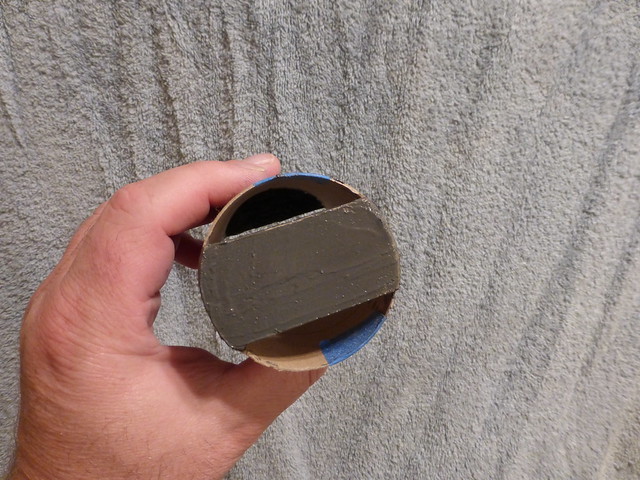
The build will be largely stock, but I do have some Kevlar that I plan to use as a lead for the shock cord, as well as a swivel and a quick release clamp that I'll add. I plan to secure the shock cord to the motor mount, rather than the side of the tube. I'm hoping to paper the fins as well.

Any other suggestions for this build? It's a long rocket at 56", and fulfilled the requirement of being taller than my daughter. I'd appreciate any suggestions. I'm not likely to start building it until Saturday evening.
 
Internal fillets... Do not install the aft most CR until after you get the fillets done.

The tube-type Bondo (Glazing and Spot Putty) in the spirals/body tube joints can really speed up the painting process.

There's two tube couplers in this rocket, it begs for a half moon baffle (plus it'll act as a shelf to keep the laundry from falling to the back of the tube.

Rail buttons.

Do not glue in the thrust ring, unless you permanently wish to limit the length of the motor you are going to use.

Have Fun!
 
Last edited:
Only thing I wish I had done to mine is make it 38mm. A nice baffle is a must if you keep it 29mm.

TA
 
Any suggestions on how to do the half moon baffle, and where I should install it? I am a bit concerned with the parachute sliding waaay down in the tube. Another alternative is to get a bulkhead and effectively make a payload section in the upper tube. This also for the tip on the thrust ring. Most Composite motors have a built-in thrust ring anyway, don't they? I do have BP motors for my Prowler, but they're not strong enough for a base-build Partizon.

In this case, I'm sticking with 29mm motor mount, as I don't have L1 certification, and I'm not sure if I will. However, this rocket could possibly be used for that down the road, or lessons from it could be applied for a future build.

Any other tips? Best technique for papering plywood fins?
 
I'd put the baffle on the uppermost tube coupler. Here's a link to my PSII based Cherokee D upscale. For my variation on the 1/2 moon baffle, I use a plate that is slightly wider than the motor tube, and centered on the back end. Then two smaller plates on the front end, with a gap that are equal to the width of the motor tube. The grey goop is JB Weld epoxy to give it some flame resistance.

15420430710_92b0ee9785_z.jpg


https://www.rocketryforum.com/showthread.php?65628-Papering-balsa-ply-Fins-A-foolproof-method
 
Last edited:
I have a Partizon in my build pile and will enjoy following the progress on your build.

:pop:
 
Just use the the first tube coupler closest to the motor mount. All you need to cut is two half moon bulkheads and glue them at opposite sides of the coupler in and alternating fashion. I use three half moons of some configuration or another like in the picture.


I don't do baffles much anymore at one point it was a must, but now with 75% of the rockets I build are HPR baffles just get in the way. I still build them on some MPR and LPR rockets and the half moon is the easiest.


TA

2013-03-29 08.28.26.jpg
 
This is helpful. I am planning on attaching a u-bolt to the top centering ring on the motor mount to secure the shock cord. Will these baffles get in the way of that if I decide to use them? The original design, of course, uses the Estes standard three fold paper glued to the inside of the tube. The prowler and other e2x designs use a plastic one that is much more secure, hence securing Kevlar to the motor mount on this build.

Also, am I better to make the baffle, or order bulkhead discs and cut them down?
 
Just make them 1/8 ply, once you mount your U bolt put some epoxy on the nuts so it wont come undone. I wish I had more pictures, i'm sure Captain did a build, instructional how to of a the half moon baffle. I will look for it and post a link.


TA
 
I did a baffle in the upper coupler, but also ran a stuffer tube up to it. Used a sanded down centering ring to hook the stuffer into the coupler then a couple bulkheads with a bunch of offset holes drilled above that to serve as the baffle. Eye bolt epoxied to upper bulkhead as shock cord mount. 15 feet of gutted paracord for the shock cord.
 
This is helpful. I am planning on attaching a u-bolt to the top centering ring on the motor mount to secure the shock cord. Will these baffles get in the way of that if I decide to use them? The original design, of course, uses the Estes standard three fold paper glued to the inside of the tube. The prowler and other e2x designs use a plastic one that is much more secure, hence securing Kevlar to the motor mount on this build.

Also, am I better to make the baffle, or order bulkhead discs and cut them down?

If you use a baffle, you would not attach the shock cord to the top centering ring. You would attach it to the top plate of the baffle. I prefer eye-bolts over U-bolts, but I guess it sort of depends on the application.

I just built a Partizon, but I kind of slapped it together in a hurry. I usually do do internal fillets, but this time I glued the mount together per the instructions, with all 3 centering rings in place. To speed it up, I tacked the rings in their specified spots with a spot of thick CA and a shot of CA accelerator, and then filleted with Titebond Molding and Trim glue. That way there was no wait time for glue to dry between rings.

When gluing the fins, I was able to drip a bead of Molding and Trim glue right through the slots onto the motor mount tube where the fin would contact it and onto the centering rings where the tab edge would contact it. Then I the added glue beads to the fin in all the recommended spots --- all along the root edge where it would contact the BT, tab edges where they contact the centering rings, tab root where it contacts the motor mount tube, fin sides where they contact the slot. When I fitted the fins into place, I feel like I got very good glue contact on all surfaces where the fins make contact. Then I did external fillets. It may not be as solid as true internal fillets, but I think it is pretty solid. And by using the molding and Trim glue, I was abl to do one after another without waiting for anything to dry and be done in a very short time.

EDIT: If you want to make tight beads with the molding and trim glue in narrow spots, it helps to put it in an empty small glue bottle with a narrow tip, like an empty 2 oz Elmer's bottle.
 
Last edited:
One thing I kind of wish I had done is a chute shelf of some kind. I didn't put one in, and it seems like the chute could potentially sink way down in the tube. We shall see. I usually take more care and spend more time on a build, but this is for a night rocket, and won't be flown often or very aggressively. I didn't do any finishing work on it at all in terms of sanding and filling, because it will only be seen at night. But I wish I had done the chute shelf --- I'd hate for it to core sample and damage the light kit!
 
One thing I kind of wish I had done is a chute shelf of some kind. I didn't put one in, and it seems like the chute could potentially sink way down in the tube. We shall see. I usually take more care and spend more time on a build, but this is for a night rocket, and won't be flown often or very aggressively. I didn't do any finishing work on it at all in terms of sanding and filling, because it will only be seen at night. But I wish I had done the chute shelf --- I'd hate for it to core sample and damage the light kit!

Ahh touche, that is a good idea, potential for laundry shenanigans, put the baffle at the top of the rocket.


TA
 
Hm. Good feedback. I hadn't intended to build a baffle for the Partizon specifically, although I've been eyeing a couple Aerotech kits that are locally available which do include a type of baffle in their kits.

On the other hand, if I were to make a specific parachute shelf rather than a full baffle, is that something that is reasonable?

Also, if I go the baffle route, what's the best to cut 1/8 plywood with? I do have a dremel, but I'm not sure if I specifically have a rotary saw for it.
 
Sure you can build a parachute shelf, I did it on some 4" Crayon bank conversions i did, circular bulkhead punched with holes for gases to pass through and a shock cord eyebolt, glue and fillet into the location that allows you to get all the laundry in and some wadding/dog barf (i always use a sheet of wadding on top the shelf to keep the dog barf from getting pushed through the holes.


The chute shelf is next to the motor casing, it has 6 holes and eyebolt, easiest way to put one in is to put a short section of coupler below shelf so it has something to push flat against, and then after gluing the shelf in another short piece over to top as reinforcement, the bottom piece of coupler is just to make sure the shelf lays in the tube without being cocked. Make sure to put the eyebolt in and loctite the botton nut.


20150307_195116.jpg
 
One other thing I noticed with this kit is that it is long and has 3 sections of BT and 2 couplers. Most of the coupler/tube connections were tight enough, but the aft-most section fit the coupler very loosely. It seems like there was a lot of potential to get a crooked rocket. When I glued it all together, I strapped all sections tightly to a long length of aluminum angle to keep it straight. I also used a couple of bungees to keep the entire length of the rocket slightly compressed (not too tight, and I used one on each side so it would be balanced). It came out straight and tight.
 
One other thing I noticed with this kit is that it is long and has 3 sections of BT and 2 couplers. Most of the coupler/tube connections were tight enough, but the aft-most section fit the coupler very loosely. It seems like there was a lot of potential to get a crooked rocket. When I glued it all together, I strapped all sections tightly to a long length of aluminum angle to keep it straight. I also used a couple of bungees to keep the entire length of the rocket slightly compressed (not too tight, and I used one on each side so it would be balanced). It came out straight and tight.

I think the reason the aft section is looser than the others is because Estes packs the kits with the nose-cones nose-down into that section and the cone sort of spreads the opening up a little (unless there is some fixture that causes the expansion during cutting of the fin slots). Total guesses on my part, but that's what I hypothesize from my Partizon kit which is still begging to be built.
 
I think the reason the aft section is looser than the others is because Estes packs the kits with the nose-cones nose-down into that section and the cone sort of spreads the opening up a little (unless there is some fixture that causes the expansion during cutting of the fin slots). Total guesses on my part, but that's what I hypothesize from my Partizon kit which is still begging to be built.

I agree. That's how mine was packed too, and I think that's why that end was looser.

The Partizon I just built is one of the PSII kits I had left over from the big Fry's PSII clearance a couple years ago. I picked it for the night rocket, because it is so long and has plenty of room to cover with LEDs, and I also thought it was going to be the PSII kit I would like the least as a general purpose rocket. Well, now that it is all put together, it's sort of growing on me. I generally go in for shorter fatter rockets, but the long thin shape and the profile of the fins is pretty nice. It also seems like a good inexpensive platform for experimenting with things like baffles or dual deploy. Now I kind of wish I hadn't sold off the second one I had...
 
It also seems like a good inexpensive platform for experimenting with things like baffles or dual deploy. Now I kind of wish I hadn't sold off the second one I had...

I doubt that it would be terribly expensive to clone (less if you recycle your nosecone).
 
I'm hoping to start on this one tonight, at least with papering fins. I've also gotten a hare-brained idea of once I finish this build that I do an upscale of my daughter's Riptide, or even a larger version of my own Photon Disruptor... But that's for another topic...

I'll start posting pictures as I get working on it. I have some ideas of how I can do a laundry shelf. :)
 
I thought the Partizon looked freakishly long so I shortened mine by about 6 inches when I built it

IMAG0128.jpg
 
Hm. My daughter is 53" tall, I could shorten this one by about 3", since the original goal was to get a rocket the same height as her. :)

That's a really nice finishing job. Any tips?
 
Hm. My daughter is 53" tall, I could shorten this one by about 3", since the original goal was to get a rocket the same height as her. :)

That's a really nice finishing job. Any tips?

If you shorten it, you'll have to build it fast. Otherwise, by the time you are done, your daughter will by up to the stock height.
 
At the rate she's growing, I'm worried that the 56" isn't going to cut it. :) So maybe I shouldn't cut the tube. :)

While I'm at it, is it reasonable to build a laundry/parachute shelf by using something like Popsicle sticks or light plywood arranged like slats in the tube, but rather than have them flat (horizontal), align them vertically? I realize this wouldn't work at all as a baffle, which is not my intent, but rather it provides a stopping point for the parachute in such a long tube.

Maybe you should buy another length of BT and some couplers so you can keep ahead of her. The incredible growing rocket!

The Popsicle stick idea might work. But it seems odd to have the shock cord mounted to the motor mount and then run through a long section of empty tube, up through the shelf. I would probably lean toward a chute shelf like the on shown in this post:

https://www.rocketryforum.com/showt...an-Estes-Partizon-Build&p=1455056#post1455056

Just a plate with holes. Mount the eye bolt in that for your shock cord and glue it into the coupler. The Partizon is so long, if you place this in the forward coupler, I don't even think you would need additional plates for it to act as a decent baffle all by itself. Just use a Kevlar leader and nomex blanket, and you won't need wadding.
 
Fair point. Now to get some 1/8" ply and find a way to cut it to fit the Partizon tubes :)
 
Last edited:
I'm curious, would 1/8" aircraft ply really be strong enough? Personally, if I was mounting to a U bolt or an eye bolt, I'd feel more confident if it was 3/16".

To get your Popsicle sticks idea (which is good and I might steal it) to work, are you planning on gluing in spacers to keep them properly spaced with each other before you glue the assembly into the coupler?
 
I was at a local art/craft supply store yesterday, and found wood discs cut to just over 2.5" wide. I'm thinking that I'll laminate 2-3 together, and then trim them down to fit inside the Partizon tube as the laundry shelf. I forgot to check them against a BT-80 tube yesterday, but it was a real stroke of luck to find these. They're pretty thin, but feel pretty strong.

Hopefully these can work. I'm hoping to get the build started tonight, likely working on the first part of the motor mount and papering the fins.

As for the Popsicle stick idea, I may still work it. In terms of spacers, I have blocks of foam from one of my many other hobbies (carry cases for my sci-fi miniature games), so they could work. Alternatively, other Popsicle sticks, but I think that may put the slats too close together.
 
Last edited:
Back
Top