Xarconian Cruiser with CA-papered fins and airbrush finish

The Rocketry Forum

Help Support The Rocketry Forum:

This site may earn a commission from merchant affiliate links, including eBay, Amazon, and others.
Welcome to my basement airbrush painting area:

XC 054.jpg

As you can see, I use a 20 lb CO2 tank for a propellant. One day maybe I get an airpump and tank in the garage, but I usually paint when folks are trying to sleep or take naps or do other things, and the CO2 tank is just so much easier... I fill it once or twice a year, no maintenance, no noise.... and notice the three-way quick connect manifold. I have hoses for my Paasche, my spray gun, and my HF dual action brushes.

The cardboard backing has got a hundred coats of airbrush paint on it. Most recently red from my EPM-010:
EPM-010 SMall.jpg

Today we'll use Auto Air Sealer White, with a K-3 Harbor Frieght mini spraygun with 4 ounce cup. Don't let the 4 ounce cup scare you, we only need maybe half an ounce or so for this job:

XC 055.jpg XC 057.jpg

I spray with about 35 lbs of CO2 pressure. No thinning (I used to thin, but it causes more trouble than it's worth with my setup). The trick is to dial the gun down to a fairly dry spray. We're NOT trying to go for that glossy lacquer coat technique... airbrush paints go on thin, and the gloss will come later from clear. Basically, you want the paint to be half dry just from the high pressure gas flowing over the piece.

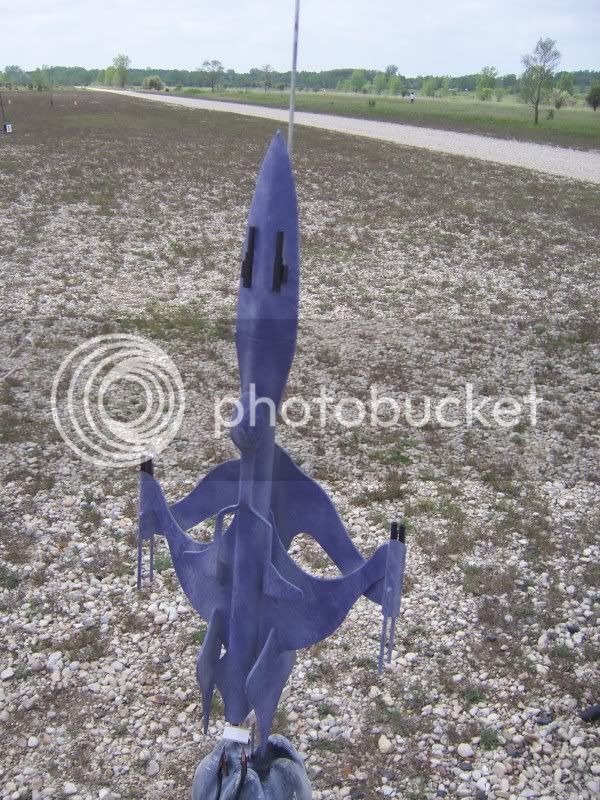
I do pretty fast passes, multiple passes per session. Eventually the rocket is fully coated:

XC 059.jpg XC 060.jpg

This is a sealer primer. Put it on thin and light, then stop. You're NOT trying to go for a totally opaque white like you might with a white lacquer primer. In the pictures you may see some mottling visible through the primer. That's fine. The next step after a few hours is opaque white paint. Meanwhile:

XC 058.jpg

The ABC's of airbrush painting: Always Be Cleaning. Never let the paint sit in the gun/brush unless you want to do a lot of hard work to get the gunk out. Also, you can use warmish water, but not hot: heat polymerizes the acrylic paint. Just use lots of flowing water and have a bottle of airbrush cleaner handy for the spray nozzle. Also use a compressed gas can to get stuff out of crevices. It took me about 5 minutes of actual painting on of primer, and about 10 minutes of cleaning this spraygun.

It was actually the next day (today) when I put the white coat on. Auto Air opaque white. When you put the white coat on, all trace of blotchiness goes away and suddenly you have a dazzling white rocket. But, the pictures wouldn't capture the difference, so I didn't shoot any.

Weight tracking:
Before applying the sealer primer coat: 116.9g
After the sealer: 121.7 g (this bird holds a lot of paint!)
After the white coat: 125.9 g (I will re-weigh when I start next steps, it might dry down a bit).

I also sprayed opaque white onto a piece of cardstock, to give me a test canvas for my color scheme. I think I've decided what to do...

At this point I will leave you hanging. It may be next weekend before I can progress in the build.

Marc
 
Friday night I got back around to working on it.

I used Tamiya tape on the nose cone cockpit window, which will remain white (or, maybe a different color eventually, but white for now...):
XC 062.jpg

Using a fingernail I made sure the edges were sharply creased to match the window contours, then had at it with a sharp hobby knife:

XC 063.jpg

To seal the edges, I painted them with a little transparent base:

XC 064.jpg

White paint would have been fine for the sealing too... but I usually use the thinner base as it dries flatter. Here it is, painted on:

XC 065.jpg

So that I could start painting quickly, I dried it with a hair drier. 3 minutes on high speed warm setting, and it was done.
 
To get the mottled "organic" look I'm going for, similar to my "project red queen" but in different colors, I'll basically be painting curving strips of color all over the bird. I figured the Paasche airbrush, which I don't use much anymore, might be a good choice. It has a fluid path that makes it easy to clean. But I forgot that it doesn't atomize the paint well for fades, at least not with unthinned paint and the H5 tip.

XC 066.jpg XC 067.jpg XC 068.jpg

The above paint was a Wicked pearl violet mixed 1 part paint to two parts Wicked transparent base. I wanted the color to be thinned, not the paint itself. You can clearly see the spatter effect caused by poor atomization. This is due to not getting the pressure/tip/paint thickness properly optimized. It is user error, not "bad airbrush," but I find the dual action Harbor Freight brush does a much better job without fussing around. Here' some pearl blue / transparent base mix run through the Harbor Freight brush:

XC 069.jpg

Zoom all the way in by clicking on the picture, and you'll see the consistency of the blue is much finer. The Paasche actually works well when there will be multiple coats overlapping uniform color... but for fade jobs like this, not so much, at least in my hands. Here it is after I put some blue on:

XC 070.jpg

To build it up, I used a variety of blues and purples, different pressures ranging from 18 lbs to 35 lbs, (thinner lines from lower pressure), and different ratios of color to transparent base.

XC 071.jpg XC 072.jpg XC 074.jpg

In real life it looks a bit darker than what you see here. The camera really picks up the white undercoat. That said, I might have been better served to undercoat it with gray instead of white. It's a bit brighter than I intended... There is one more blue (Wicked Laguna Blue) that went on after that last picture.
 
I am surprised you would let something like the air bubbles in the glue (inside of the air/space scoop, top right of picture) get by you.

Some CWF applied with the side of a tooth pick and the needle files mentioned earlier would have smoothed everything out and would have worked wonders.

That being said, the rest of the build and paint look very good. Nice choice of colors.
 
Marc that looks a H*** of a lot better then the Estes's paint job! When you said you were going to paint it different, I didn't expect this.
I just got an air brush system for Christmas. but haven't had a chance to play around with it, couldn't even tell you what brand it is off the top of my head.
Wifey did the mid January sweep and every thing has been put away, in her secret places. Without the pass words (I cleaned up my rockets) I can't use it!!!

anyway your Xarconian Cruiser looks fantastic
 
I am surprised you would let something like the air bubbles in the glue (inside of the air/space scoop, top right of picture) get by you.

Some CWF applied with the side of a tooth pick and the needle files mentioned earlier would have smoothed everything out and would have worked wonders.

That being said, the rest of the build and paint look very good. Nice choice of colors.

I actually did use files like you described, quite a bit of cwf applicators, and assorted shapes of sanding tools. <we should get a "sanding" icon added to the list of available icons>. But true, I missed some spots. With all going on with the paint job and the stock decals (two sheets worth!) which will distract the eye, I didn't bother to obsess about it. I know I often do obsess about little details, so no wonder you're surprised!

Anyway, today I carefully painted the insides of the tubes and side pods black. Not carefully enough, as I got a few spots and bleeds, but nothing that will show much when the decals are on.

Without, and with flash:

XC 075.jpg XC 076.jpg

I'm not sure when I will have time to put the decals on. Meanwhile I'm doing minor paint touchup.
 
Wow! Beautiful work! It gives me second thoughts about scrapping my kit for parts. It also reminds me of a Babylon 5 Whitestar! :)

Perhaps gold for the windshield later on?
 
Sharp looking rocket, Marc. I always enjoy following your builds.

Dave
 
Thanks for the kudos, guys! And I agree with grapetang, this is somewhat reminiscent of the Whitestar! That was what was behind my sadness that I didn't undercoat with gray... after I looked at the rocket and realized it bore some resemblance to the Whitestar, I realized I missed an opportunity. Oh well, I can save that for another day.

I'm hoping to start on decals tonight. Not much time, and an out of country trip coming up this Sunday, so this build may sit on hiatus for a bit before I wrap it up. I will say that I'm not sure I will use ALL the decals provided... don't want to cover up too much of the paint.

Marc
 
Thanks HD!

Meanwhile, I had hoped to do decals tonight, but there was too much going on with my older son... (he has some challenges) Bottom line I was trying to help keep him focused on homework during the time I might have put on the decals. Normally Friday night would be another shot, but my boy has a school social thing, so maybe Saturday I can get them on. Looking forward to it.

Oh, the white paint dried down by a gram or so. After the color coats were fully dry, it weighs in at 127.5g. So, color coats only added about 2-3 grams.
 
Last edited:
Reminds me of a more colorful version of a B5/Vorlon ship

Well done

Kenny
 
Today was Decal Day (at least, that's what it said on my calendar).

So I got out my Xarconian Cruiser.

XC 077.jpg

I decided the cockpit needed something other than plain white, so I masked it off and sealed the edges:

XC 078.jpg XC 079.jpg

While the transparent base I used on the edges was drying, I got started cutting decals.

Interestingly, these decals were printed on whole sheets, rather than just having little islands of decal film on the paper. There was a hair or piece of lint or something stuck under one of them!

XC 080.jpg

After about half of a movie, the decals were cut out:

XC 081.jpg

The movie was the completely forgettable "At the Devil's Door." Not recommended. I'm rating it two stars on Netflix.

The two largest decals aren't going to be used: they would cover up too much of my nicely finished wings.

OK, here's how I do decals. I warn the readers, that there is much that is debatable about methods of putting on decals. I'm not trying to start any wars here, but this is how I do it.

First, with recent Estes decals, I often don't bother to top-coat them. They are thick enough and almost always handle well, and they resist scratching. Most other details, I'll either spray a light coat of Valspar clear lacquer, or coat with Future, before cutting them out of the sheet.

Anyway, I get some nice very warm water in a bowl. It's just tap water, nothing added. Put the decal in, making sure it is fully dunked. While it's steeping in the warm water, I paint the area on the rocket where it will go with Future (or whatever they call it now) with a small detail brush. Then, I take the decal out, blot off excess water, and slide it onto the slippery Future liquid and work it gently into place. Then I blot with a damp paper towel.

Working with airbrush painted surfaces (acrylic water based airbrush paints, specifically) is a bit different than a much smoother lacquer or enamel surface. Airbrushed surfaces are rougher, and decals put onto them tend to silver (air gets under the decal as it dries). This looks awful. The Future adds an extra layer under the decal to fill the void, and it prevents the silvering and promotes excellent adhesion. The residue of Future doesn't inhibit any clear coating I do downstream (either more Future, or clear lacquer or enamel).

Here is the finished rocket with all decals:

XC 082.jpg

One bummer is I found my nosecone had gotten out of alignment during painting, so when it is on straight, some of the airbrush patterns don't line up perfectly. Oops.

The cockpit was sprayed with Iridescent Yellow (either Wicked or Auto Air... I forget which, probably auto air). It provides nice contrast with the blue/purple!
 
Last edited:
WOW !! The decals really bring it to life--great choice of colors overall-- WELL DONE !!
 
It's not quite done yet. Looking at it last night i decided the flat black decals were just too muted for a bird sporting organometallic skin. It needs a sparkly force shield around the entire rocket. When I get home from a business trip I will take the next steps... Stand by this weekend...
 
It's not quite done yet. Looking at it last night i decided the flat black decals were just too muted for a bird sporting organometallic skin. It needs a sparkly force shield around the entire rocket. When I get home from a business trip I will take the next steps... Stand by this weekend...

Breath holding------turning blue now------I can't feel my feet----
 
OK, back from my business trip and time to finish off the build / finish.

Yesterday I made a mix of about equal parts of "Hot Rod Sparkle," Transparent Base, and Reducer plus about two drops of Aluminum Base.

XC 089.jpg XC 090.jpg

I sprayed this through the H3 tip of my Paasche brush at about 35 PSI. Should have used the H5 brush; it would have flowed better.

The Hot Rod Sparkle stuff is very goopy. To spray it you need to reduce/thin it. The mix I made in transparent base with reducer let it mix pretty well, but it does have a habit of settling out. About midway through my spraying the tip got clogged when the thicker "settled mix" got sucked through. Had to futz around to free it and finish the job but it turned out OK. I sprayed just a light dusting of the stuff over the whole rocket. No attempt at making a complete wet coat or anything.

Here are some "before" pictures:

XC 084.jpg XC 085.jpg

And some after pictures:

XC 086.jpg XC Sparkle Closeup.jpg
XC Sparkle Closeup 2.jpg

I'm still pondering whether I should clearcoat it. I'm kind of thinking to leave it alone but I might Future coat it. Will decide tomorrow.
 
Ooo... nice sparkly force field! I'm sure the pictures don't do it justice. I've seen ModPodge glitter glue effects but it's too thick w/visible brush strokes; it seems like glitter in white glue. You're solution looks great!

You've got me thinking about sci-fi rocket projects now... :)
 
I re-weighed the rocket. It came in at 128.0 g after decals were applied and everything was dry again.

Today I coated it with Future (Pledge with Future Shine, the bottle says). It's dry but I'm waiting for a sunny day to take a glory shot. In the sun the sparkle stuff ought to show up nicely.

Tomorrow is forecast to be cloudy, but if I get a few minutes of sun, I'll take a shot.

Marc
 
Very cool, Marc! Great work, as usual. I hope to sneak a peak if that beauty shows up at an AMOREA launch this season.
 
Thanks Dean! I'm looking forward to resumption of the club launches in the spring!

Meanwhile, taking advantage of relatively sunny moments this morning, here are some glory shots, attempting to catch the hot rod sparkle glint:

XC 093.jpg XC 094.jpg
XC 096.jpg XC 097.jpg

Finished weight, not including parachute (I swap chutes depending on field / wind conditions) is 128.9 grams. Thus, the Future coating added 0.9 grams after overnight drying. This is about a quarter to a fifth of what a traditional multi-coat clear lacquer would have added.

Other than clipping in a chute, and stuffing in an engine and wadding, it's ready to fly!
 
Looks great... sure seems like that would be "sky camo" though... hope you can see it in flight...

Later! OL JR :)
 
Yeah... hadn't thought of that... but from what I hear, it's not going very high on a C6 anyway due to weight/drag. And if I put it on a D10 or D21, I won't see it for long even if I paint it "recovery orange!"

Thanks!
 
Beautiful work! "Sky camo"... LOL! I found EchoVictor's thread while digging around, and both yours & his are very inspiring! :) :) :)


100_2169.jpg
 
That was an awesome build from the time when I was starting my BAR phase. I remember it. Awesome build, that was. I will have to try out the "furnace filter paint interference" trick. Thanks for the reminder!
 

Latest posts

Back
Top