Madcow Tomach Build Thread - "Not an Engineer"

The Rocketry Forum

Help Support The Rocketry Forum:

This site may earn a commission from merchant affiliate links, including eBay, Amazon, and others.
Cool - thanks guys!

For the nosecone of this rocket, I'll be using the tried-and-true Vern Knowles-style system. (My standard for ALL nosecones.)

IMG_2935.jpg
Here we have all of the hardware I'll be using on the nosecone - 1/4" eyebolt with nuts/washers, 2.5" #10-24 machine screws, 1/2" #10-24 machine screws, and some #10-24 hex couplers.

IMG_2938.jpg
I know, I know, 4 x 2.5" long screws is way overkill for a 54mm nosecone. But this is the exact same method I always use, so why re-invent the wheel...

IMG_2940.jpg
Bulkhead inserted into place. As you can see, doing the nosecone anchors BEFORE you glue the coupler in makes it a lot easier since you can access both sides.

IMG_2950.jpg
First, we tack them in place using hobby epoxy.

IMG_2951.jpg
And ready for the next step!
 
IMG_2960.jpg
Now, we add 2 layers of Kevlar soaked in West Systems epoxy. (Letting the epoxy cure before adding the 2nd layer.)

IMG_2961.jpg
And the aft end. Now, the coupler is ready to be glued into the nosecone.

IMG_2962.jpg
3/4" copper pipe caps are about the perfect size for ejection charge holders on a 54mm coupler!

IMG_2964.jpg
Lastly, I set the 1st fin today, using Aeropoxy ES6209 and the handy fin alignment guides that come with the kit.
 
IMG_2968.jpg
Nosecone coupler glued in using Aeropoxy.

IMG_2970.jpg
Completed nosecone.

Anyone know the complete cure time for ES6209? The website says 24 hours but it's been longer than that now, and the epoxy is still a bit sticky.
 
Just a little sticky but hard? Or tacky and soft? If it's the former then that is fine... if it's the later then something happened when you mixed the epoxy and you need to verify that you used the correct parts and the ratio was right.
 
Just a little sticky but hard? Or tacky and soft? If it's the former then that is fine... if it's the later then something happened when you mixed the epoxy and you need to verify that you used the correct parts and the ratio was right.
Definitely the former - sticky, but very hard. (I feel like we're making innuendos here...) Glad I didn't mix it wrong!
 
Yeah the aeropoxy can take a long time to fully cure... like a few days to a week.

Oh and don't forget that most epoxies are exothermic reactions
 
It might be what people refer to as "amine blush". Seems to happen with Aeropoxy. It is discussed in this thread a bit:

https://www.rocketryforum.com/showt...ompatibility-problem&highlight=aeropoxy+blush

I have used Aeropoxy a bit and had some sticky / waxiness.
Yeah the aeropoxy can take a long time to fully cure... like a few days to a week.

Oh and don't forget that most epoxies are exothermic reactions
Good to know - thanks guys. And yes, the exothermic reaction is particularly noticeable when mixing large batches of hobby epoxy, I've found.
 
I have placed sticky epoxy in front of a space heater for an hour or two as a poor man's curing oven to finish up hardening. Just rotate the part every 15 minutes or so. I think the slightly elevated temperature helps push the reaction to completion and the warm air flow may help pull out any solvents.
 
Cool, I wouldn't have thought to try a curing-oven approach. Good idea!
 
IMG_2977.jpg

Edit: The damn stuff still doesn't seem to have fully cured...
 
Did you happen to save the mixing cup you used? Can you bring it to the meeting on Tuesday?
 
Did you happen to save the mixing cup you used? Can you bring it to the meeting on Tuesday?
Yep, I still have it and will bring it Tuesday. Do you know how hard it's supposed to be when cured?
 
Back to work on this project!

IMG_3034.jpg
Glued up the other 2 fins last night, now curing as we speak.

IMG_3035.jpg
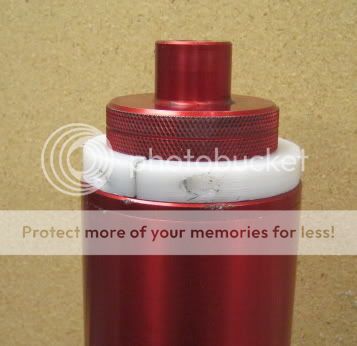
And now, for this rocket... My first snap-ring case!!! Full 54mm hardware set by Mike Fisher, 30" long case, as well as a set of o-rings.

IMG_3036.jpg
For comparison, here we have the booster section next to the 30" Fisher case, a K250W case, and a 54/1706 case. :) Makes the 1706 look so small...
 
Back to work on this project!

View attachment 255022
Glued up the other 2 fins last night, now curing as we speak.

View attachment 255023
And now, for this rocket... My first snap-ring case!!! Full 54mm hardware set by Mike Fisher, 30" long case, as well as a set of o-rings.

View attachment 255024
For comparison, here we have the booster section next to the 30" Fisher case, a K250W case, and a 54/1706 case. :) Makes the 1706 look so small...

Very nice. How does the hardware from Mike work. Is that for EX only, or can it take some commercial snap ring reloads?
 
Very nice. How does the hardware from Mike work. Is that for EX only, or can it take some commercial snap ring reloads?
Good question! I don't know, actually. The case might have the same dimensions as AMW and Gorilla hardware, but not sure about Loki...
 
Good question! I don't know, actually. The case might have the same dimensions as AMW and Gorilla hardware, but not sure about Loki...

No, it's different. Not saying that you can't get it to work with commercial loads with some variety of spacers and such, but certainly great for research! I have all of Mike's 38 & 54 hardware and a 75 or two.
 
Last edited:
No, it's different. Not saying that you can't get it to work with commercial loads with some variety of spacers and such, but certainly great for research! I have all of Mike's 38 & 54 hardware and a 75 or two.

Yes case is about 1.5 inches or so longer than AMW or Loki. Binder Design site says (for 38 mm), only for EX. I don't know anything about EX. Not even sure if one can do it in California.
 
No, it's different. Not saying that you can't get it to work with commercial loads with some variety of spacers and such, but certainly great for research! I have all of Mike's 38 & 54 hardware and a 75 or two.
Cool! Can't wait to put propellent in mine.

Yes case is about 1.5 inches or so longer than AMW or Loki. Binder Design site says (for 38 mm), only for EX. I don't know anything about EX. Not even sure if one can do it in California.
Mike also offers 54mm, 75mm, and 98mm. He told me this case is a 54/2800 or thereabouts.
 
I've run into a slight problem - the aft thrust ring of my motor hardware pictured above is too wide to work with an Aeropack or Slimline motor retainer. I know there must be some alternative (?) because I've definitely flown a 54mm snap-ring case using a standard Aeropack retainer before.

I went to take a look at the Aeropack minimum-diameter motor retainer, but their website seems to be down right now. Another concern is that this would further limit space for recovery gear...
 
Yep, I still have it and will bring it Tuesday. Do you know how hard it's supposed to be when cured?

Hard. Should be able to push a fingernail into it and not dent it. Blush is fairly common with 6209, but the epoxy under it should still be hard. Heat noticeably speeds up cure time in my experience.
 
I've run into a slight problem - the aft thrust ring of my motor hardware pictured above is too wide to work with an Aeropack or Slimline motor retainer. I know there must be some alternative (?) because I've definitely flown a 54mm snap-ring case using a standard Aeropack retainer before.

I went to take a look at the Aeropack minimum-diameter motor retainer, but their website seems to be down right now. Another concern is that this would further limit space for recovery gear...

And the MD retainers won't work well with a snap ring case. (spinny spinny) I'd just tape it and friction fit.
 
Hard. Should be able to push a fingernail into it and not dent it. Blush is fairly common with 6209, but the epoxy under it should still be hard. Heat noticeably speeds up cure time in my experience.
I talked to Jeremy about it and a theory he had was that the plastic cup I mixed in had some weird effect on the epoxy. Not sure why, but just for interest's sake I applied all the force I could onto that fin, and it didn't budge. PLUS I'll be adding fiberglass cloth and whatnot, so I'm certain it won't come loose. I mixed my 2nd batch on a sheet of cardboard, so we'll see if that solves the curing issue this time.

And the MD retainers won't work well with a snap ring case. (spinny spinny) I'd just tape it and friction fit.
Spinny spinny? Yes, friction fit would probably work fine, but I feel like I could do better than that...
 
Spinny spinny? Yes, friction fit would probably work fine, but I feel like I could do better than that...

The bulkhead on snap ring cases will spin even when assembled, if you screw it into an aeropac MD retainer, you may never get it out. I'm not sure if mike's are setup the same way as the LOKI I have, or if something would stop it. Scott was saying he's working on a ring to screw onto his new bulkheads that would stop this.

But like you said, not much room there for any of that. I think friction fitting is a better option than putting a retainer on the back end.
Oh, I understand that now. The forward bulkhead of Mike's hardware is just flat top/bottom with a 3/8" (I think) hole tapped in the forward end.
Thanks for the input!
 
Dude - just use tape (friction fit) and an eyebolt. If you really want mechanical retention beyond that (if your motor is on your recovery line, it's not being lost even if the friction fit slips out), here's what I've done - make a little "frisbee" with a 54mm coupler bulkplate glued in to a little 1" ring of coupler. Drill a 1/4" hole through the bulkplate for your eyebolt, and sandwich the "frisbee" on top of your motor using the eyebolt and a nut/washer. Then just slide the motor in with the frisbee on top, drill and tap three screws at 120deg apart into the little ring. No need for fancy aftermarket parts that just add weight and drag and are made for commercial motors ;)

-s
 
Dude - just use tape (friction fit) and an eyebolt. If you really want mechanical retention beyond that (if your motor is on your recovery line, it's not being lost even if the friction fit slips out), here's what I've done - make a little "frisbee" with a 54mm coupler bulkplate glued in to a little 1" ring of coupler. Drill a 1/4" hole through the bulkplate for your eyebolt, and sandwich the "frisbee" on top of your motor using the eyebolt and a nut/washer. Then just slide the motor in with the frisbee on top, drill and tap three screws at 120deg apart into the little ring. No need for fancy aftermarket parts that just add weight and drag...
All good ideas! In fact, the "not losing a motor case because of the harness" is exactly what happened on my 75mm shakedown flight - the motor popped out, but just dangled in the air like a streamer.

...and are made for commercial motors ;)
Although, I like this one even better. :)
 
Dude - just use tape (friction fit) and an eyebolt. If you really want mechanical retention beyond that (if your motor is on your recovery line, it's not being lost even if the friction fit slips out), here's what I've done - make a little "frisbee" with a 54mm coupler bulkplate glued in to a little 1" ring of coupler. Drill a 1/4" hole through the bulkplate for your eyebolt, and sandwich the "frisbee" on top of your motor using the eyebolt and a nut/washer. Then just slide the motor in with the frisbee on top, drill and tap three screws at 120deg apart into the little ring. No need for fancy aftermarket parts that just add weight and drag and are made for commercial motors ;)

-s

Nice idea.
 
I do like Steve posted above. I did a 3" min dia one time and I needed all the space I could salvage. I ended up making a 2 piece nylon ring. Freed up enough more space for about 5 more feet of shock cord. These also make good rail button attachment point too.

FC.jpg


Tony
 
Back
Top