Filling/Sanding Balsa Nose Cones

The Rocketry Forum

Help Support The Rocketry Forum:

This site may earn a commission from merchant affiliate links, including eBay, Amazon, and others.

MichaelRapp

Well-Known Member
Joined
Nov 9, 2014
Messages
279
Reaction score
38
Hi all,

I noticed that some of the rockets I picked up in the recent Estes Black Friday sale have balsa nose cones. (It's either the Cosmic Explorer or the Reflector, can't remember off-hand.)

As a beginner, I've noticed I have a tendency to over-sand and this tendency would be magnified on a nose-cone. So here is how I plan to approach filling and sanding the nose-cone.

First, I'm going to use a relatively light coating of CWF. What I am trying to avoid is a "frosting" like look. If I have a lot of "mountains and valleys" I may work too hard on the mountains and then sand too much and alter the shape of the nosecone. If I keep the CWF fairly smooth I hope to avoid that.

CWF sands pretty easily so I think I'll start with some 400 or even 800 grit sandpaper and go slowly. I'll sand with a circular motion and check my progress every three-to-five seconds or so.

How does that sound?
 
Sounds OK. That's what I do. I usually use a little coarser grit to sand the CWF stuff down, but you seem patient and careful, so I'm not going to advise that 400-grit is bad. What you describe is the basic procedure. There are endless posts on balsa wood filling here on TRF and elsewhere.

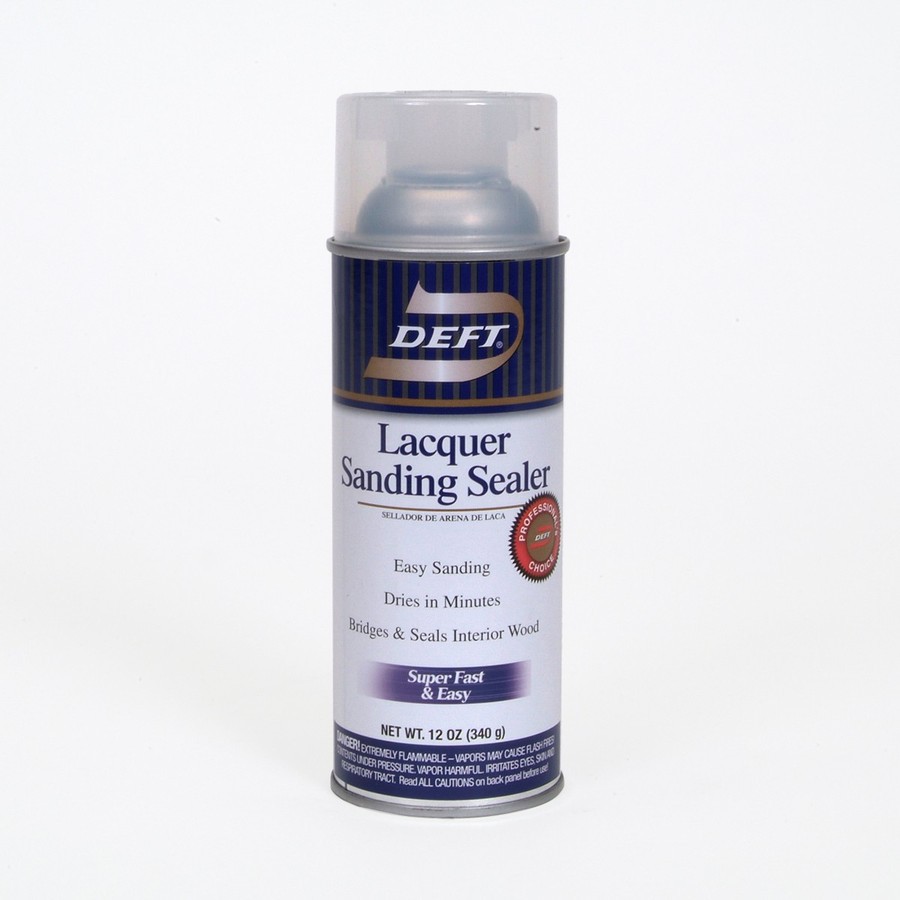
I like to finish with a few layers of lacquer sanding sealer or dope. Gives the work a final smoothing.

-Wolf
 
Funny, I used the CWF on the one kit with a balsa nose cone, and I laid it on a little thick (based on previous exp. with it being too thin on my fins), and I felt really, really lost when sanding because I couldn't see the wood grain any more. In fact, I also applied it to the shoulder of the cone and the balsa payload transition, and it was so thick that I couldn't get them into the tube after my initial sanding!

Like you mentioned, I used a really, really fine sand paper, and sanded as evenly as possible, even to the point of counting the number of times I moved the paper on each section/quadrant of the nose cone.

I'm almost thinking of trying the old Aero-Gloss Sanding Sealer (fumes and all) on my balsa nose cones, because I don't recall ever having this problem 30 years ago! Before I do that, however, I'll mix the CWF a little more thinly, so I don't lose sight of the balsa wood grain.
 
I generally 'harden' the balsa with CA 1st, then do the sand and fill routine.
Rex
 
I have to admit that I cheat and still use the old Elmer's FNF. I still have a large tub of that. The newer CWF seems not as soft and sandable as the old formula. I use dope and talcum powder occasionally, but I get sick of that and switch back to FNF. This stuff is pretty good. Convenient spray. Fast dry.

037125015138.jpg
 
I always use about six coats of good old-fashioned sanding sealer and sanding lightly with 220 and finally 400 grit sandpaper. Some of my balsa nose cones have been mistaken for plastic.
 
I'm almost thinking of trying the old Aero-Gloss Sanding Sealer (fumes and all) on my balsa nose cones, because I don't recall ever having this problem 30 years ago! Before I do that, however, I'll mix the CWF a little more thinly, so I don't lose sight of the balsa wood grain.

Fumes? What fumes? I used a lot with no problem.

Fumes? What fumes? I used a lot with no problem.

Fumes? What fumes? I used a lot with no problem.

Fumes? What fumes? I used a lot with no problem.

Fumes? What fumes? I used a lot with no problem.

Fumes? What fumes? I used a lot with no problem.
 
If you're having problems with over-sanding, what I would do is to thin the filler more than usual, and sand w/320. Go slowly and do several coats.

"Back in the day", we made our own sealer by mixing clear dope (butrate lacquer) with baby powder. This gave an easily sanded filler; a soft filler in a hard matrix. You could do something similar using one of the modern water-based polys.

Another great solution a friend came up with was to take a small amount of Plastic Wood and rub it into the balsa until it crumbled and all falls off. This gives a rock-hard surface with filled pores. When properly sanded, it gave a surface like glass. Of course, we were rubbing this stuff in with our bare fingers. There's all kinds of good solvents in the formula.
 
I generally 'harden' the balsa with CA 1st, then do the sand and fill routine.
Rex

That's what I do. Then I don't have to worry about sanding the nose cone too much.

One or two applications of medium CA followed by two coats of Elmer's FnF (Sanding between coats) then two coats of PlastiKote primer and filler (In one).
 
Interesting....thanks for the suggestions.

The CA approach sounds interesting. Rex and Bob, how do you apply the CA? CA has surprised me....it flows ridiculously easy (isn't it supposed to be less viscous than water?). Do you just "paint" the nose cone with the little nozzle on the typical CA bottle?

This is how I use the CA with a balsa nose cone.

First, wrap and tape a small piece of wax paper to the tip of your index finger.

Second, holding the nose cone upside down (Shoulder up) run a light bead of medium CA around the circumference of the nose cone starting just below the shoulder where the nose cone is exposed when inserted into a body tube.

Third, using your wrapped index finger, brush the CA down towards the tip of the nose cone. You may have to do this several times.

Fourth, look at the nose cone. Where you see a 'dry' area run another light bead of CA around the circumference of the nose cone at that point. Again, wipe downward with wrapped index finger. Repeat this until nose cone is completely coated. Hang upside down until set and dry.

Make sure to do this work outside with plenty of ventilation. Also, wear clothes you don't have to worry about getting CA on. :facepalm:

Once dry, sand surface of nose cone until smooth. Repeat process if necessary.
 
Thin Titebond 50% with wather and coat it 3 or 4 times. Then another 2 or 3 time with unthinned Titebond.
Glue soaks in deeper and you don't get a crunchy skin. Just let it dry over night between coats. Sands nice with 220.
Prime, wet sand with 400 and paint.
 
since we didn't come right and say it...install the screw eye before applying the CA, this gives you something to hang the nose by :). I usually put one wrap of masking tape on the shoulder before I start 'CAing' balsa 'wicks' ca quite nicely. for the same reason use cotton swabs with plastic sticks instead of paper.
Rex
 
That's what I do. Then I don't have to worry about sanding the nose cone too much.

One or two applications of medium CA followed by two coats of Elmer's FnF (Sanding between coats) then two coats of PlastiKote primer and filler (In one).

Ultra thin CA (pink bottle stuff from Hobby Lobby) works best, IMHO.

The thinner the CA, the deeper its pulled into the wood grain by capillary action, and the deeper the hardening effect on the nosecone.

Later! OL JR :)
 
Interesting....thanks for the suggestions.

The CA approach sounds interesting. Rex and Bob, how do you apply the CA? CA has surprised me....it flows ridiculously easy (isn't it supposed to be less viscous than water?). Do you just "paint" the nose cone with the little nozzle on the typical CA bottle?

That's what I do... should be some pics of the process in one of my Dr. Zooch Beta Build threads...

It doesn't make the cone "bulletproof", but it DOES help reduce dents and dings.

What I use is the pink bottle "ultra thin CA" from Hobby Lobby. I take the balsa cones or transitions and the CA outside, in a paper box lid (low sided cardboard box works well) that I line with a piece of wax paper. (The wax paper prevents the cones from "gluing themselves" to the box when they're set down in there to dry. If you're prone to gluing parts to yourself or gluing your fingers together with CA, or just don't like having CA "glue scabs" on your fingertips, I'd also recommend gloves. This is DEFINITELY a project to do OUTSIDE, because the CA fumes are QUITE overpowering (like tear gas!). I recommend doing it in an area with decent airflow, with the breeze coming from either your left or right, NOT into your face or at your back (into your face will whip the fumes straight into your face, obviously, and the wind at your back can whip the fumes around into your face as the breeze curls around you due to turbulence.) I take the cones, hold them "tip down", and starting at the back edge of the cone directly above the shoulder, I start squeezing out CA onto the surface and gently "rubbing it around" onto the cone as I gently turn it, holding it at least 45 degrees tip down, and slowly turning it. The balsa will rapidly "drink in" the CA, sucking it down deep into the wood by capillary action down into the pores and grain of the wood. It will react with residual moisture in the wood and begin curing. Just continue turning and spreading CA onto the cone, working down toward the tip, letting the wood soak up as much CA as it will take. Beware that 1) the CA CAN be pulled up all the way to the end of the cone shoulder, as it follows the wood grain via capillary action... this can glue your fingers to the cone if you're not careful. 2) The other thing is, CA reacts with moisture to cure... if the wood has a little higher moisture content than most commonly does, it can react VERY quickly, releasing considerable heat, which can drive the moisture out of the cone as smoke or steam and heat the cone up. Not a big problem, but be careful-- you don't want to breathe those vapors-- CA fumes are *powerful* and act like tear gas!

Anyway, let the wood take in as much CA as it will hold. It will cure inside the wood grain and eventually seal it off, and the wood will simply not take any more in. As more is applied, it will eventually just run down to the tip and drip off. At that point, wipe off any remaining CA from the tip with a paper towel (very quickly so you don't glue it to the cone) and then set them up on WAX PAPER to dry (so they don't glue themselves to the cardboard box). In about 10-15 minutes, you'll be ready to move on to the next step.

Now, the CA treatments tends to leave a very rough, gritty, textured surface. Basically, it raises any "balsa hairs" (stray uncut wood fiber from the cone being manufactured to the correct shape) still attached to the wood, and any wood dust hiding down in the pores or wood grain, and turn it into a sort of solid "concretion" on the surface. No matter how clean and smooth the cone APPEARS to be before CA application, it WILL be rough and gritty afterwards-- can't be avoided. Sand the cone down smooth with 220 grit to get the rough stuff, and then 400 grit to smooth it out to the point its ready to take thinned Carpenter's Wood Filler (CWF) or whatever method of filling you want to use.

Later! OL JR :)

Later! OL JR :)
 
Funny this subject just popped up...

I was filling the shoulders on a balsa transition with some CA just twenty minutes ago. I had split it in two and carved out a hollow for a tiny video camera.

IMG_2236.jpg

When I install it, I'll need to tape the two halves together after turning on the camera.

This transition is made from pretty soft balsa, and I've had masking tape strip bare balsa off the surface I was working on before. I was going to paint it, but was worried that might add too much thickness for the tape plus body tube.

Then I realized I could just fill the shoulders with CA, and wouldn't need to worry about painting it.

A few minutes after filling one of the halves, I got curious about something and picked it up - by the shoulder!

I dropped the thing, and it just barely released from my thumb. My girlfriend asked me why I had suddenly jumped in a panic. "I nearly superglued this thing to my thumb!" I said.

It's curing on wax paper now. My thumb still burns a little...
 

Latest posts

Back
Top