


The Krogen method of crazed paint:
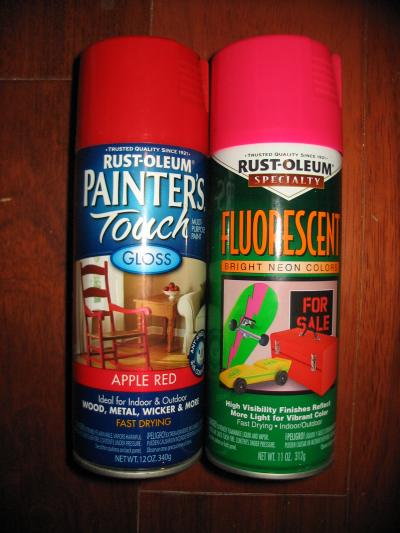
First you need some paint. The exact type and brand isn't critical, just get whatever they stock at your favorite store. The key is that you need to use a 'fast drying' (ie, not high heat, textured, rust proof, etc) paint for the first coat, and florescent paint for the top coat. I used Rust-Oleum Painters Touch Gloss paint for the first coat, and Rust-Oleum Specialty Fluorescent for the second coat.
The actual method is quite simple:
First prepare the surface for paint. This depends on the surface, but in general you would want to lightly sand it, wipe it down with a clean/dry cloth, and of course mask off the areas that you don't want painted. If the surface is very porous or rough, I would recommend starting with a layer of sanding sealer or primer, sanding it smooth, and then continuing with the process. Also, it is a very good idea to start on a piece of scrap material, so that you can experiment and get the effect you are looking for.
Then put down a coat of the base paint. You want a pretty good coat, but don't go so thick that you risk runs in the paint. Let this dry enough that it is not tacky, but not long enough that it fully cures. I have found about 5 minutes to be about right.
Next spray the fluorescent paint. This is the most critical step, as the thickness of this layer directly affects the size of the features in the finished product. A light coat (just enough to get a full coverage) will give features that are about 1/4" in diameter. A heavy coat (as heavy as you can go without risking runs) will give features that are as large as 2" in diameter.
Unfortunately, the paint will start to craze over in about 30 seconds, sometimes less, which means that a second coat is out of the question. It also means that you need to be careful in choosing your technique for putting this coat on, as you cannot go back over an area after about 30 seconds without creating a break in the pattern. Let this coat dry fully before adding any more coats.
At this stage the surface should be mostly the color of the florescent paint, with patches of the base color showing through. If not then something didn't work right, and you need to experiment more.
Here are a few of the color combinations that seemed to turn out looking the best:
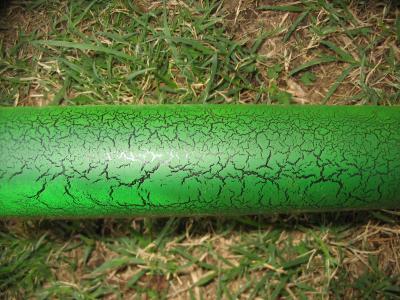
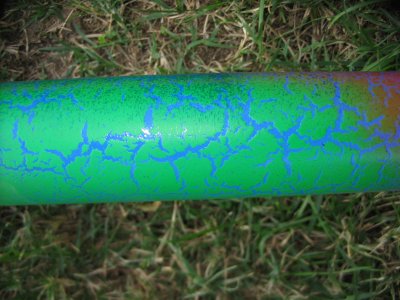
Green on Black and Green on Blue:
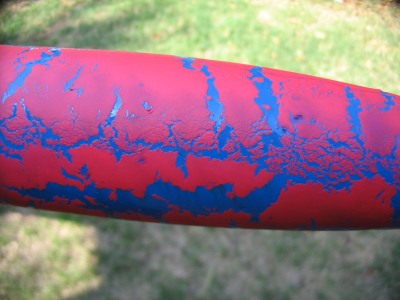
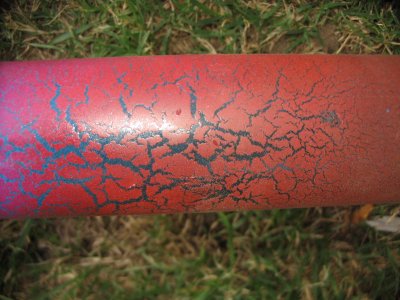
Red on Blue and Red on Black:
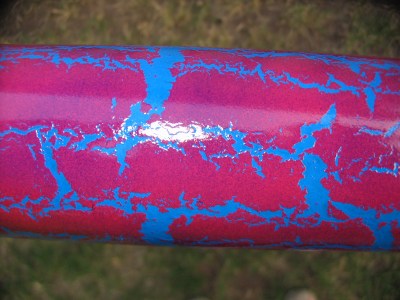
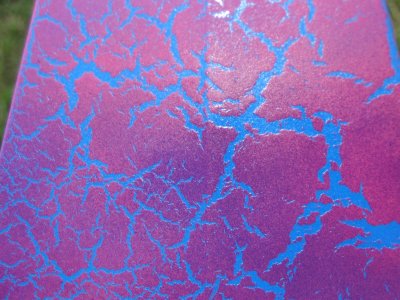
Red on Blue with a coat of candy blue and a clearcoat:
Feel free to experiment, there are a lot of amazing effects possible when you use multiple layers, color variants, different thicknesses, even thickness variants, etc, etc.
First you need some paint. The exact type and brand isn't critical, just get whatever they stock at your favorite store. The key is that you need to use a 'fast drying' (ie, not high heat, textured, rust proof, etc) paint for the first coat, and florescent paint for the top coat. I used Rust-Oleum Painters Touch Gloss paint for the first coat, and Rust-Oleum Specialty Fluorescent for the second coat.
The actual method is quite simple:
First prepare the surface for paint. This depends on the surface, but in general you would want to lightly sand it, wipe it down with a clean/dry cloth, and of course mask off the areas that you don't want painted. If the surface is very porous or rough, I would recommend starting with a layer of sanding sealer or primer, sanding it smooth, and then continuing with the process. Also, it is a very good idea to start on a piece of scrap material, so that you can experiment and get the effect you are looking for.
Then put down a coat of the base paint. You want a pretty good coat, but don't go so thick that you risk runs in the paint. Let this dry enough that it is not tacky, but not long enough that it fully cures. I have found about 5 minutes to be about right.
Next spray the fluorescent paint. This is the most critical step, as the thickness of this layer directly affects the size of the features in the finished product. A light coat (just enough to get a full coverage) will give features that are about 1/4" in diameter. A heavy coat (as heavy as you can go without risking runs) will give features that are as large as 2" in diameter.
Unfortunately, the paint will start to craze over in about 30 seconds, sometimes less, which means that a second coat is out of the question. It also means that you need to be careful in choosing your technique for putting this coat on, as you cannot go back over an area after about 30 seconds without creating a break in the pattern. Let this coat dry fully before adding any more coats.
At this stage the surface should be mostly the color of the florescent paint, with patches of the base color showing through. If not then something didn't work right, and you need to experiment more.
Here are a few of the color combinations that seemed to turn out looking the best:
Green on Black and Green on Blue:
Red on Blue and Red on Black:
Red on Blue with a coat of candy blue and a clearcoat:
Feel free to experiment, there are a lot of amazing effects possible when you use multiple layers, color variants, different thicknesses, even thickness variants, etc, etc.