12" Talon for LDRS Build Thread

The Rocketry Forum

Help Support The Rocketry Forum:

This site may earn a commission from merchant affiliate links, including eBay, Amazon, and others.

SpartaChris

Well-Known Member
Joined
Feb 8, 2009
Messages
2,733
Reaction score
0
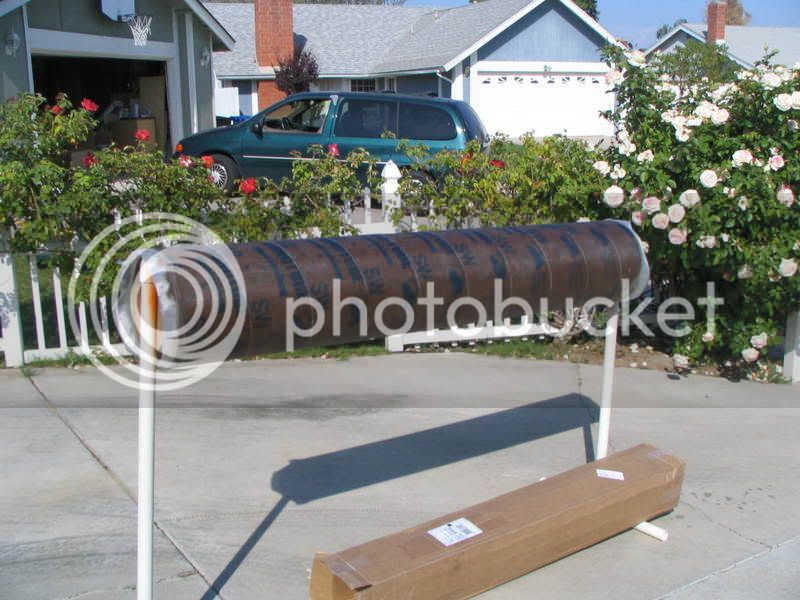
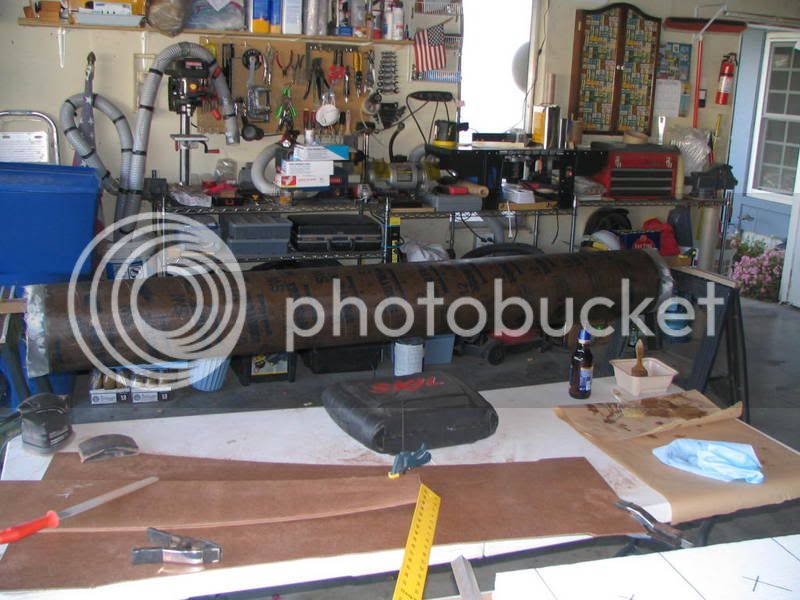
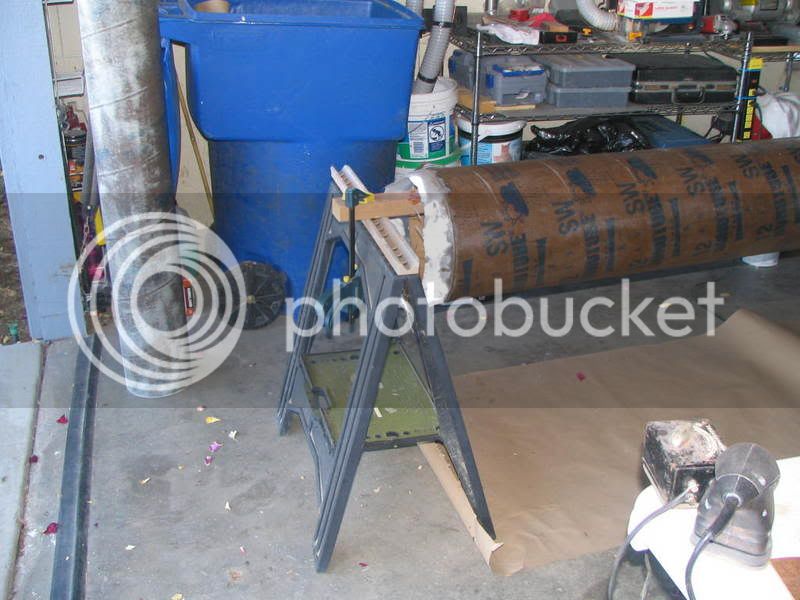
Wanting to do something special for LDRS, Jolly Roger Joe Cox, Speedy Weasel Charlie Cox and myself thought it would be fun to build a 12" Talon. The motor will be a 6" O5200 . The planned flight date will be on Monday morning.

For starters, here's the rocksim file Joe created. We don't have an eng file for the O motor yet so we threw in CTI's O5100 to give an idea of what to expect.

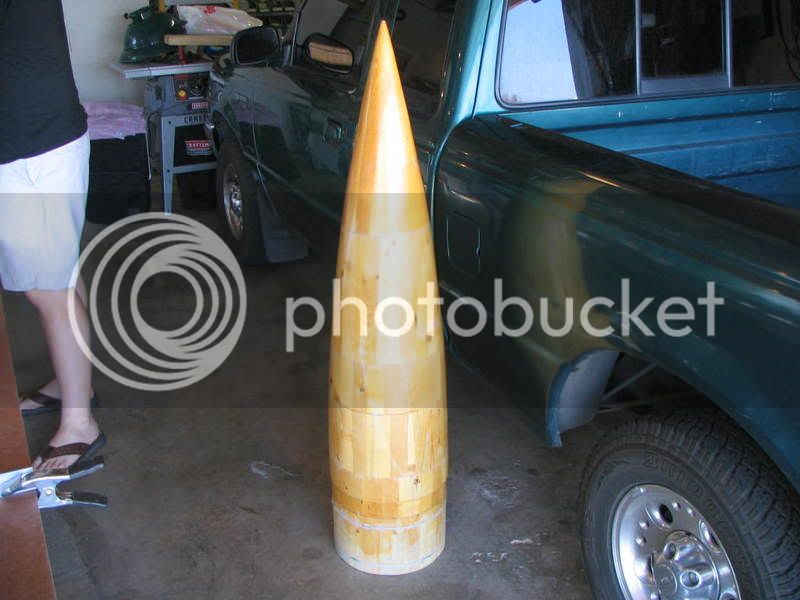
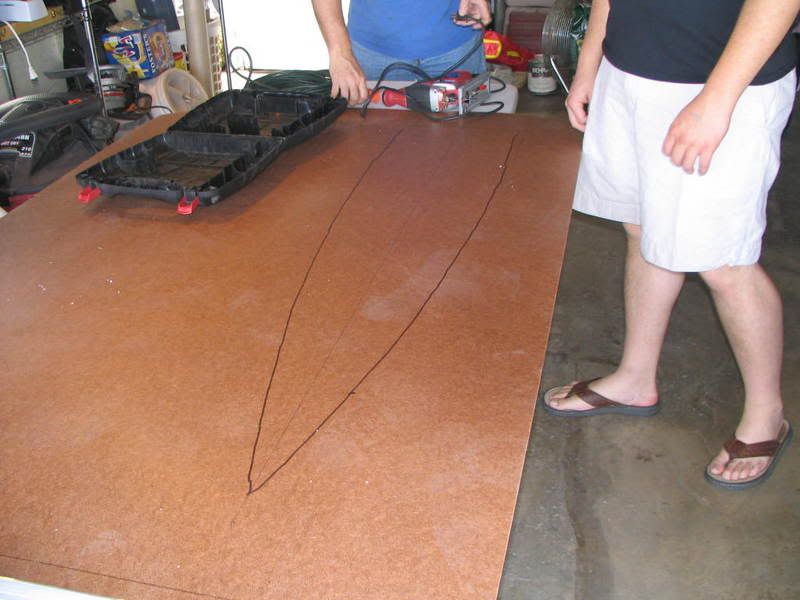
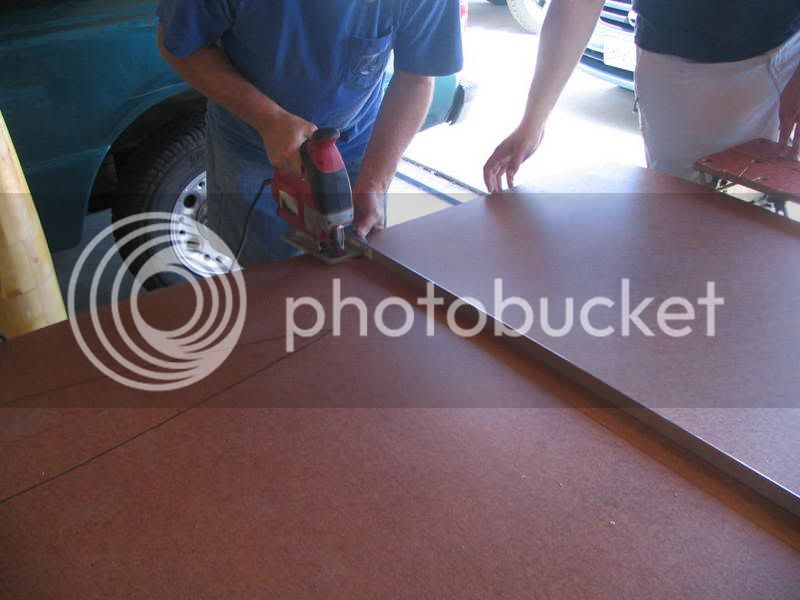
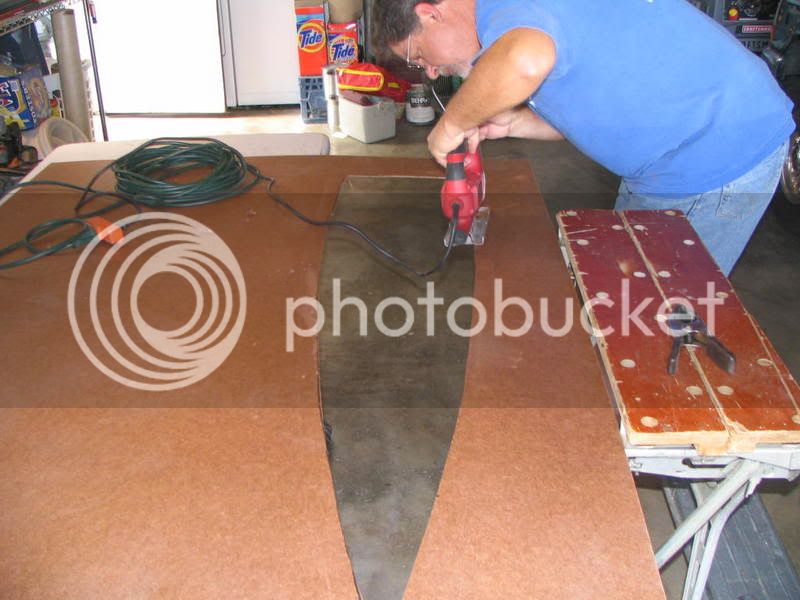
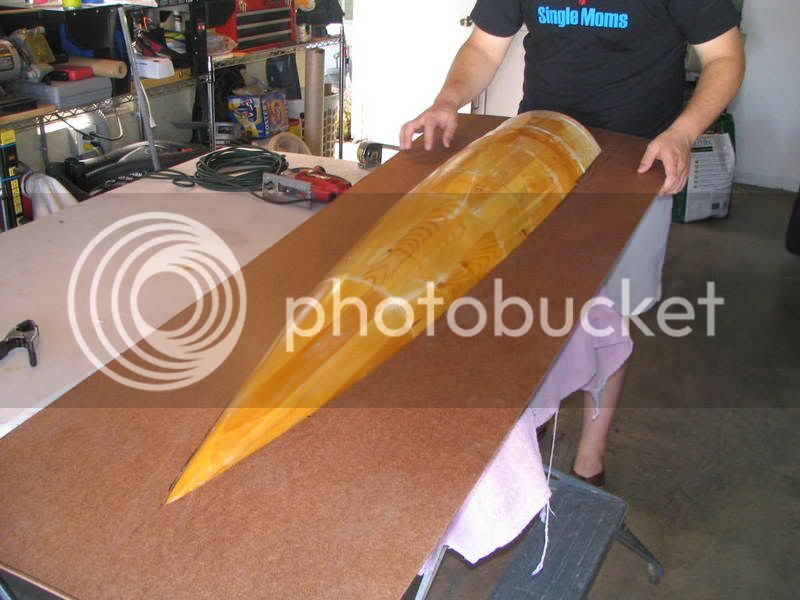
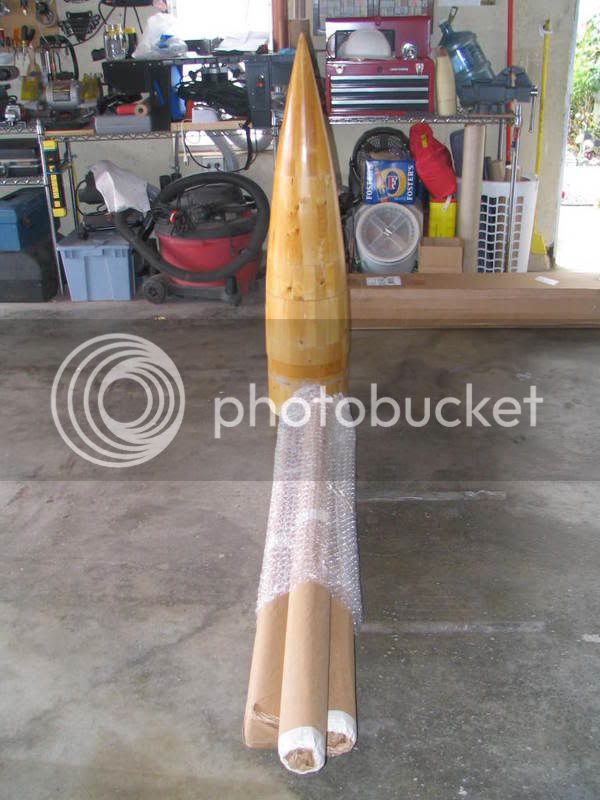
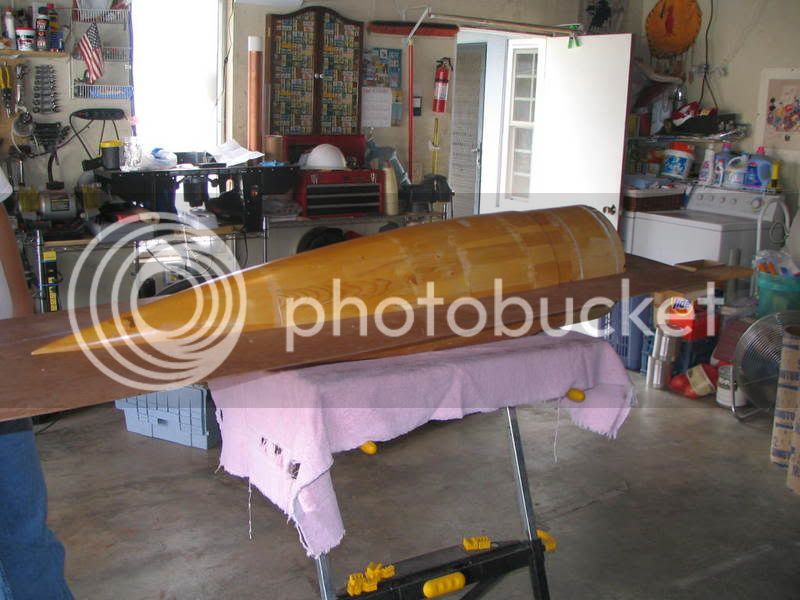
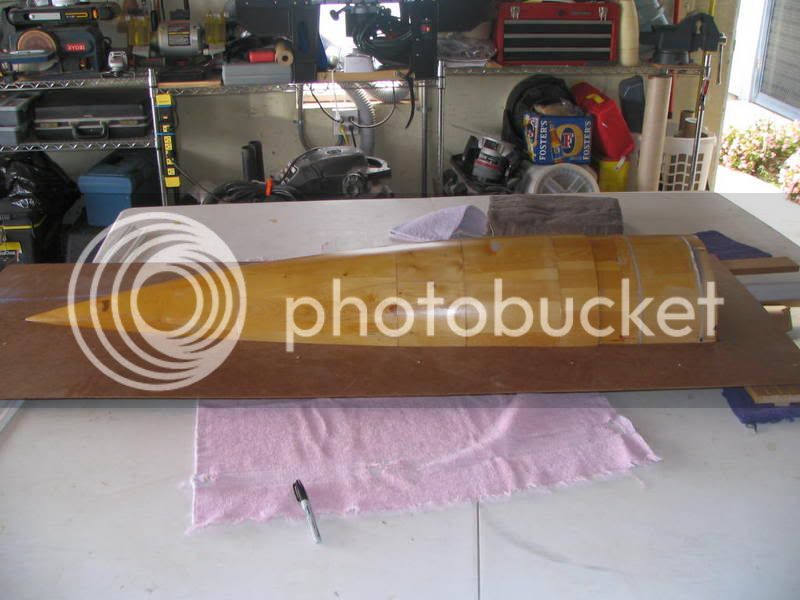
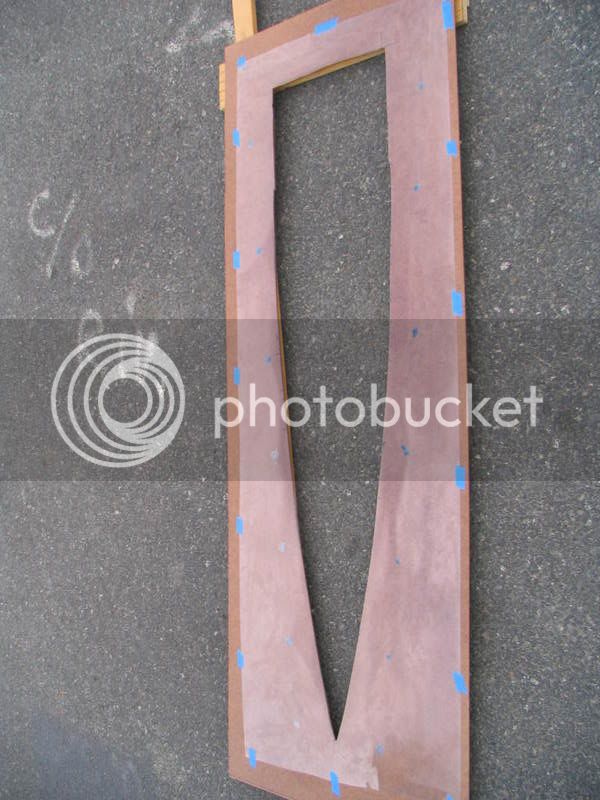
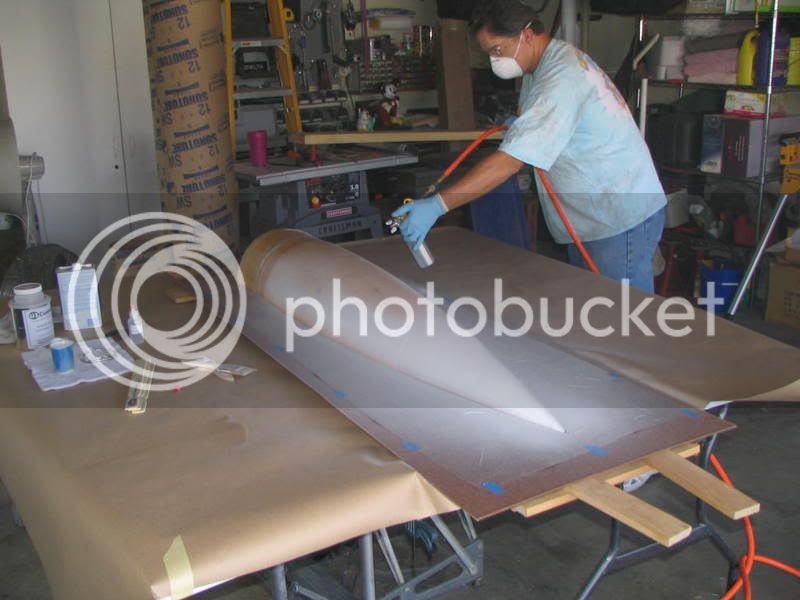
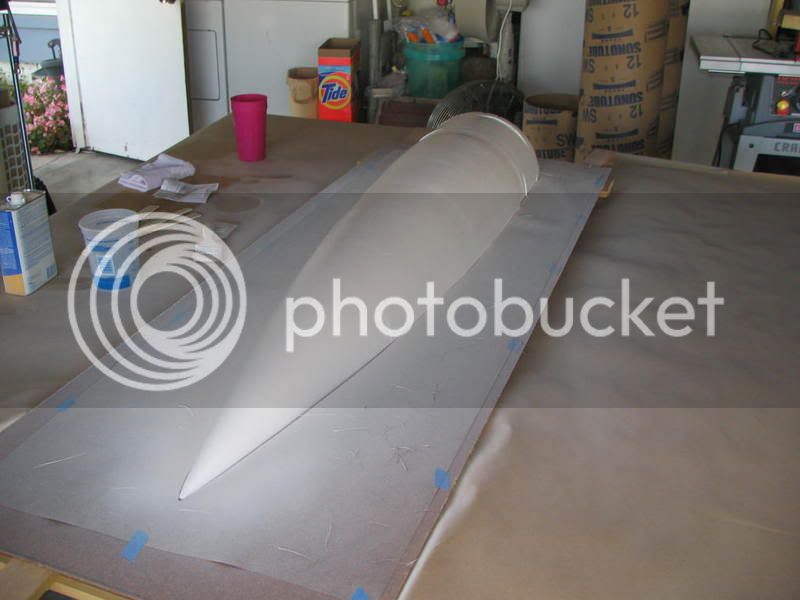
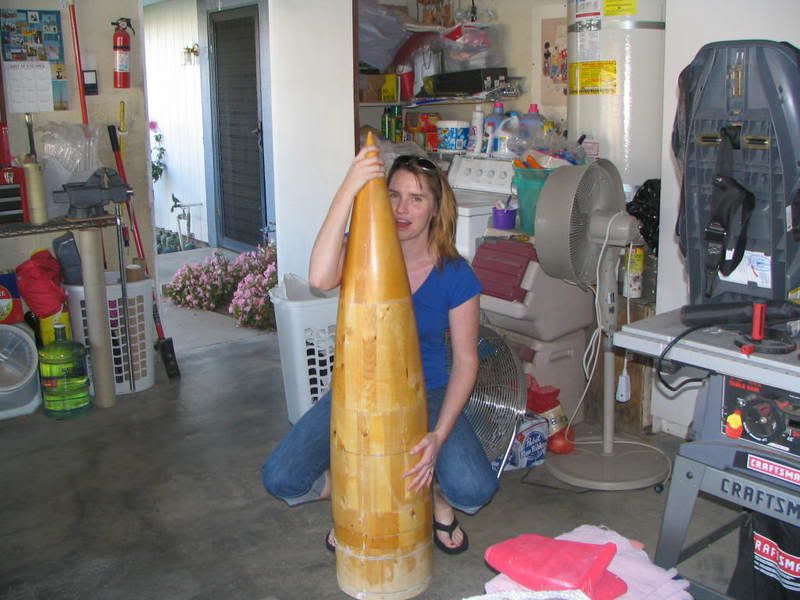
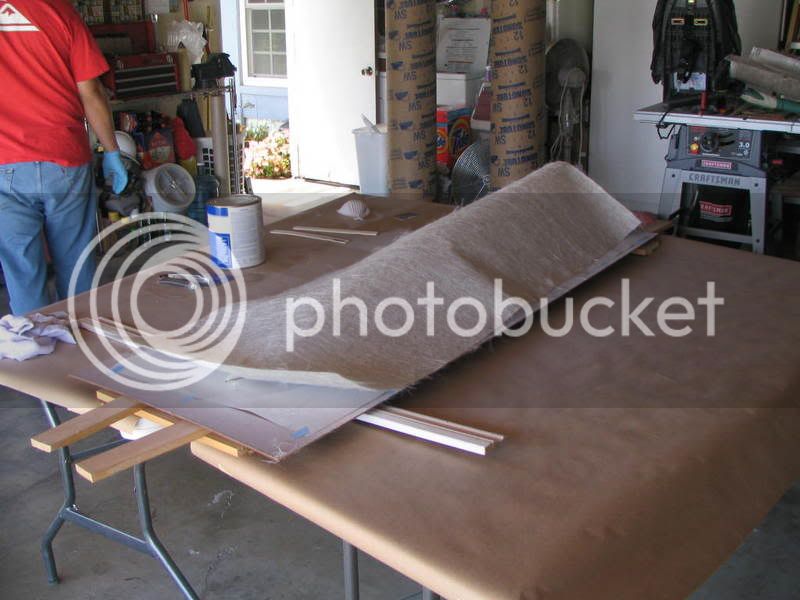
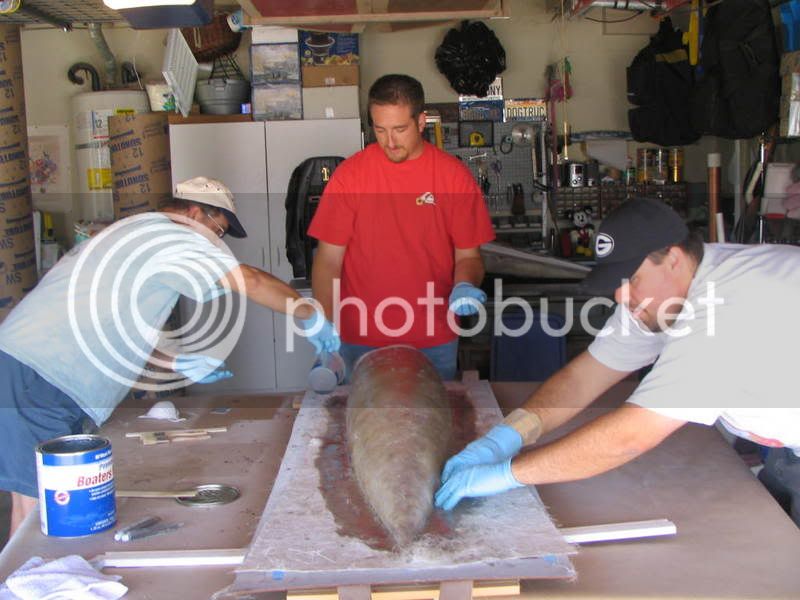
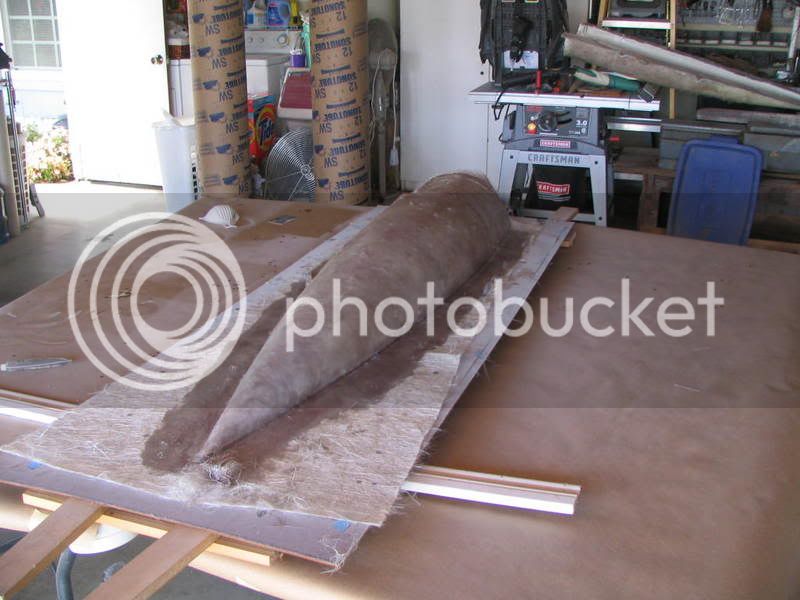
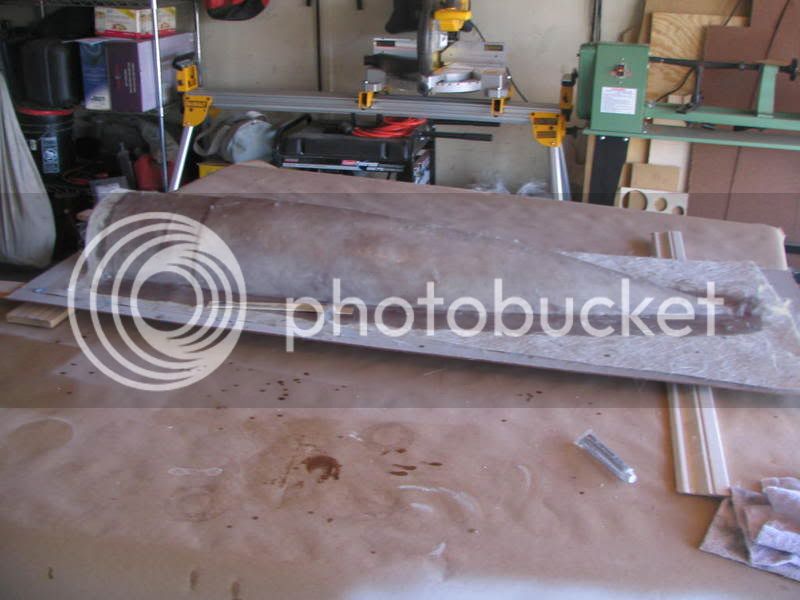
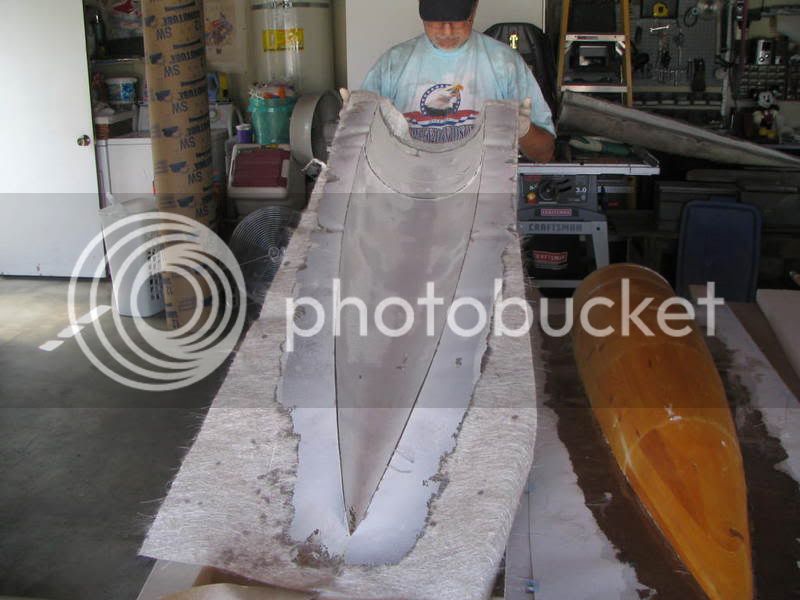
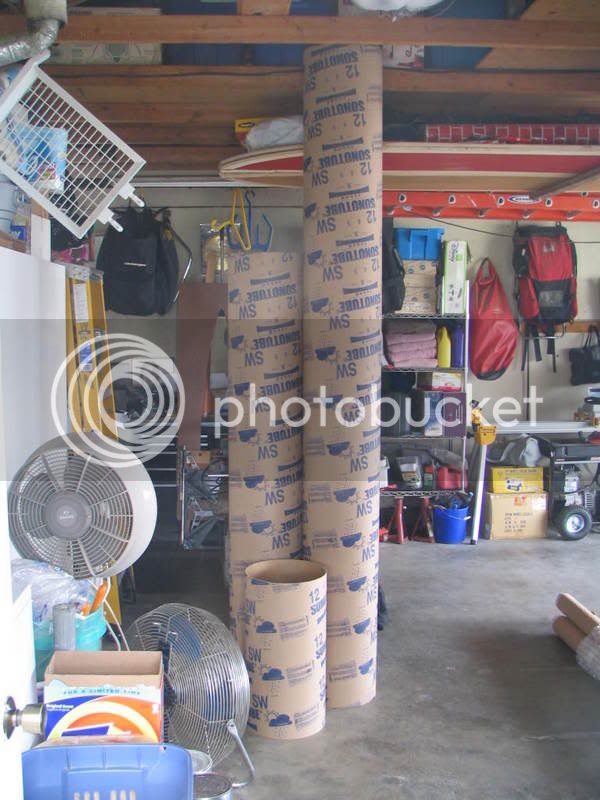
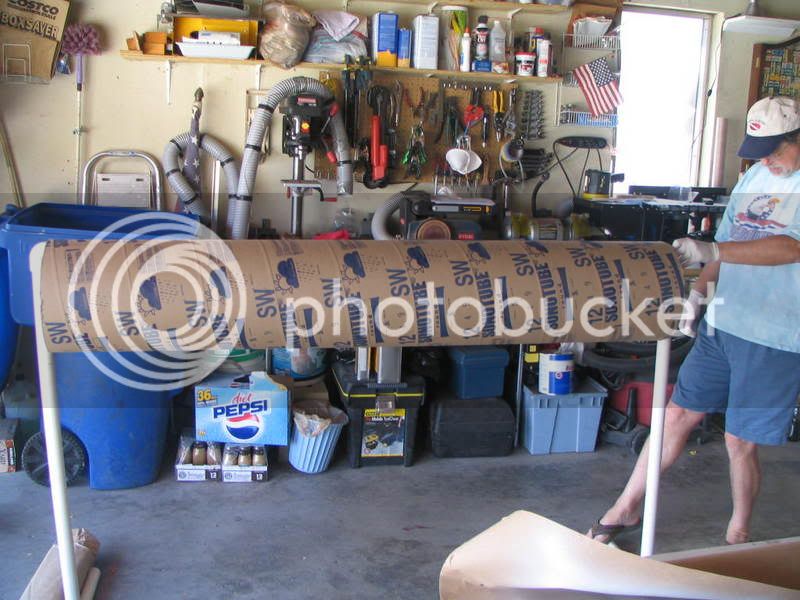
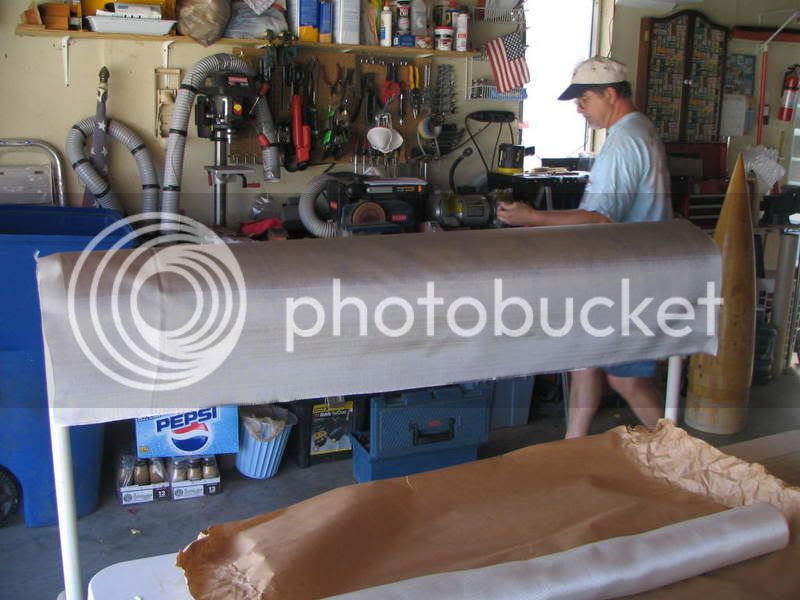
The rocket will be made from Sonotube for the airframe and will have a scratch built fiberglass nose and tail cone. Fins will be removable and will be made of some form of composite contruction, to be later determined. We will also feature adjustable nose weight and motor mount systems, so we can still fly it here in CA.

As the build progresses, the sim is subject to change, so stay tuned!
 
While the build will present many challenges, we felt the most challenging would be making the nose cone. We've cut them out of foam before, but the idea for a fiberglass nose cone came quickly after Roc Member Alan Farrington donated a plug that was made specifically for Sonotube.

1NosePlug.jpg


So, our first order of business was to figure out how to make the mold. After doing a little research we learned that we needed to make a plate that would sit at the half way point of the the nose cone.

To do this, we bought some hardboard from Home Depot and using a rather high tech jig that involved a sharpied taped to the end of a dowel, we transferred the contour of the nose cone to the hardboard. The end result looked something like this:

2Transferredshape.jpg


Our next order of business was to trim the excess hardboard using our super deluxe high tech jig saw cutting jig-a-ma-bob:

3JigsawAlignmentSystem.jpg
 
A pilot hole was drilled so the blade to the jig saw would fit and cutting was under way:

4CuttingContour.jpg


With a nice steady hand, Joe finished cutting the hole in the plate:

5ContourAlmostDone.jpg


We deliberately made the hole too small so that we could get as close to an exact fit as possible. Here's a test fit of the plate over the plug:

6TestFitoverPlug.jpg


Here's a shot of the rolls of glass from US Composites. I dunno how many yards of cloth and mat we have in there, but that box was heavy!

8GlassandPlug.jpg
 
We finally got the plate sanded down enough to give us a nice, decent fit:

10PlateFits.jpg


The plug was treated to several coats of carnuba wax followed by teflon and then laid up in our super high tech plate mounting jig:

11PlacedinJig.jpg


To treat the plate, we taped some mylar to the surface and then sprayed it with some mold release:

13releasesprayedonpeelplyandplate.jpg


Charlie mentioned that he wanted to spray some release under the lip, so here's Joe helping him out. Don't try this at home boys and girls:

12Donttrythisathome.jpg


No Joes were harmed in the making of this build. (And no, he didn't spray his lip.)
 
Next we went to spray the gelcoat:

9GelCoat.jpg


Here's Joe using his new super cool sprayer he bought sometime before the last ice age but never used until now:

14SprayedwithGelcoat.jpg


And wallah!

15lettinggelcoatcure.jpg
 
Wow!!!!

Can hardly wait to see this one!

I have always wanted to learn how to make a fiberglass nose cone or any piece that required a plug. Do you know how the plug was made??

Post plenty of pictures.
 
My understanding is that the plug was turned as one piece by Alan's Dad, and then cut in half for shipping. It might have been cut into more pieces for shipping purposes, but I know that it was cut up to be made smaller and then glued together for use.

And we will post plenty of pics. Today we're planning on making the first half of the mold. Will see how that comes out.
 
Originally posted by John Coker
That’s a big part! Nice work guys.

FibreGlast makes a great video for anyone who has other questions about molding, "A Step-by-Step Guide to Molding Fiberglass":
FibreGlast DVDs & Videos

There are some additional pictures of this process on my site:
Nike-Asp nosecone

Wow!

Welcome back to the Forum John, it has been a long time...

Johnnie
 
GNARLY!!!!!!!!!!! You know how I love my Talons.. I talked to Ed from GLR, he and Kent will be at LDRS. I bet They'll love this!

Can't wait to see how the first half works out.. Well I guess you guys won't be using our balls email for a while :D

Brent
 
Outghta be nice as I have the Talon 4 and know how beautiful the rocket is. It will look so amazing under boost of that O motor.

Why not do something crazy for the second launch like stuffing a small to medium P in her? :) I think the O will be sufficient enough, don't you think.:)
 
Originally posted by SpartaChris
The plug was treated to several coats of carnuba wax followed by teflon and then laid up in our super high tech plate mounting jig:

...

To treat the plate, we taped some peel ply to the surface and then sprayed it with some mold release:
[/B]
The release wax for those wondering is TR-104 High Temp Release, followed by 4 layers of liquid PTFE from AVT Composites and a few quick hits with some new aerosol release from McRocket-Carr.

But the surface is NOT peel ply. It's .01" mylar, treated with the aerosol release spray.
 
All right I know that you guys worked on it this weekend.

Now where are the pictures! No pressure!

By the way Chris Happy Birthday.

How early did you get started on it Saturday Morning?
 
yeah Chris, and you know which pic I wamt to see the most, so where is it?

;)
 
Sorry.. I was too tired last night to post pics or an update.

Just for you Brent, here's the pic of my Fiancee being silly.. Yes, she's a keeper!

IMG_2731.jpg
 
The nose cone saga continued...

After the gelcoat was cured, we laid fiberglass mat over the mold:

16LayingMat.jpg


And then began the wetting out process using West Marine Polyester Resin and hardner. All hands on deck at this point:

17WettingOut.jpg


It's really tough to massage the resin into the fiberglass mat since it winds up balling up the strands of fiberglass, so we used a tapping method to literally pat the resin into the mat:

18MoreWetOut.jpg


Extra precaution was taken to ensure that we got the joints:

19Workingintothejoints.jpg
 
Here's Charlie and I doing a little touch up:

20TouchUp.jpg


And letting the mold cure:

21Lettingitcure.jpg


Side view:

22OtherSide.jpg


And wallah! Popped the mold off with no issues at all!

23Pullingmoldfromplug.jpg


There are some imperfections that need to be filled, but nothing major. If all goes well, we will get the nose cone laid up today or next weekend.
 
Here's a quick shot of the airframe tubes. There's a 6', an 8' and a 2' that will be used as a coupler:

1AirframeTube.jpg


Prepping the 6' tube for glass:

246fttube.jpg


Test fit for the glass:

25readyforglass.jpg


Now fast forward a bunch.. There have been a lot of glassing threads here on TRF, so we opted not to take too many pics of the process. We used the massage method to work the resin into the cloth and airframe, with some great success! Brent Dougherty happened to be over yesterday working on a nose cone for his L3 project, so special thanks to him for helping out with this step. If you get a chance, check out his L3 build: https://www.rocketryforum.com/showthread.php?s=&threadid=35293

26glassedandcuring.jpg
 
We also got the 8' tube glassed yesterday:

278glassed.jpg


Check out our cool high tech mounting rig:

28hightechmountingjig.jpg


That's it for yesterday. Stay tuned!
 
Chris!!, NICE PIC!!! ....
I won't even go there...
You are welcome for the help, it was fun to be a small part in such a BIG cool project. Actually when looking through yours, mine, and Lee's threads, it is pretty cool to think we are all on the same Balls project, and we aren't even the specialists in the group!!!

Brent
 
Originally posted by MaxQ
The rocket is called "Screw You, Hippie?

hahaha, God I hope so.

Chris,

This is a beautiful idea. I'll be watching this thread very closely, keep up the good work!
 
Ryan: We used only one layer of 10 oz cloth. Sonotube really doesn't need the reinforcement, but we opted to anyway, for durability reasons.

Max: Yes, that is the name of the rocket. Just seemed fitting!

Tim and Nate: Thanks! We still have a long way to go. Not too much was able to get done on it today, but hopefully next weekend we'll have a decent update!
 
Originally posted by SpartaChris
Ryan: We used only one layer of 10 oz cloth. Sonotube really doesn't need the reinforcement, but we opted to anyway, for durability reasons.


Thanks, that is really helpful. Might I ask the wall thickness of your Sonotube? The stuff I got out here I wouldn't dare use without glassing.
 
I think it's like 3/16" thick, but I don't know that for sure. Next time I am at the house we're building it at, I'll get a measurement and let you know.
 
Back
Top