"American Arrow" Scheme Help

The Rocketry Forum

Help Support The Rocketry Forum:

This site may earn a commission from merchant affiliate links, including eBay, Amazon, and others.

Rat

Well-Known Member
Joined
Apr 25, 2006
Messages
313
Reaction score
0
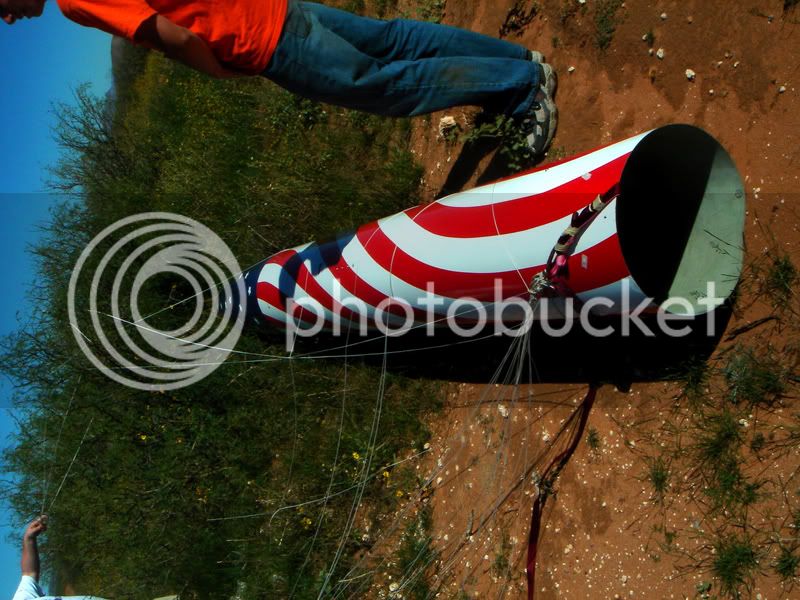
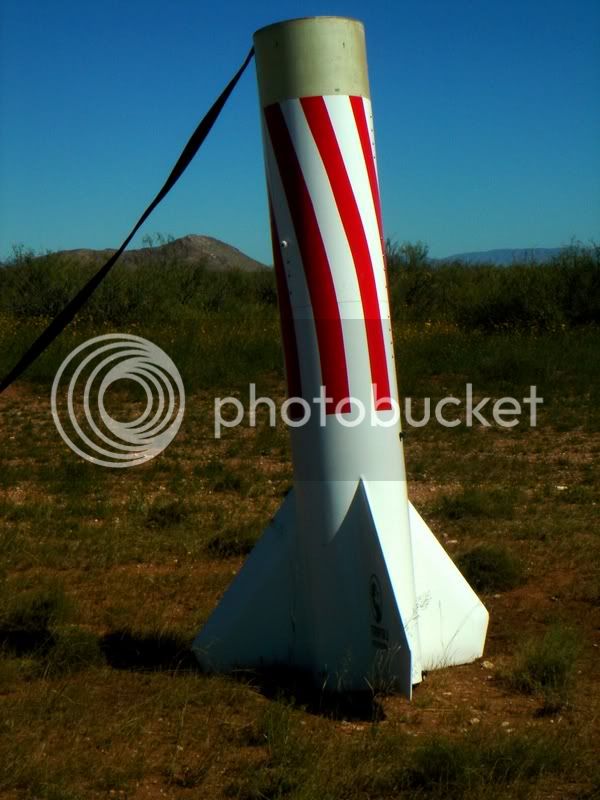
Looking for some opinions here. As you can see this is an Estes Canadian Arrow that I have renamed for obvious reasons. The pattern for the red stripes has me baffled. I'm unsure what to do here. Here are my ideas:

1. Straight vertical stripes down the body tube and on the fins.
2. Straight vertical stripes down the body tube stopping just above the fins. Then what to do with the fins and boattail.
3. Some kind of "Barber Pole" spiral.
4. ???

I'm kind of partial to number 2 mainly becaus I don't want to put myself through a bunch of nasty fin masking.

I'm open to ideas so let them fly.

Thanks!
 
I really like the n/c.

Here's what I'd do . . . red stripes down the length of the bt and fins, with equal stripes of white showing in between. This way it comes out looking like an American Flag.

Or,

1/3 of the way down, solid red. But I don't think that'd look as nice.
 
I'm not sure if anyone else would agree with me, but how about red and white roll patterns that cover the whole body tube plus fins? I got the idea from Dave Comb's 2x18 Full Moon.
 
I vote #2 except put a sort of curve into the masking stripes.

than a red tail section
 
I think vertical stripes in a random sine wave pattern simulating the waving of the flag in the wind would be nice.
 
I think paint it somewhat stock on the bottom half, but instead of putting a maple leaf pattern, put a star with the red stripes above it.

I'm not a big fan of vertical stripes on a rocket (don't know why, they just look a little odd to me), but I think a spiral pattern would be killer!
 
Basically I just quartered the rocket vertically. Including the fins actually makes the profile look like an arrow. Not sure If the lettering will be included but this is what I'm going with. Thanks for the suggestions. I'll post when it's done.

AK, thanks for the comment on the NC. I cut each star out with a scrapbookers paper cutter from masking tape and applied them individually. Easier than it sounds just time consuming.

Thanks All!
 
For a stripe pattern to consider, here is my "Star Spangled D Bird", built in the mid-1980's made out of BT-80 and powered by two clustered D12's (in this photo, two D12-0's and two E9-6's).

https://birminghamrocketboys.com/BRBGallery/August19,2006Launch/IMG_1786_crop

If it looks familiar, a few years later North Coast Rocketry produced a beefed up version, the "Star Spangled G Bird".

- George Gassaway
 
Well I got the red sprayed today. No stenciling and there probably won't be any. I basically just quartered the fuselage vertically.


Next up a 29mm V2 conversion.

:D
 
Looks really good - still can't get over how good the nose looks.

Well done!
 
I like it. If it were me I would have painted it like this
xprizecup099.jpg

https://i116.photobucket.com/albums/o13/flagphotos/xprizecup092.jpg
xprizecup096.jpg

https://i116.photobucket.com/albums/o13/flagphotos/xprizecup096.jpg


But thats just me.
 
Originally posted by Rat
I cut each star out with a scrapbookers paper cutter from masking tape and applied them individually. Easier than it sounds just time consuming.
If you were using the stars as 'reverse' masking (to be removed after the blue paint is applied?), could you have used the cheapo star-shaped stickers they sell at the craft stores?

BTW, cool paint scheme idea, and looks like a very nice job on the finish too!
 
First off, thanks for the compliments everyone. Without feedback this wouldn't be much fun or very educational.

Powderburner,

I actually thought about using those precut stars but was concerned about their ability to conform to complex curves. I actually tried to use vellum(?) because I was afraid the masking tape would gum up the punch(I wrote cutter originally but it is a punch.). Well I couldn't get the backing off the vellum after punching it so I tried the tape. As long as you are careful you can punch them out without jamming the punch. And they lay flat as can be on the surface.

Time consuming but worth it.:D Actually masking the fins off for the striping was more difficult.

BTW I bought a couple of other punches so be on the lookout for some interesting paint schemes. :p
 
You did a great job rat but i still think the original scheme was incredibly cool lol :)
Cheers
fred
 
Originally posted by powderburner
If you were using the stars as 'reverse' masking (to be removed after the blue paint is applied?), could you have used the cheapo star-shaped stickers they sell at the craft stores?

We tried something like that for our Red Glare a few years ago. My wife and I bought a number of star-shaped stickers, but we discovered they didn't stick well enough to use as masks for painting. We ended up using a couple of star-shaped scrapbook cutters (two different sizes) to cut masks from masking tape. We then trimmed the tape to make slightly smaller stars since we needed a range of stars in different sizes. It worked okay, though we did end up hand-painting some of the stars.


-- Roger
 
Back
Top